Have you ever found yourself staring into the freezer, wishing for a scoop of rich, satisfying ice cream but not the sugar crash that comes with it? I’ve been there more times than I can count. It’s that classic dilemma. You want something sweet and creamy, but you also want to stick to your health goals.
Well, what if I told you that you could have it all? Imagine a dessert that tastes like a Snickers bar but is packed with protein. Sounds pretty good, right? Thanks to the amazing Ninja Creami, this dream is now a delicious reality. This machine is a total game changer for homemade ice cream lovers.
Jump To:
Why You’ll Love This Recipe
First off, the flavor is just incredible. We’re talking creamy peanut butter, rich chocolate, and sweet little bits of date that taste just like caramel. It hits all the right notes for a candy bar inspired treat. It’s a fantastic example of Ninja Ice Cream Recipes Healthy enough to eat regularly.
But the best part? It’s packed with protein. Each serving has a solid amount of protein, making it a great post workout snack or a guilt free evening indulgence. You are actually nourishing your body while satisfying your sweet tooth.
The texture is another huge win. If you own a Ninja Creami, you already know about the magic it works. It takes a solid frozen block and turns it into the smoothest, creamiest ice cream imaginable. No ice crystals, no weird consistency. Just pure, scoopable goodness.
This is one of those Ninja Creami Ice Cream Recipes High Protein Low Cal that doesn’t feel like a compromise. It’s also incredibly simple to prepare. You just mix a few ingredients, freeze the pint, and let the machine do the hard work. It’s perfect for anyone new to making their own ice cream at home.
Ingredients
Protein Ice Cream Base
- 2 cups milk (2%, soy, oat, or Ripple all work well)
- ¼ cup creamy peanut butter
- ¼ cup maple syrup
- 1 teaspoon vanilla extract
- ¼ cup vanilla protein powder (about 1 scoop)
Snickers Mix Ins
- 2 tablespoons chopped peanuts
- 2 tablespoons dark chocolate chips
- 2 tablespoons chopped dates
Optional Toppings
- Date caramel sauce
- Chocolate drizzle
Step By Step Instructions
Making this recipe is so straightforward. The hardest part is just waiting for it to freeze! Let’s walk through it together.
Step 1: Mix The Base
First things first, you’ll need to create the ice cream base. This needs to be done the night before you want to enjoy your treat. Grab your Ninja Creami pint container or a separate mixing bowl.
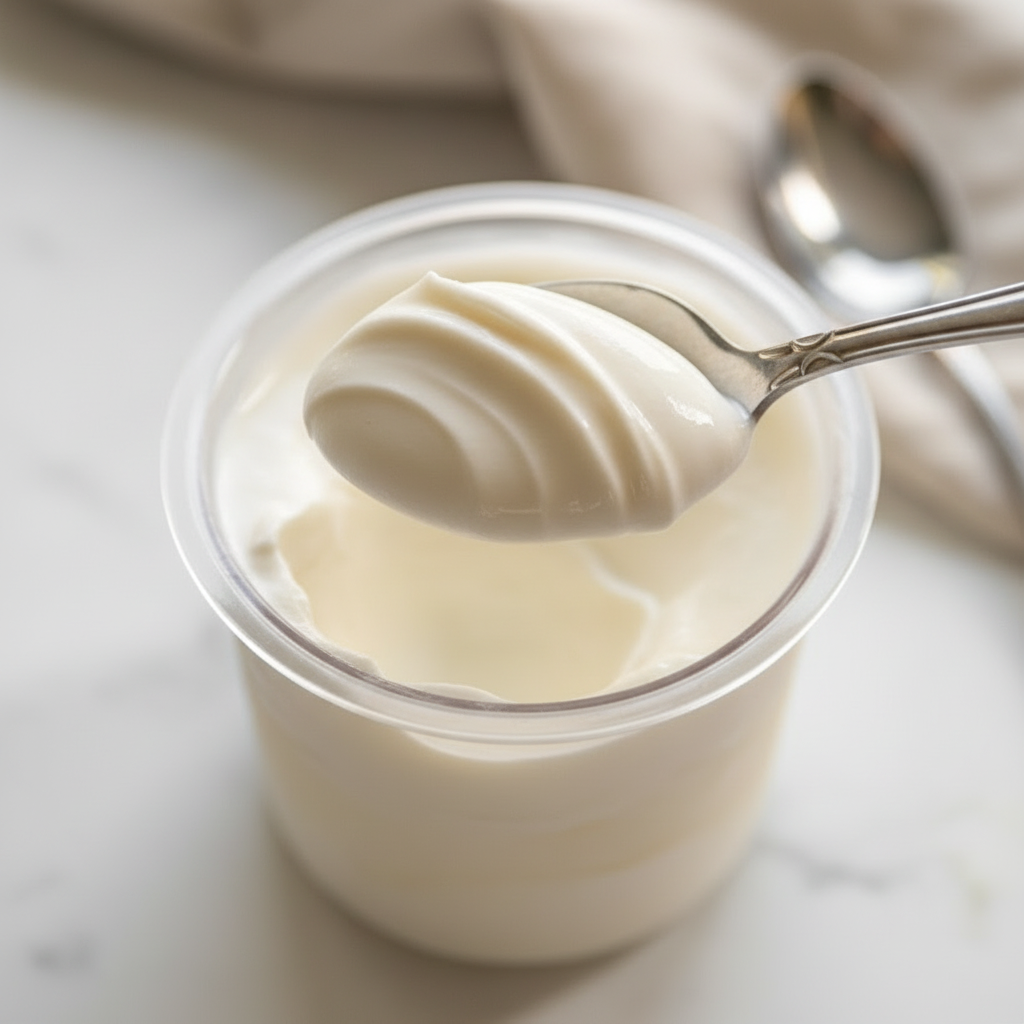
Pour in your milk of choice. Then, add the creamy peanut butter, maple syrup, vanilla extract, and your favorite vanilla protein powder. I find that a good quality protein powder makes a huge difference in the final taste and texture.
Now, whisk everything together until it’s completely smooth. You want to make sure there are no clumps of protein powder or peanut butter left. A smooth base means a smooth ice cream.
Step 2: Freeze It Solid
Once your base is mixed, secure the lid on the pint container. Make sure it’s on tight! Place it in the freezer on a level surface. This is important so it freezes evenly.
You’ll need to let it freeze for at least 6 hours, but honestly, leaving it overnight is your best bet. The base needs to be frozen solid for the ninja creami to work its wonders.
Step 3: Spin In The Ninja Creami
This is where the fun begins! Take your frozen pint out of the freezer. Place it into the outer bowl of your Ninja Creami, attach the lid with the blade, and lock it into the machine.
Select the “Ice Cream” setting and let it run. It’s a little loud, but the result is so worth it. When it finishes, take it out and check the texture.
Sometimes, especially with high protein recipes, it might look a bit crumbly or powdery after the first spin. Don’t worry! This is totally normal. Just put it back in and hit the “Re spin” button. This second spin usually creates that perfectly creamy consistency we’re looking for.
Step 4: Add The Mix Ins
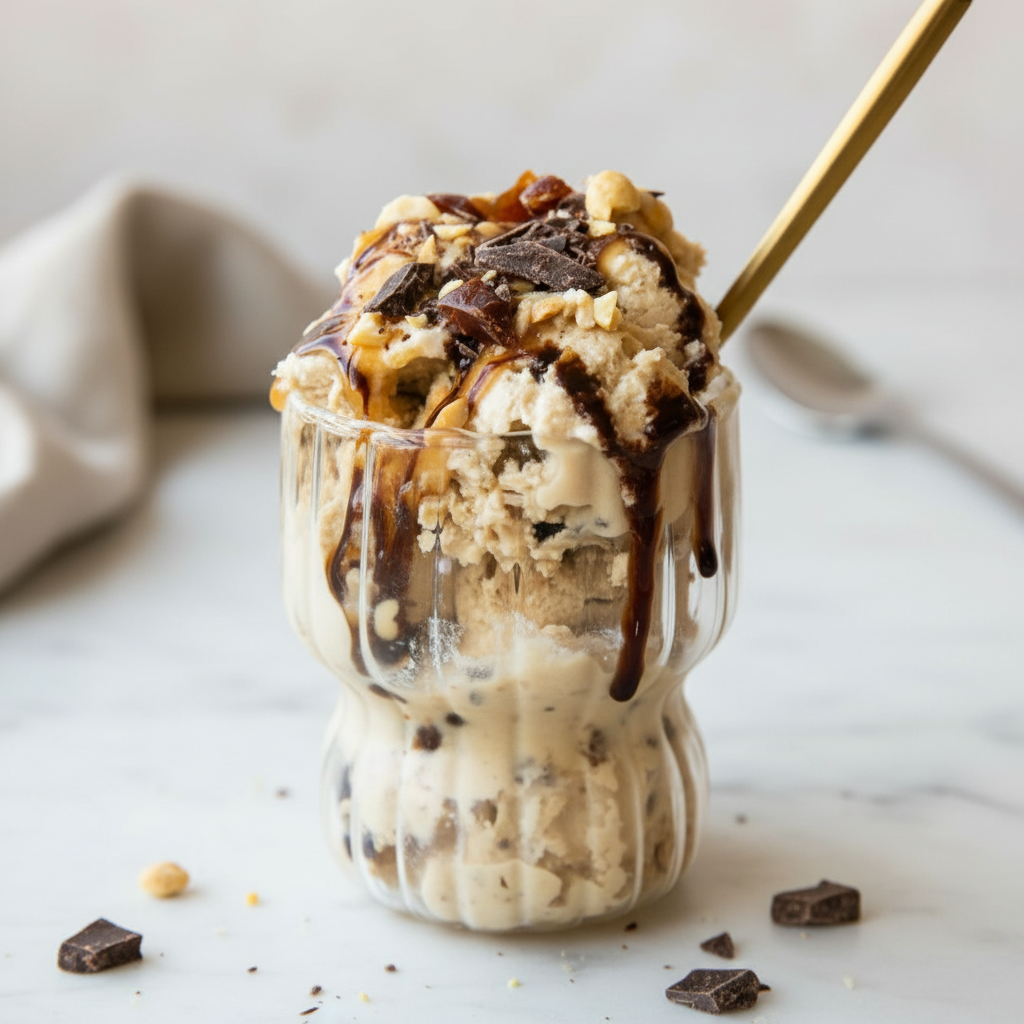
Now for the best part, the Snickers elements. Use a spoon to create a little well or hole down the center of your freshly spun ice cream. This is where you’ll add all the goodies.
Drop in your chopped peanuts, dark chocolate chips, and those sweet, chewy chopped dates. The dates are a great natural way to get that caramel like flavor and texture.
Place the pint back into the machine and run the “Mix In” cycle. This will gently fold all those delicious bits and pieces throughout the ice cream without completely pulverizing them. You still want those nice chunks!
Step 5: Serve And Enjoy
And that’s it! Your homemade, high protein Snickers ice cream is ready. Scoop it into a bowl right away while it’s at its creamiest. If you’re feeling a little extra, drizzle some date caramel or melted chocolate on top. Enjoy every single bite.


How To Store Leftovers
If you happen to have any leftovers, storing them is easy. Simply smooth out the top of the ice cream in the Ninja Creami pint and pop the lid back on. Place it back in the freezer on a level surface.
Because this is a healthier, homemade ice cream without lots of fats, sugars, or stabilizers, it will freeze very hard. This is completely normal. It won’t be scoopable straight from the freezer like store bought ice cream.
When you’re ready for another serving, just take it out and run it through the “Ice Cream” or “Re spin” cycle again. This will bring it right back to that fresh, creamy texture you loved the first time. The Ninja Creami is great for this.
Tips
Here are a few extra tips to make your ice cream experience even better. For a lighter texture and fewer calories, you can swap the peanut butter for PB2 powder. Just mix two tablespoons of the powder with a little water to rehydrate it before adding it to the base.
Don’t be afraid to experiment! This recipe is a fantastic base. You could try different nut butters like almond or cashew. You could also use a chocolate protein powder for a double chocolate peanut butter vibe. The mix in possibilities are endless.
Make sure your freezer is cold enough. The base needs to be fully frozen for the Ninja Creami to process it correctly. A base that isn’t frozen solid can result in a soupy texture, and nobody wants that.
If you don’t own a Ninja Creami, you can still try a version of this. Mix the base in a blender, pour it into an ice cube tray, and freeze. Once frozen, blend the cubes until creamy, adding a splash of milk as needed to get things moving. It won’t be quite the same, but it’s a good alternative.
Conclusion
So there you have it. A delicious, satisfying, and protein packed ice cream that tastes like a candy bar. This is one of my favorite Ninja Ice Cream Recipes Healthy enough to keep in regular rotation. It proves that you don’t have to choose between tasty treats and your fitness goals.
The Ninja Creami truly opens up a world of possibilities for creating healthier frozen desserts at home. This Snickers inspired recipe is just the beginning. I hope you give this one a try and love it as much as I do. It is a fantastic starting point for your ninja creami adventures.
FAQ
Can I Make This Dairy Free?
Absolutely! This recipe is very flexible. To make it dairy free, simply use a plant based milk like soy, oat, almond, or Ripple milk. Also, make sure your protein powder is a plant based variety. The results are just as creamy and delicious.
What If I Don’t Have Vanilla Protein Powder?
No problem. You can use an unflavored protein powder and maybe add an extra splash of vanilla extract. A chocolate protein powder would also be amazing here, giving it more of a rich, chocolate peanut butter cup flavor. Feel free to experiment with what you have.
Why Is My Ice Cream Crumbly After The First Spin?
This is a very common occurrence, especially with Ninja Creami Ice Cream Recipes High Protein Low Cal. The lower fat and sugar content can make the frozen base very hard and dense. The “Re spin” function is designed specifically for this. It gives the machine a second pass to break everything down and whip it into a creamy texture. Don’t skip this step if your ice cream looks dry.
Can I Use A Different Sweetener?
Yes, you can. Maple syrup provides a great flavor and also helps with the texture. However, you could try using agave, date syrup, or even a liquid sugar free alternative like monk fruit. Just be aware that changing the sugar can sometimes affect the final texture, as sugar helps keep ice cream from freezing too hard.
High Protein Snickers Ice Cream (Ninja Creami)
A rich and creamy high-protein ice cream that tastes just like a Snickers bar! Made easily in the Ninja Creami, this is a satisfying and wholesome dessert perfect for a post-workout snack or evening treat.
Ingredients
Instructions
- In your Ninja Creami pint container, add the milk, creamy peanut butter, maple syrup, vanilla extract, and vanilla protein powder. Whisk everything together until completely smooth with no clumps.
- Secure the lid on the pint and place it on a level surface in the freezer. Freeze for at least 6 hours, or preferably overnight, until frozen solid.
- Once frozen, place the pint into the outer bowl of your Ninja Creami, attach the blade lid, and lock it into the machine. Select the ‘Ice Cream’ setting and process. If the texture is crumbly, use the ‘Re-spin’ function to make it creamy.
- Use a spoon to create a hole down the center of the ice cream. Add the chopped peanuts, dark chocolate chips, and chopped dates into the hole.
- Place the pint back into the machine and run the ‘Mix-In’ cycle to incorporate the additions throughout the ice cream.
- Serve immediately for the best creamy texture. Top with optional date caramel or chocolate drizzle if desired.
Notes
For a lighter option, you can swap the peanut butter for PB2 powder. Rehydrate two tablespoons of the powder with a little water before adding it to the base.
Feel free to experiment with different nut butters like almond or cashew, or use chocolate protein powder for a richer flavor.
Ensure the base is frozen completely solid for the best results. A base that isn’t fully frozen may result in a soupy texture.
Nutrition
Calories
Sugar
Fat
Carbs