Let’s be real for a moment. You’re trying to hit your protein goals (source), but that sweet tooth is calling your name. The eternal struggle, right? You want a decadent, creamy dessert, but you don’t want to undo all your hard work. This is where the magic happens. These ninja creami recipes protein-packed creations are the answer you’ve been looking for.
Honestly, once you try this, you’ll wonder how you ever lived without it. Forget those chalky, expensive tubs of “healthy ice cream” from the store. We’re talking about making your very own high-protein, low-calorie dessert that tastes ridiculously good.
Here’s why you’ll be obsessed:
- So Easy, It’s Almost Cheating: Seriously. You just mix a few things, freeze it, and let the machine do the work. It’s perfect for beginners.
- Endless Flavors: Vanilla, chocolate, strawberry, mint chip… if you can dream it, you can make it. You control the flavor and the sweetness.
- Macro-Friendly Goodness: Pack in 25-40 grams of protein per pint with way fewer calories and sugar than traditional ice cream. It’s a guilt-free treat that actually helps you meet your goals.
- Incredibly Creamy Texture: This isn’t some icy, sad dessert. The Ninja Creami creates a smooth, scoopable, and genuinely satisfying creamy texture that rivals the real deal.
What is a Ninja Creami?
So, you’ve seen it all over TikTok and Instagram, but what exactly is this gadget? It’s not a blender and it’s not a traditional ice cream maker.
Think of it this way: a blender smashes and pulverizes things at high speed. A traditional ice cream maker churns a liquid base while slowly freezing it. The Ninja Creami works differently. It takes a solid, frozen block (your ice cream base in its pint) and uses a special paddle to shave and churn it into a creamy, dreamy consistency.
This process breaks down the ice crystals into microscopic particles, which is the secret to that unbelievably smooth finish. It’s what lets us turn a simple protein shake into a legit scoop of ice cream.
Jump To:

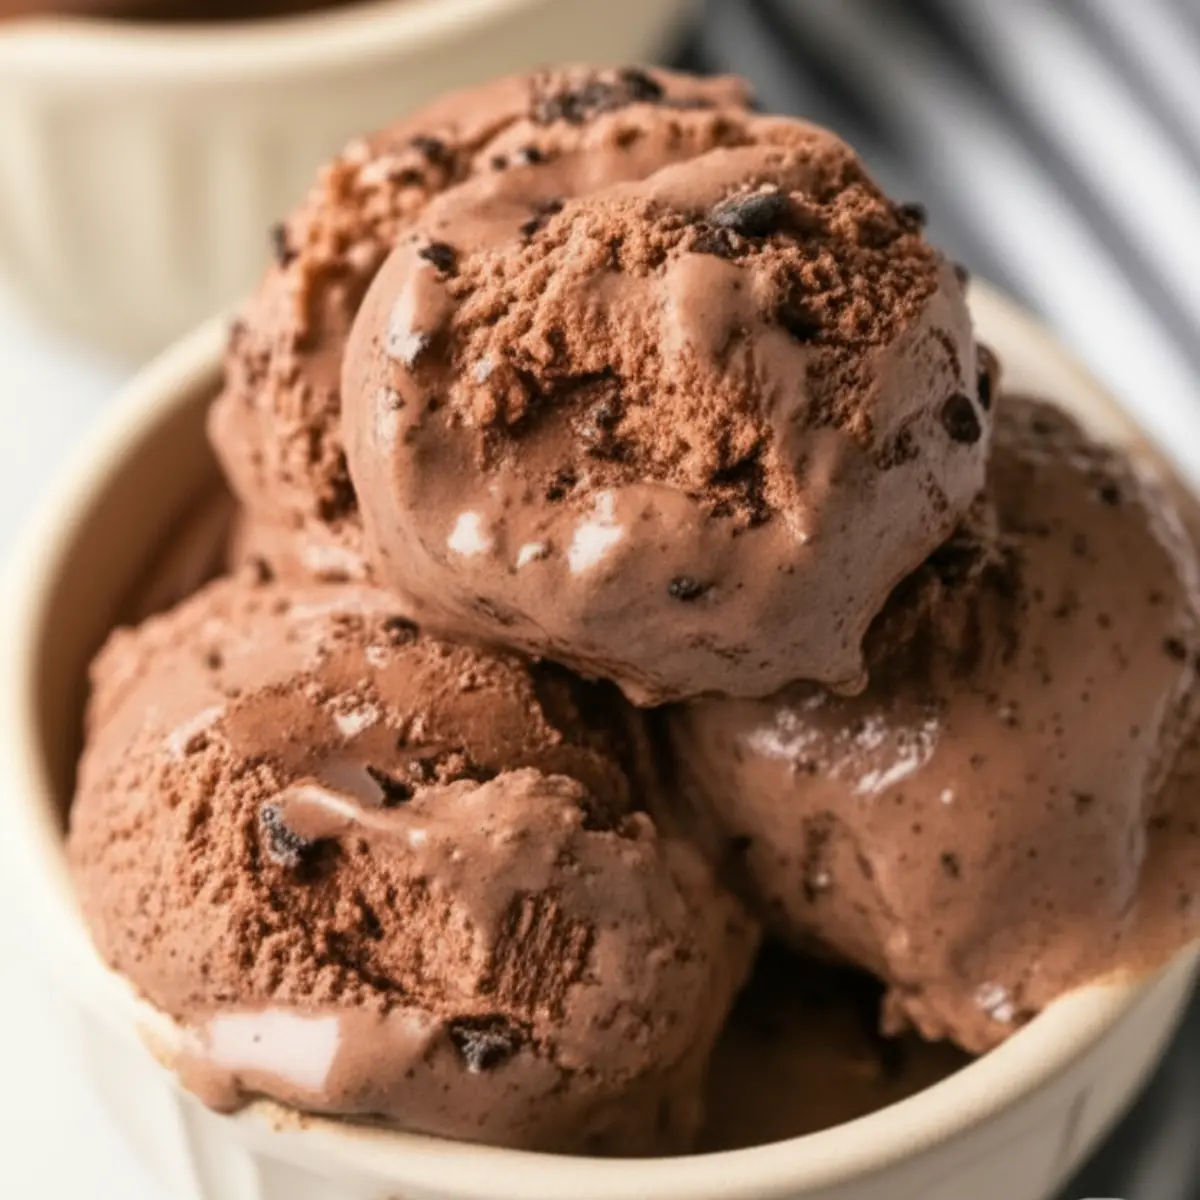
Ninja Creami Recipes Protein Ice Cream
This Ninja Creami protein ice cream is smooth, chocolatey, and packed with 24 grams of protein per serving! With just four simple ingredients, you can create a creamy protein dessert that tastes like the real thing, without the heaviness of traditional ice cream.
- Total Time: 24 hours 10 minutes
- Yield: 2 servings 1x
Ingredients
1/4 cup chocolate protein powder
1/2 cup 2% cottage cheese (Good Culture brand recommended)
1 cup Fairlife chocolate milk (or chocolate milk of choice)
4 gluten-free chocolate sandwich cookies (crushed, optional)
Instructions
1. Add all ingredients into a blender and blend until smooth.
2. Pour the mixture into your Creami container, cover, and freeze for 18-24 hours.
3. Remove the lid and attach the container to the machine. Hit “ice cream”, then add 1 additional tbsp chocolate milk and hit “re-spin”.
4. For optional mix-ins, crush up the cookies and add them to the creami cup after the ice cream is done. Hit “mix-in”.
Notes
Makes 2 servings. Nutrition info is for one serving, not including mix-ins.
Feel free to add other gluten-free mix-ins of choice.
You can use 10 grams of collagen powder for a similar texture without added sugars.
If you want to sweeten it more, add honey or maple syrup to the mixture before blending.
- Prep Time: 10 minutes
- Freeze Time: 24 hours
- Cook Time: 0 minutes
- Category: Ninja Creami Recipes
- Method: Frozen
- Cuisine: American
Nutrition
- Serving Size: 1 serving
- Calories: 171
- Sugar: 14g
- Sodium: 366mg
- Fat: 3g
- Saturated Fat: 2g
- Unsaturated Fat: 1.1g
- Trans Fat: 0g
- Carbohydrates: 17g
- Fiber: 2g
- Protein: 26g
- Cholesterol: 24mg


Ninja NC301 CREAMi Ice Cream Maker + 2 Pint Containers and Lids Bundle
Deal price: $219.94
You save 14% ($35.04)
As an Amazon Associate, I earn from qualifying purchases. Pricing and availability may change.
Best Protein Powder for Ninja Creami
Choosing the right protein powder is a game-changer for your Ninja Creami creations. The type of protein you use will directly impact the final texture of your ice cream, so it’s worth knowing the differences. Here’s a breakdown of the most common types and how they perform.
Whey/Casein Blends
This is the gold standard for achieving a thick, creamy, and less icy texture in your Ninja Creami. Casein protein is known for creating a thicker consistency, which helps prevent ice formation and results in a smoother final product. Many recipes specifically recommend a whey and casein blend for the most reliable and delicious results. If you’re aiming for that perfect, scoop-shop-style ice cream, a whey/casein blend is your best bet.
Whey Isolate
Whey protein isolate is a popular choice for its high protein content and fast absorption. While it works well in Ninja Creami recipes, it can sometimes produce a slightly icier texture compared to a whey/casein blend. To counteract this, you might want to add a thickening agent like a tablespoon of sugar-free pudding mix or a quarter teaspoon of guar gum. With a little tweaking, whey isolate can still create a fantastic protein ice cream.
Plant-Based Powders
If you’re following a vegan or dairy-free diet, plant-based protein powders are a great option. However, they can behave a bit differently in the Ninja Creami. Some plant-based powders may result in a slightly grittier texture. To get a smoother consistency, you might need an extra re-spin. If you’re using a plant-based protein, consider adding a thickening agent or a bit of extra liquid to help create a creamier base.
Ingredients You’ll Need
The beauty of a high protein ninja creami recipe is its simplicity. You don’t need a long list of complicated ingredients. Here are the basics for a fantastic vanilla base:

- Milk or Milk Alternative: About 1 to 1.5 cups. Fairlife skim milk is super popular for its extra protein and creaminess, but almond milk, cashew milk, or even regular milk work great.
- Protein Powder: One scoop (around 30g) of your favorite brand. This is the star of the show!
- Sweetener: A tablespoon or two of a zero-calorie sweetener like stevia, erythritol, or allulose is perfect for keeping it sugar-free. You can also use maple syrup or honey if you prefer.
- Pudding Mix (The Secret Weapon!): About 1 tablespoon of instant sugar-free pudding mix (vanilla or cheesecake flavor). This is optional, but it’s the key to a thick, non-icy texture. It contains emulsifiers that make all the difference.
- A Pinch of Salt & Vanilla Extract: These enhance the flavor, so don’t skip them!
Let’s Talk Protein Powders

Choosing the right protein powder can make or break your creamy protein ice cream. Not all powders are created equal when it comes to freezing and churning.
- Whey/Casein Blends: This is the gold standard for the Creami. Brands like Quest or PEScience use a blend that includes casein, which creates a naturally thicker, creamier result. The casein absorbs more liquid, preventing that dreaded icy texture. If you want the best protein ice cream, start here. (PubMed Central (PMC))
- 100% Whey Protein: Whey isolate is fantastic for shakes, but it can sometimes result in a slightly icier texture in the Creami. It still works, but you might need to lean more heavily on the pudding mix or add a little guar gum (just 1/4 tsp) to help with creaminess. U.S. Food and Drug Administration (FDA)
- Plant-Based Powders (Pea, Soy, etc.): These can be a bit trickier. They tend to absorb a lot of liquid and can sometimes result in a slightly gritty or gummy texture. Look for a high-quality plant-based blend, and don’t be afraid to add a bit more liquid to get the initial consistency right before freezing.
How to Make Ninja Creami Recipes Protein Ice Cream (Step-by-Step)

Ready to make some magic? Here’s the simple four-step process.
Quick Tip: For a visual walkthrough, search for a recipe video on YouTube! Seeing the consistency of the base before freezing can be super helpful for your first time.
Step 1: Blend the Base
Grab a small blender or a bowl and a whisk. Combine your milk, protein powder, sweetener, pudding mix, salt, and vanilla extract. Blend or whisk everything thoroughly until it’s completely smooth. You want to make sure there are absolutely no clumps of powder left.
Pour the mixture into your creami pint. Be careful not to fill it past the “Max Fill” line! The mixture will expand a bit when it freezes.
Step 2: Freeze Overnight
This is the hardest part: waiting. Secure the lid on your pint and place it in the freezer on a level surface. You need to let it freeze for a full 24 hours (USDA Food Safety and Inspection Service). I know, it’s tempting to pull it out early, but a rock-solid freeze is essential for the Creami to work its magic. A partially frozen base will just turn into a soupy mess.
Step 3: Process in the Creami
Once your base is completely frozen, take it out of the freezer. Remove the lid from the pint and place the pint into the outer bowl of your Ninja Creami. Secure the outer bowl lid with the paddle attached, and lock it into the machine.
Press the “Lite Ice Cream” or “Ice Cream” button. The machine will be loud—that’s normal! It’s doing the hard work.
After the first spin, your ice cream might look a little crumbly or powdery. Don’t panic! This is a very common and easily fixable step. Just add a tablespoon of milk (or almond milk), put it back in the machine, and hit the “Re-Spin” button. Sometimes it takes two re-spins, but you’ll be rewarded with a perfectly creamy texture.
Step 4: Add Mix-Ins (Optional)
Now for the fun part! If you want to add things like chocolate chips, crushed cookies, brownie bits, or sprinkles, create a small well in the center of your ice cream. Add your mix-ins, place the pint back in the machine, and press the “Mix-In” button. This will gently fold everything together without pulverizing your goodies.


Expert Tips for the Creamiest Texture

Want to level up your game? Here are a few pro tips for making the best protein ice cream every time.
A Tiny Bit of Guar Gum: If you find your ice cream is still a bit icy, add 1/4 teaspoon of guar gum to your base before blending. This is a natural thickener and emulsifier that works wonders.
Don’t Skip the Re-Spin: I can’t stress this enough. The re-spin cycle is what takes your creation from good to great. Be patient and give it that extra spin with a splash of liquid.
Use High-Protein Milk: As mentioned, Fairlife milk has less sugar and more protein than regular milk, and its ultra-filtered nature lends itself to a creamier base. It’s a popular choice for a reason.
Serve Immediately: Homemade protein ice cream made in the Creami is best enjoyed fresh. If you refreeze the leftovers, it will turn back into a solid block. The good news? You can just pop it back in the machine and re-spin it again the next day!
Variations & Flavor Customizations
This is where you can let your creativity shine. The vanilla base is a blank canvas.
- Chocolate Peanut Butter: Use chocolate protein powder and a tablespoon of powdered peanut butter (like PB2). Mix in some mini peanut butter cups.
- Strawberry Cheesecake: Use vanilla protein, add a tablespoon of cheesecake pudding mix, and a handful of fresh or freeze-dried strawberries. For an extra touch, check out our guide to making a graham cracker swirl.
- Mint Chocolate Chip: Add a few drops of peppermint extract and a touch of green food coloring to the base. Use the “Mix-In” function for mini chocolate chips.
- Coffee Kick: Use vanilla or chocolate protein and add a shot of cooled espresso or 1-2 teaspoons of instant espresso powder to the base. It’s a game-changer. If you like this, you’ll love our Mocha Fudge Brownie recipe.
Topping Ideas
The best part of any ice cream is the toppings, right? Go wild!
- Sauces: Sugar-free chocolate or caramel syrup.
- Crunch: Crushed nuts, granola, or a crumbled protein bar.
- Fruit: Fresh berries, sliced banana, or cherries.
- Classics: Whipped cream and sprinkles, of course!
Troubleshooting Common Issues (Icy, Powdery, etc.)
Having some trouble? Don’t worry, nearly every issue with a Ninja Creami protein ice cream is fixable. Here’s a more detailed look at the common culprits and how to solve them.
Help! My Ice Cream is Powdery or Crumbly!
This is the most common “problem,” and it’s barely a problem at all. It usually happens after the first spin. A powdery, sand-like texture just means the base is very cold and dry, which is completely normal for high-protein, low-fat mixtures.
- Solution:
- Add Liquid: Add 1-2 tablespoons of your liquid base (milk, almond milk, etc.) directly into the pint.
- Re-Spin: Put it back into the machine and use the “Re-Spin” function. This is the magic button!
- Be Patient: One or two re-spins will almost always transform it into a perfectly creamy dessert. Don’t give up after the first try.
Why is My Ice Cream Icy?
Icy texture is the enemy! It usually means there’s too much water content or not enough fat, protein, or emulsifiers in your base to create a smooth blend. This allows large, crunchy ice crystals to form.
- Solution:
- Add a Binder: This is where that sugar-free pudding mix or a pinch of guar gum becomes your best friend. Add about 1 tablespoon of pudding mix or 1/4 teaspoon of guar gum to your base before freezing. They help bind the water and prevent ice crystals.
- Check Your Protein: As discussed, 100% whey isolate can sometimes result in an icier texture than a whey/casein blend. If you’re using whey isolate, a binder is highly recommended.
- Add a Little Fat: A tablespoon of cream cheese, full-fat Greek yogurt, or even a little canned coconut cream can add the necessary fat for a smoother, richer mouthfeel, making it a truly creamy protein ice cream.
My Pint is Frozen into a Solid Brick or Has a Hump. Now What?
If you try to spin a pint that has a hump in the middle from freezing unevenly, it can damage the machine’s blade. Sometimes, the base is just frozen rock-solid and needs a little help before spinning.
- Solution:
- Temper It: Before you process it, let the pint sit out on the counter for 10-15 minutes to temper slightly.
- Warm Water Trick: Run the outside of the pint under warm water for about 60 seconds. This softens the edges just enough for the paddle to do its job safely.
- Prevent the Hump: To avoid this issue in the future, always freeze your pints on a perfectly flat surface and without the lid on. This helps it freeze evenly.
Why is My Ice Cream Too Soft or Runny?
This usually happens for one of two reasons: your base either wasn’t frozen long enough, or it sat out on the counter for too long before you spun it.
- Solution:
- Just Refreeze: This is an easy one! Simply pop the pint back into the freezer for 30-60 minutes to let it firm up, then try spinning it again.
- Ensure a Full Freeze: For best results, always freeze your base for a full 24 hours to ensure it’s completely solid.
Frequently Asked Questions
What is the best protein powder to use for Ninja Creami recipes?
How do I make my Ninja Creami protein ice cream less icy?
Can you make protein ice cream in the Ninja Creami without banana?
What liquids work best for the ice cream base?
How long does the pint need to freeze for best results?
What protein powder is best for the Ninja Creami?
Can I make this dairy-free?
Why is my ice cream powdery?
Conclusion
That’s everything you need to get started on your journey with ninja creami recipes protein ice cream. It’s an easy, fun, and delicious way to get more protein into your diet without feeling like you’re missing out on dessert. Whether you’re a beginner or just looking for new flavor ideas, the tips and tricks in this guide will help you master the art of making the perfect pint every time. So go ahead, experiment with different flavors and mix-ins, and enjoy your guilt-free treat!