There is something truly magical about bringing a homemade cake to the table. You know what I mean? The lights go down, the candles flicker, and everyone starts singing. It is the highlight of the party. Finding the perfect birthday cake can feel like a lot of pressure, but honestly, it does not have to be.
You want something that looks impressive but tastes even better. Store bought cakes often look great but lack that comforting flavor and moisture. That is where this recipe comes in. It is designed for home bakers who want to create Delicious Cakes Homemade without needing a culinary degree.
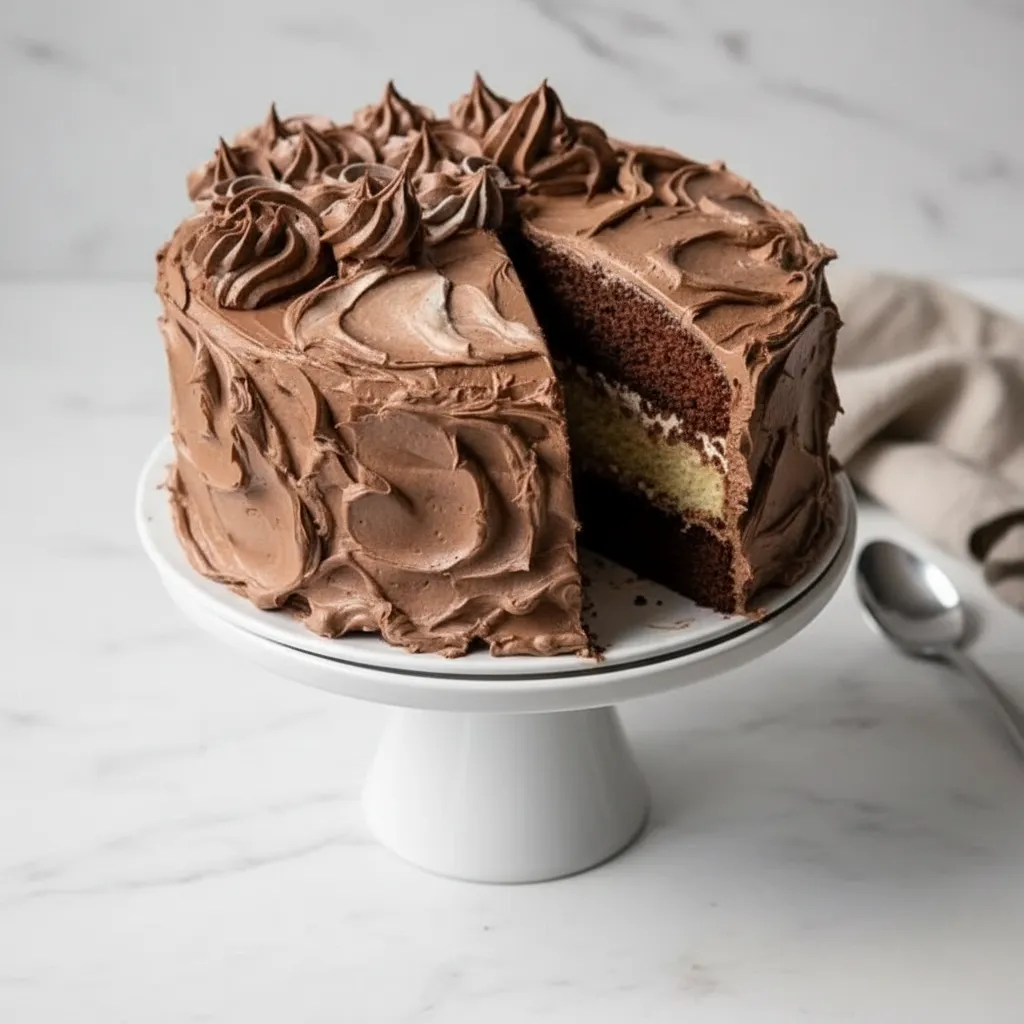
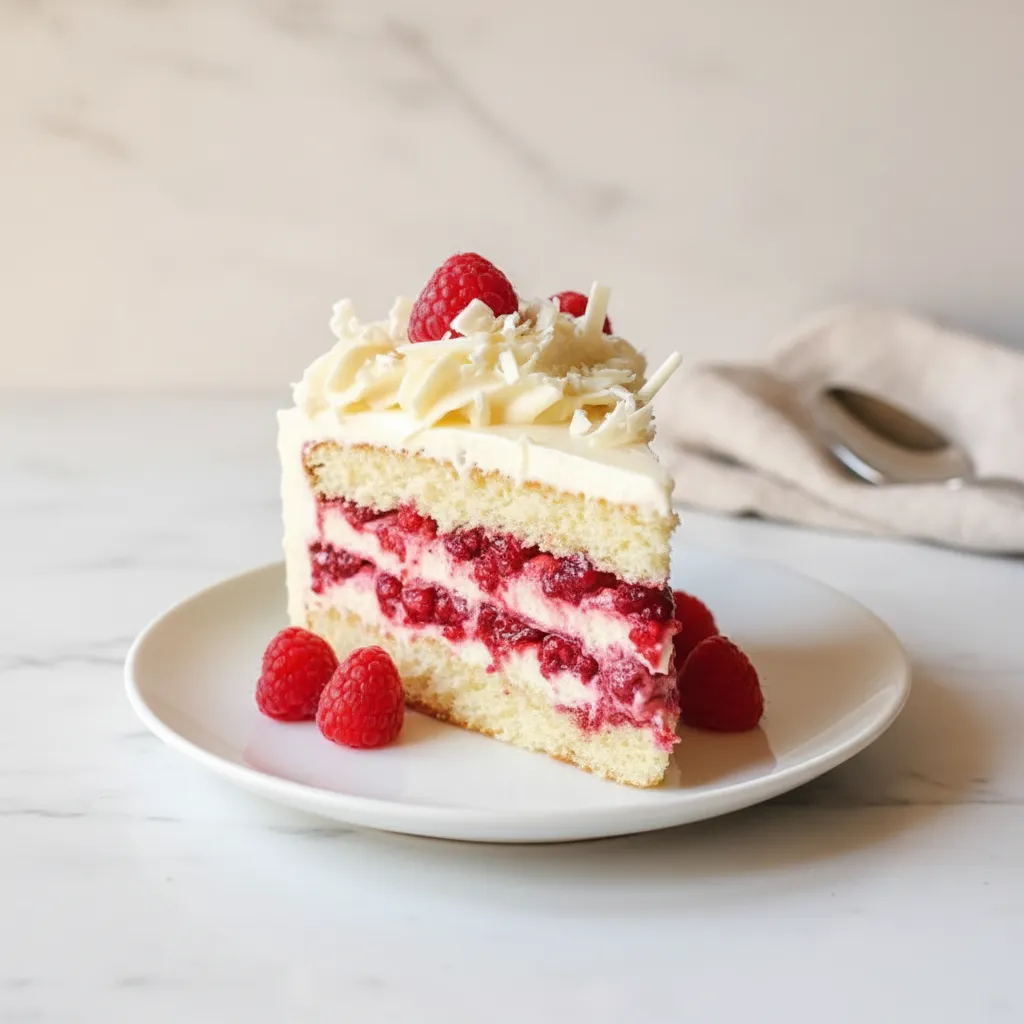
This White Chocolate Raspberry Dream Cake is the answer. It balances the rich sweetness of white chocolate with the bright zing of fresh raspberries. It is one of those Popular Cake Recipes that people will ask you for again and again. Let me walk you through how to make this stunning dessert right in your own kitchen.
Jump To:
Why You’ll Love This Recipe
First off, the flavor combination is undeniable. White chocolate can sometimes be too sweet on its own. However, when you pair it with tart raspberries, it creates a perfect balance. It is a sophisticated twist on Classic Cake Flavors like vanilla or chocolate.
This recipe is also incredibly forgiving. Unlike a complicated soufflé or a temperamental pastry, this cake batter comes together easily. You do not need fancy tools. If you have a mixer and some bowls, you are ready to go. It is a great entry point for anyone wanting to make Amazing Looking Cakes at home.
Another reason to love this is its versatility. It works perfectly as a Cake For Celebration events, anniversaries, or just a Tuesday night treat. While a quick Bar Cakes Recipe is nice for a picnic, this layer cake brings a sense of occasion that sheet cakes just cannot match.
Finally, the texture is spot on. The sour cream and milk ensure the crumb stays moist and tender for days. You will not have to worry about serving dry cake to your guests. It is the kind of birthday cake that creates lasting memories.
Ingredients
Here is everything you need to get started. I recommend gathering all your ingredients before you begin mixing. This makes the process smooth and stress free.
- 2 1/2 cups all purpose flour
- 2 teaspoons baking powder
- 1/2 teaspoon baking soda
- 1/2 teaspoon salt
- 1 cup unsalted butter (softened)
- 1 1/2 cups granulated sugar
- 4 large eggs
- 1 teaspoon vanilla extract
- 1 cup whole milk
- 1/2 cup sour cream
- 6 ounces white chocolate, melted
- 1 1/2 cups fresh raspberries
- 1/2 cup raspberry jam
- 2 cups heavy whipping cream
- 2 tablespoons powdered sugar
- 1 teaspoon vanilla extract (for the cream)
Step-By-Step Instructions
Ready to bake? Follow these steps closely, and you will have a beautiful birthday cake in no time.
Step 1: Prep The Oven And Pans
Start by preheating your oven to 350°F (175°C). Getting the oven to the right temperature is crucial for an even rise. While it heats up, grease two 9 inch round cake pans. Dust them with a little flour to ensure the cakes release easily later on.
Step 2: Whisk Dry Ingredients
Grab a medium sized bowl. Whisk together the all purpose flour, baking powder, baking soda, and salt. You want to make sure the raising agents are distributed evenly throughout the flour. This prevents any large air pockets in your cake.
Step 3: Cream Butter And Sugar
In a large mixing bowl, combine the unsalted butter and granulated sugar. Use an electric mixer on medium speed. Beat them together for about 3 to 4 minutes. You are looking for a texture that is light and fluffy. This step adds air to the batter, which makes the cake soft.
Step 4: Add Eggs And Vanilla
Add the eggs one at a time. Beat the mixture well after each egg goes in. This helps create a stable emulsion. Once all the eggs are in, mix in the vanilla extract until it is fully incorporated. The smell at this stage is just wonderful.
Step 5: Mix Wet Ingredients
In a separate small bowl, stir together the whole milk and sour cream until smooth. The sour cream adds a nice tang and extra fat, which keeps the birthday cake moist for longer.
Step 6: Combine Everything
Now, gently add the dry ingredients to the butter mixture. Alternate with the milk and sour cream mixture. Start with the dry ingredients and end with the dry ingredients. Beat on low speed until just combined. Be careful here.
Overmixing can make the cake tough, and we want it tender.
Step 7: Fold In White Chocolate
Take your melted white chocolate and gently fold it into the batter using a spatula. Make sure the chocolate is not too hot, or it might scramble the eggs. Fold until fully incorporated.
Step 8: Bake The Cakes
Divide the batter evenly between your prepared pans. Smooth the tops with a spatula. Bake for 25 to 30 minutes. You will know they are done when a toothpick inserted into the center comes out clean.
Step 9: Cool And Make Filling
Let the cakes cool in the pans for 10 minutes, then turn them out onto a wire rack to cool completely. While they cool, mash the fresh raspberries in a bowl. Stir in the raspberry jam. This creates a thick, fruity filling that packs a punch.
Step 10: Whip The Cream
In a large bowl, beat the heavy whipping cream, powdered sugar, and vanilla extract on high speed. Keep going until stiff peaks form. This is your frosting. It is light, airy, and not too heavy.
Step 11: Assemble The Cake
Place one cake layer on a serving platter. Spread the raspberry filling over the top. Add a generous layer of whipped cream over the fruit. Place the second cake layer on top and press gently.
Cover the top and sides with the remaining whipped cream. Garnish with fresh raspberries. Chill for at least 1 hour before serving to let it set. Now you have a stunning birthday cake ready to go.


How To Store Leftovers
Because this cake uses fresh whipped cream and fruit, you need to store it in the refrigerator. It cannot sit out on the counter for too long, especially on a warm day. Place any leftovers in an airtight container or cover the cake gently with plastic wrap.
It will stay fresh in the fridge for up to 3 days. The whipped cream might lose a little volume over time, but it will still taste delicious. If you want to freeze it, I recommend freezing the cake layers before you frost them.
Wrap the unfrosted layers tightly in plastic wrap and then foil. They can be frozen for up to a month. Thaw them in the fridge overnight before assembling your birthday cake.
Tips
Here are a few tricks to ensure your baking success. First, make sure your ingredients are at room temperature. This includes the butter, eggs, milk, and sour cream. Room temperature ingredients mix together much better, creating a smoother batter.
When measuring flour, spoon it into the measuring cup and level it off with a knife. Do not scoop directly from the bag. Scooping packs the flour down, and you might end up with a dry cake.
Let the melted white chocolate cool slightly before adding it to the batter. If it is piping hot, it can affect the texture of the eggs and butter. Just let it sit for a few minutes after melting.
Finally, do not skip the chilling step. Putting the assembled cake in the fridge for an hour helps the layers set. It makes slicing much cleaner and easier, so you get those perfect wedges of birthday cake.
Conclusion
Making a birthday cake at home is such a rewarding experience. This White Chocolate Raspberry Dream Cake is sure to impress your friends and family. It looks like it came from a bakery, but it has that special homemade touch that everyone loves.
Whether you are new to baking or looking for fresh American Cake Recipes to add to your collection, this one is a keeper. The combination of flavors is timeless, and the method is straightforward. So grab your apron and get baking!
Do not forget to share your creations. There is nothing better than seeing a beautiful cake bringing people together. Enjoy every bite of your creation.
FAQ
Here are some common questions about this recipe.
Can I Use Frozen Raspberries?
Yes, you can use frozen raspberries for the filling. Just make sure to thaw them and drain any excess liquid before mashing them with the jam. For the garnish on top, fresh berries look much better and hold their shape.
Is This Similar To A Lemon Raspberry White Chocolate Cake?
It is very similar in texture! A Lemon Raspberry White Chocolate Cake usually adds lemon zest to the batter and maybe some lemon juice in the filling. If you love citrus, you can easily add a tablespoon of lemon zest to this batter for a zesty twist.
Can I Make This Gluten Free?
Absolutely. You can swap the all purpose flour for a high quality gluten free flour blend that contains xanthan gum. The texture might be slightly different, but it will still be one of the Most Beautiful Cakes you have made.
Can I Make The Layers Ahead Of Time?
Yes, you can bake the cake layers a day in advance. Let them cool completely, wrap them tightly in plastic wrap, and store them at room temperature. Make the whipped cream and assemble the cake on the day you plan to serve it.
Why Did My Cake Sink In The Middle?
This usually happens if the oven door was opened too early during baking or if the oven temperature was not accurate. Try to resist peeking until the end of the baking time. An oven thermometer can also help you ensure your heat is correct for the perfect birthday cake.
White Chocolate Raspberry Dream Cake
This White Chocolate Raspberry Dream Cake is a delightful homemade dessert balancing rich white chocolate with tart fresh raspberries. It’s a forgiving recipe perfect for home bakers, ensuring a moist and tender crumb for any celebration.
Requirements


Ingredients
Instructions
- Start by preheating your oven to 350°F (175°C). Grease two 9 inch round cake pans. Dust them with a little flour to ensure the cakes release easily later on.
- Grab a medium sized bowl. Whisk together the all purpose flour, baking powder, baking soda, and salt. You want to make sure the raising agents are distributed evenly throughout the flour. This prevents any large air pockets in your cake.
- In a large mixing bowl, combine the unsalted butter and granulated sugar. Use an electric mixer on medium speed. Beat them together for about 3 to 4 minutes. You are looking for a texture that is light and fluffy. This step adds air to the batter, which makes the cake soft.
- Add the eggs one at a time. Beat the mixture well after each egg goes in. This helps create a stable emulsion. Once all the eggs are in, mix in the vanilla extract until it is fully incorporated. The smell at this stage is just wonderful.
- In a separate small bowl, stir together the whole milk and sour cream until smooth. The sour cream adds a nice tang and extra fat, which keeps the birthday cake moist for longer.
- Now, gently add the dry ingredients to the butter mixture. Alternate with the milk and sour cream mixture. Start with the dry ingredients and end with the dry ingredients. Beat on low speed until just combined. Be careful here. Overmixing can make the cake tough, and we want it tender.
- Take your melted white chocolate and gently fold it into the batter using a spatula. Make sure the chocolate is not too hot, or it might scramble the eggs. Fold until fully incorporated.
- Divide the batter evenly between your prepared pans. Smooth the tops with a spatula. Bake for 25 to 30 minutes. You will know they are done when a toothpick inserted into the center comes out clean.
- Let the cakes cool in the pans for 10 minutes, then turn them out onto a wire rack to cool completely. While they cool, mash the fresh raspberries in a bowl. Stir in the raspberry jam. This creates a thick, fruity filling that packs a punch.
- In a large bowl, beat the heavy whipping cream, powdered sugar, and vanilla extract on high speed. Keep going until stiff peaks form. This is your frosting. It is light, airy, and not too heavy.
- Place one cake layer on a serving platter. Spread the raspberry filling over the top. Add a generous layer of whipped cream over the fruit. Place the second cake layer on top and press gently.
- Cover the top and sides with the remaining whipped cream. Garnish with fresh raspberries. Chill for at least 1 hour before serving to let it set. Now you have a stunning birthday cake ready to go.
Notes
Make sure your ingredients are at room temperature. This includes the butter, eggs, milk, and sour cream. Room temperature ingredients mix together much better, creating a smoother batter.
When measuring flour, spoon it into the measuring cup and level it off with a knife. Do not scoop directly from the bag. Scooping packs the flour down, and you might end up with a dry cake.
Let the melted white chocolate cool slightly before adding it to the batter. If it is piping hot, it can affect the texture of the eggs and butter. Just let it sit for a few minutes after melting.
Do not skip the chilling step. Putting the assembled cake in the fridge for an hour helps the layers set. It makes slicing much cleaner and easier, so you get those perfect wedges of birthday cake.
Nutrition
Calories
Sugar
Fat
Carbs