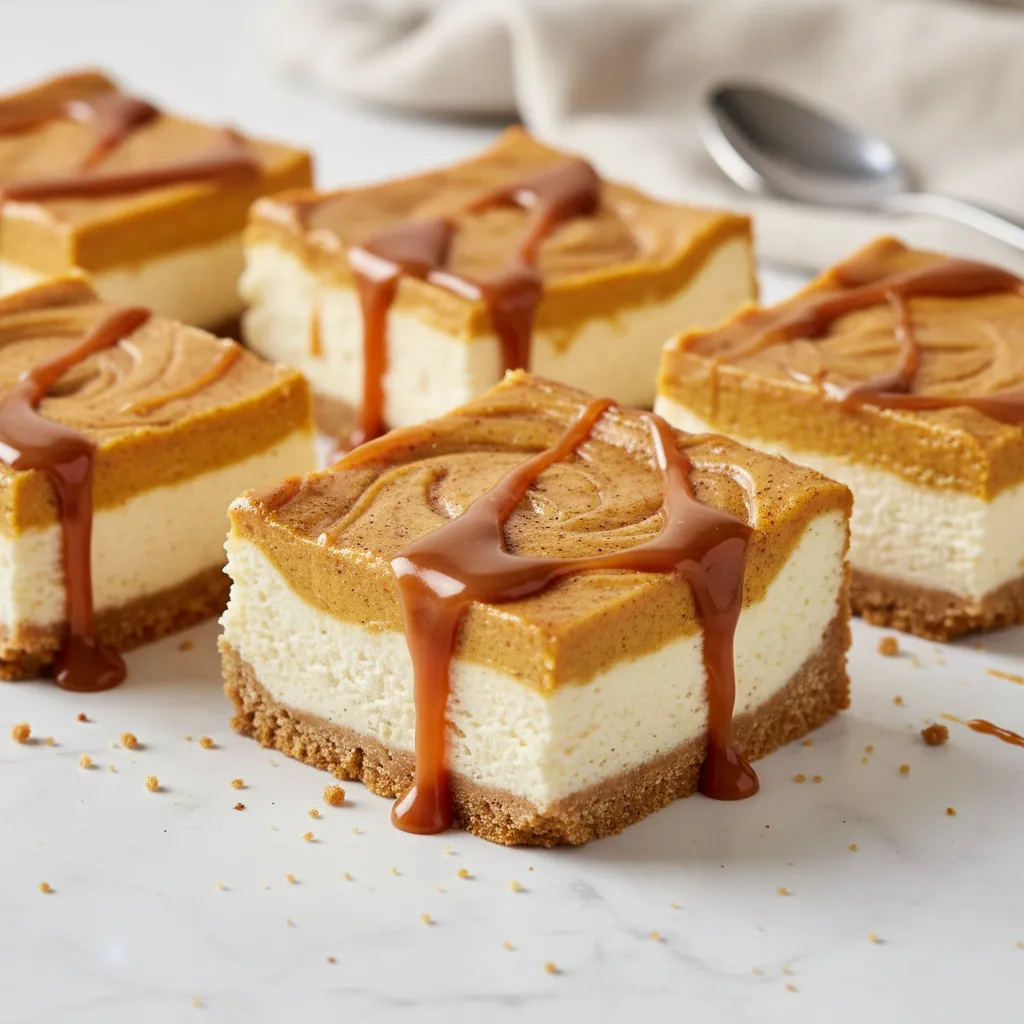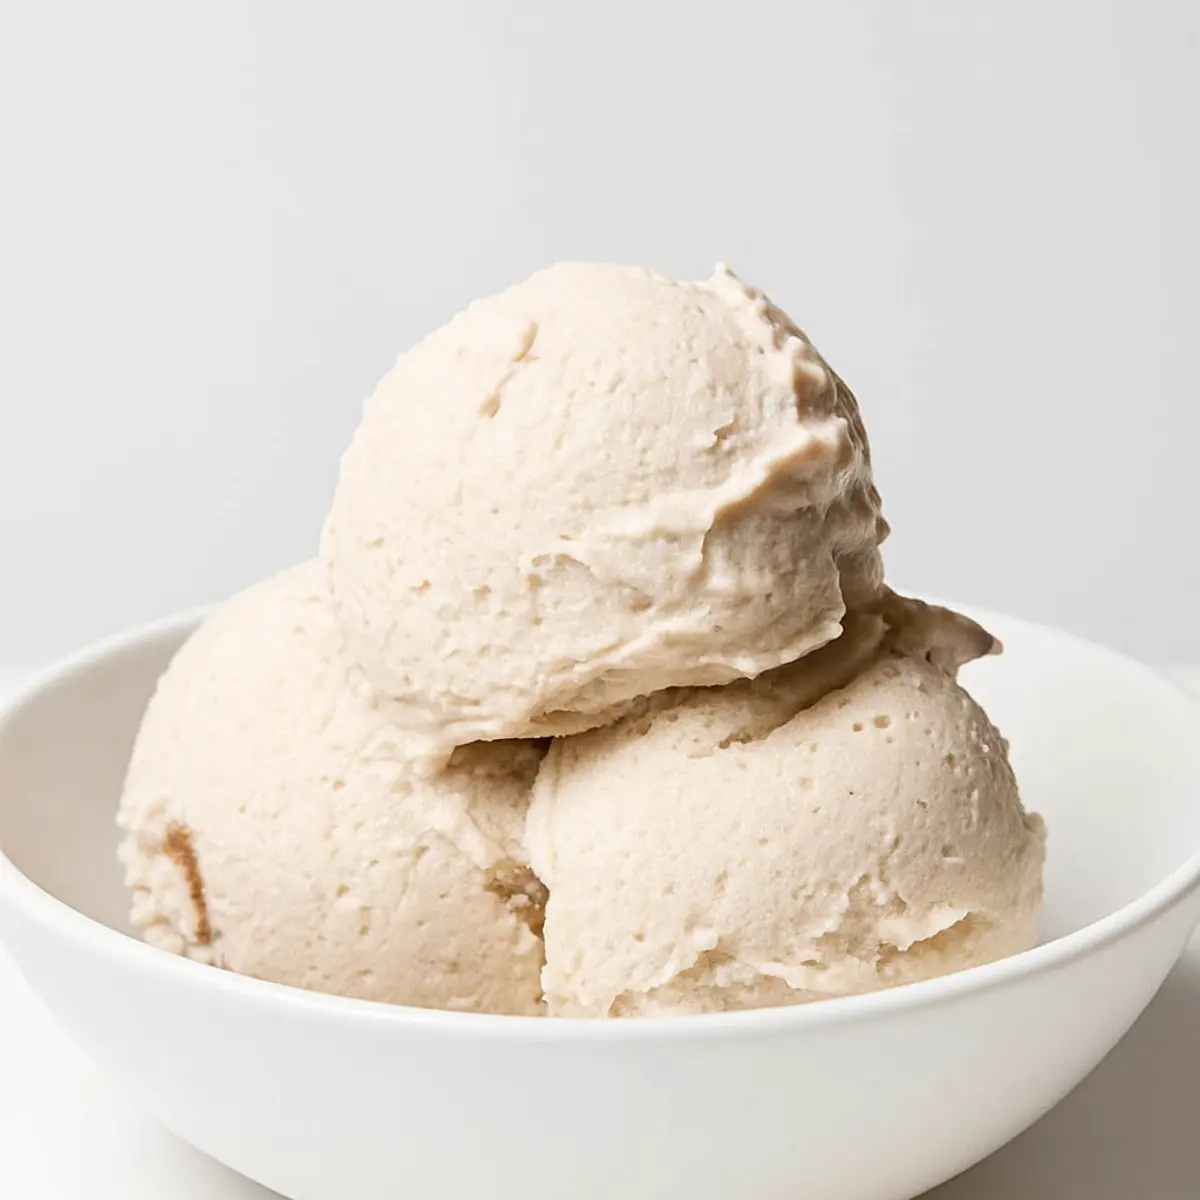
When fall rolls around, there’s one flavor that everyone craves: pumpkin. And while pumpkin pie is a classic, sometimes you want something a little different, something creamy, rich, and ridiculously easy to make. That’s where this recipe comes in. Get ready to fall in love with The Best No-Bake Pumpkin Cheesecake Recipe you’ll ever try. It has all the warm, spiced flavor of a traditional pumpkin dessert but with a velvety, smooth texture that melts in your mouth—all without ever turning on your oven.
This recipe is designed for everyone, from seasoned bakers to total beginners. It features a crunchy gingersnap crust, a luscious pumpkin cream cheese filling, and a cloud of whipped cream on top. It’s the ideal make-ahead dessert for holiday gatherings, a cozy weekend treat, or anytime you need a taste of autumn. Let’s get started on this simple yet impressive dessert.
Jump To:
Why You’ll Love This Recipe
Honestly, what’s not to love about a dessert that’s both delicious and incredibly simple? This Easy Pumpkin Cheesecake is a winner for so many reasons. First and foremost, it’s a no-bake recipe. That means no fussing with the oven, no water baths, and no worrying about cracks on the surface. It’s a huge relief, especially when you’re busy with other holiday cooking.
The texture is just phenomenal. It’s light and airy from the whipped cream yet rich and decadent from the cream cheese and pumpkin. The warm spices—cinnamon, ginger, nutmeg, and cloves—are perfectly balanced, giving it that signature fall flavor we all adore. Plus, the gingersnap crust adds a wonderful spicy-sweet crunch that contrasts beautifully with the creamy filling. This is truly one of the best Fall Cheesecake Recipes you can have in your collection.
Ingredients
For the Gingersnap Crust
- 2 cups (200g to 250g) gingersnap crumbs or graham cracker crumbs
- 1/3 cup (67g) granulated sugar
- 1/2 cup (113g) unsalted butter, melted
For the Pumpkin Cheesecake Filling
- 1 (15-ounce) can pumpkin purée
- 1 cup (240ml) heavy cream
- 2 (8-ounce) packages cream cheese, softened
- 1 cup (120g) powdered sugar
- 2 tablespoons molasses
- 1 teaspoon vanilla extract
- 1 1/2 teaspoons ground cinnamon
- 1 teaspoon ground ginger
- 1/4 teaspoon ground nutmeg
- 1/4 teaspoon ground cardamom
- 1/8 teaspoon ground cloves
For the Optional Toppings
- 1 cup heavy cream
- 2 tablespoons powdered sugar
- 1 teaspoon vanilla extract
- Caramel sauce, for drizzling
Step-By-Step Instructions
Step 1: Drain the Pumpkin
First things first, let’s get that pumpkin purée ready. Scrape it from the can into a small bowl lined with a couple of paper towels. Just set it aside while you work on the other components. This little trick is super important—it draws out excess water, which helps make your cheesecake filling thicker and creamier. Nobody wants a runny cheesecake!
Step 2: Make the No-Bake Crust
In a food processor or a large bowl, combine your cookie crumbs, sugar, and melted butter. Mix them together with a spatula until all the crumbs are nicely moistened and the mixture starts to clump. It should feel like wet sand.
Next, press this mixture into the bottom of a 9 or 10-inch springform pan. Use your fingers or the flat bottom of a measuring cup to pack it down firmly and evenly, bringing it slightly up the sides. A tightly packed crust is key to preventing it from crumbling later. Pop the pan into the freezer to chill while you prepare the filling.
Step 3: Whip the Cream
Using a stand mixer with a whisk attachment or a hand mixer, whip the heavy cream on medium-high speed. You’re looking for very stiff peaks, which should take about 1 to 2 minutes. A little tip: whip it a bit longer than you normally would, until it’s extra thick and clings to the whisk. Be careful not to turn it into butter! Once it’s ready, transfer the whipped cream to another bowl and set it aside.
Step 4: Whip the Cream Cheese
In the same mixing bowl (no need to wash it!), whip the softened cream cheese on medium-high speed until it’s completely smooth. This can take about 4 minutes. Be sure to pause a couple of times to scrape down the sides and bottom of the bowl. This ensures every bit of cream cheese is smooth and lump-free.
Step 5: Make the Filling
Add the drained pumpkin purée, powdered sugar, molasses, vanilla, cinnamon, ginger, nutmeg, cardamom, and cloves to the whipped cream cheese. Start mixing on the lowest speed until the powdered sugar is mostly incorporated—this prevents a sugar cloud in your kitchen! Then, increase the speed to medium-high and whip for another 2 to 3 minutes until the filling is creamy and smooth. Again, scrape the bowl a few times to catch any stubborn lumps.
Step 6: Fold in the Whipped Cream
Now, gently fold the whipped cream you set aside earlier into the pumpkin mixture using a silicone spatula. Use gentle, sweeping motions, rotating the bowl as you go. The goal here is to combine everything without deflating all that lovely air you whipped into the cream. This is what gives the cheesecake its light, mousse-like texture.
Step 7: Fill and Chill
Take your chilled crust out of the freezer and pour the pumpkin filling into it. Use an offset spatula or the back of a spoon to spread it into an even layer and smooth the top. Cover the pan tightly with plastic wrap, trying not to let it touch the surface of the cheesecake. Now for the hard part: the waiting. Refrigerate the cheesecake until it’s thoroughly chilled and set. This will take at least 8 hours, but for the Best Pumpkin Cheesecake Recipe results, 12 to 24 hours is ideal.
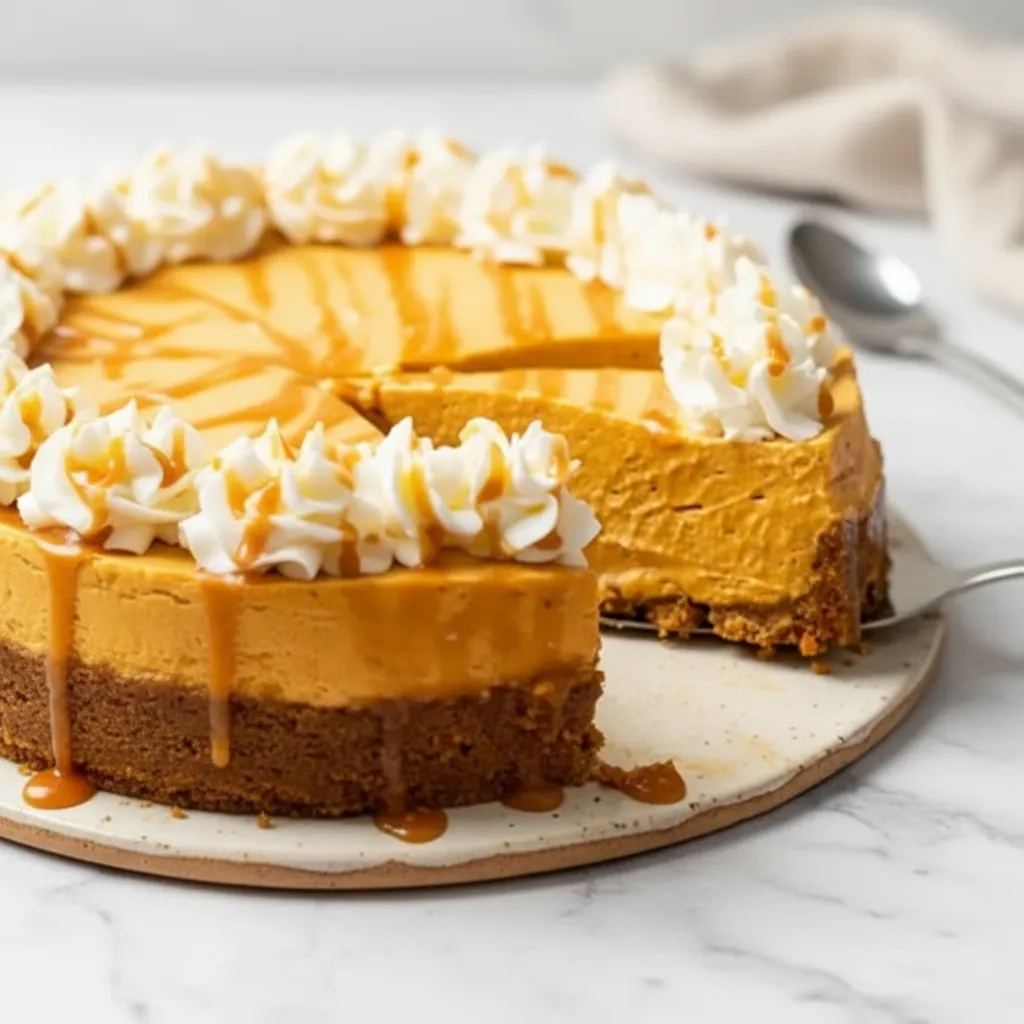
Step 8: Decorate and Serve
Once your cheesecake has set, run a thin knife or offset spatula around the edge to loosen it from the pan. Carefully remove the rim of the springform pan. You can slide the cheesecake onto a serving platter or serve it right from the base.
If you’re using the optional topping, whip the heavy cream, powdered sugar, and vanilla until stiff peaks form. Transfer it to a piping bag with a star tip and pipe rosettes around the edge of the cake. A drizzle of caramel sauce is the finishing touch. Slice, serve, and enjoy!


How To Store Leftovers
Storing this cheesecake is a breeze. Simply cover any leftover cheesecake tightly and store it in the refrigerator. It will stay fresh and delicious for up to 3 days. I find the flavors actually meld together and taste even better on the second day, so it’s a great dessert to make ahead of time.
Conclusion
And there you have it—a stunning, creamy, and flavorful dessert that captures the essence of fall in every bite. The Best No-Bake Pumpkin Cheesecake Recipe is more than just a recipe; it’s an experience. It’s about creating something special for the people you love without spending hours in the kitchen. This pumpkin cheesecake is proof that sometimes the simplest things are the most satisfying. So go ahead, give it a try, and watch it become a new seasonal favorite.
FAQ
Can I use a regular pie dish instead of a springform pan?
Yes, you can! A 9-inch deep-dish pie plate will work well. Just know that you won’t be able to remove the sides, so you’ll have to slice and serve it directly from the dish. It will still taste just as delicious.
Can I make this recipe ahead of time?
Absolutely! This cheesecake is perfect for making ahead. It needs at least 8 hours to set, but it’s even better if you let it chill for a full 24 hours. You can make it a day or two before you plan to serve it.
Is it possible to make this cheesecake gluten-free?
Yes, it’s very easy to adapt. Simply use your favorite gluten-free gingersnaps or graham-style crackers for the crust. The rest of the ingredients are naturally gluten-free, but always double-check your labels just to be safe.