Have you ever spent hours preparing a holiday turkey, only to carve into a dry, disappointing bird? We have all been there. It is a common kitchen story. But what if I told you there is a simple method that gives you a moist, evenly cooked turkey with wonderfully crispy skin every single time? Get ready to meet your new favorite technique.
This Smoked Spatchcock Turkey recipe is a fantastic way to prepare your bird. Spatchcocking, which just means removing the backbone and flattening the turkey, allows it to cook faster and more evenly. When you add the rich flavor of smoke, you get a truly special meal that will impress everyone at your table.
Jump To:
Why You’ll Love This Recipe
Honestly, once you try this method, you might never go back to roasting a whole turkey the old fashioned way. It just makes sense. The results are that good, and the process is surprisingly straightforward for any home cook.
The biggest win is the cooking time. A spatchcocked turkey cooks much quicker than a traditional one because more of its surface is exposed to heat. This means less time waiting and more time enjoying the meal with family and friends.
Even cooking is another huge plus. Since the turkey lays flat, the dark meat of the thighs and the white meat of the breast finish cooking at nearly the same time. This puts an end to the classic problem of dry breasts and undercooked thighs.
And let’s talk about that skin. Because the entire skin side is facing up and getting direct heat, you get wall to wall crispy, golden brown skin. There are no soggy spots on the bottom. Every single bite has that delightful crunch.
The flavor is also incredible. The dry brine seasons the meat deeply, making it juicy and savory from the inside out. The smoker infuses every part of the bird with a gentle, smoky aroma that pairs beautifully with the savory spice rub.
Plus, a Smoked Spatchcock Turkey just looks amazing. It creates a stunning presentation on a platter, making it easy to carve and serve. Your guests will definitely be impressed before they even take their first bite. It is a centerpiece worth celebrating.
Ingredients
The ingredient list is simple, focusing on a flavorful dry brine and a classic smokehouse rub. The magic comes from how these simple elements work together. You do not need anything fancy to get amazing results.
- 10 to 15 lb whole turkey, giblets and neck removed, fully thawed
- 3 to 4 tablespoons kosher salt
- 1 tablespoon packed brown sugar
- 1 tablespoon smoked paprika
- 2 teaspoons black pepper
- 2 teaspoons garlic powder
- 2 teaspoons onion powder
- 2 teaspoons dried sage
- 1 teaspoon dried thyme
- 1 teaspoon dried rosemary
- Olive oil, for brushing
Step By Step Instructions
Follow these steps closely, and you will be on your way to the best turkey you have ever made. We will walk through everything from the brine to the final carve. It is easier than you think!
Step 1: The Dry Brine Process
First things first, let’s get that turkey brined. A dry brine is less messy than a wet one and does an incredible job of seasoning the meat and helping the skin get super crispy. Make sure your turkey is completely thawed before you begin.
Pat the entire turkey dry with paper towels. You want the surface to be as dry as possible. Then, generously rub the kosher salt all over the skin. Get it everywhere, on the top, bottom, and around the legs and wings.
Place the salted turkey on a large sheet pan with a wire rack. Put it in the refrigerator, completely uncovered, for at least 24 to 48 hours. This step is crucial. The salt draws out moisture and then gets reabsorbed, seasoning the meat deeply. Leaving it uncovered dries out the skin, which is the key to getting it crispy later. Do not rinse the salt off when you are done.
Step 2: Preparing Your Smoker
It is time to get your smoker ready. You want to preheat it to 225°F or 107°C. Whether you have a dedicated smoker or are making a Pit Boss Smoked Turkey, the goal is low and slow heat to start.
Choose your wood chips or pellets. Fruit woods like apple or cherry give a mild, sweet smoke that is wonderful with poultry. Hickory or pecan offer a more robust, classic smoky flavor. This is a great time to experiment with what you like best.
Step 3: How To Spatchcock The Turkey
Now for the main event, spatchcocking the bird. Take the turkey out of the refrigerator. Flip it so it is breast side down on a large cutting board. You will see the backbone running down the center.
Using a pair of sturdy kitchen shears or poultry shears, carefully cut along one side of the backbone, from the tail to the neck. Then, repeat the cut on the other side of the backbone. This can take a bit of muscle, so be careful.
Once it is cut on both sides, remove the backbone completely. Don’t throw it away! You can save it to make a delicious turkey stock or gravy. This is a great trick used in many Smoked Turkey Necks Recipes to build flavor.
Now, flip the turkey over so it is breast side up. Place your hands on the center of the breastbone and press down firmly. You should hear a crack. This breaks the breastbone and allows the turkey to lie completely flat.
Step 4: Seasoning Your Bird
With the hard part done, it is time to add more flavor. In a small bowl, mix together the brown sugar, smoked paprika, black pepper, garlic powder, onion powder, sage, thyme, and rosemary. This creates a wonderfully savory and aromatic rub.
Rub this mixture all over the flattened turkey. Make sure to cover every surface. Gently lift the skin over the breast and thighs and work some of the seasoning directly onto the meat for an even deeper flavor. Be generous with it!
Step 5: The First Smoke
Your smoker should be at a steady 225°F. Carefully place the seasoned turkey inside, skin side up. For even cooking, try to position the thighs toward the hottest part of your smoker, as they can handle more heat.
Insert a reliable meat thermometer into the thickest part of the breast, making sure you do not hit the bone. This is the best way to track your progress. Close the smoker and let it cook. This initial low temperature smoke will probably take about 3 to 4 hours, or until the internal temperature reaches 130°F or 54°C.
Step 6: Finishing at High Heat
Once the breast hits 130°F, it is time to crisp up that skin. Carefully remove the turkey from the smoker and set it aside. Increase the smoker’s temperature to 400°F or 204°C.
While the smoker heats up, brush the turkey’s skin all over with a generous layer of olive oil. This will help it get that beautiful golden brown color and extra crispy texture. Reinsert the thermometer into the breast.
Return the turkey to the hot smoker. Continue cooking until the breast temperature reaches about 157°F to 160°F. The temperature will continue to rise a few degrees as the turkey rests, bringing it to a safe 165°F.
Step 7: The All Important Rest
This step is non negotiable! Once the turkey is done cooking, transfer it to a clean cutting board. Loosely tent it with aluminum foil and let it rest for a good 30 to 45 minutes. This allows the juices inside the meat to redistribute, resulting in a much more moist and tender turkey.
If you cut into it too soon, all those delicious juices will run out onto the board instead of staying in the meat. So be patient. It is well worth the wait. After resting, you can carve your Smoked Spatchcock Turkey and serve it up.


How To Store Leftovers
If you are lucky enough to have leftovers, storing them properly will keep them tasting great. First, let the turkey cool down completely. Then, carve the remaining meat off the bones.
Place the leftover turkey in an airtight container or a resealable plastic bag. It will keep in the refrigerator for about 3 to 4 days. You can also freeze it for longer storage. Just make sure it is in a freezer safe container, and it will last for a couple of months.
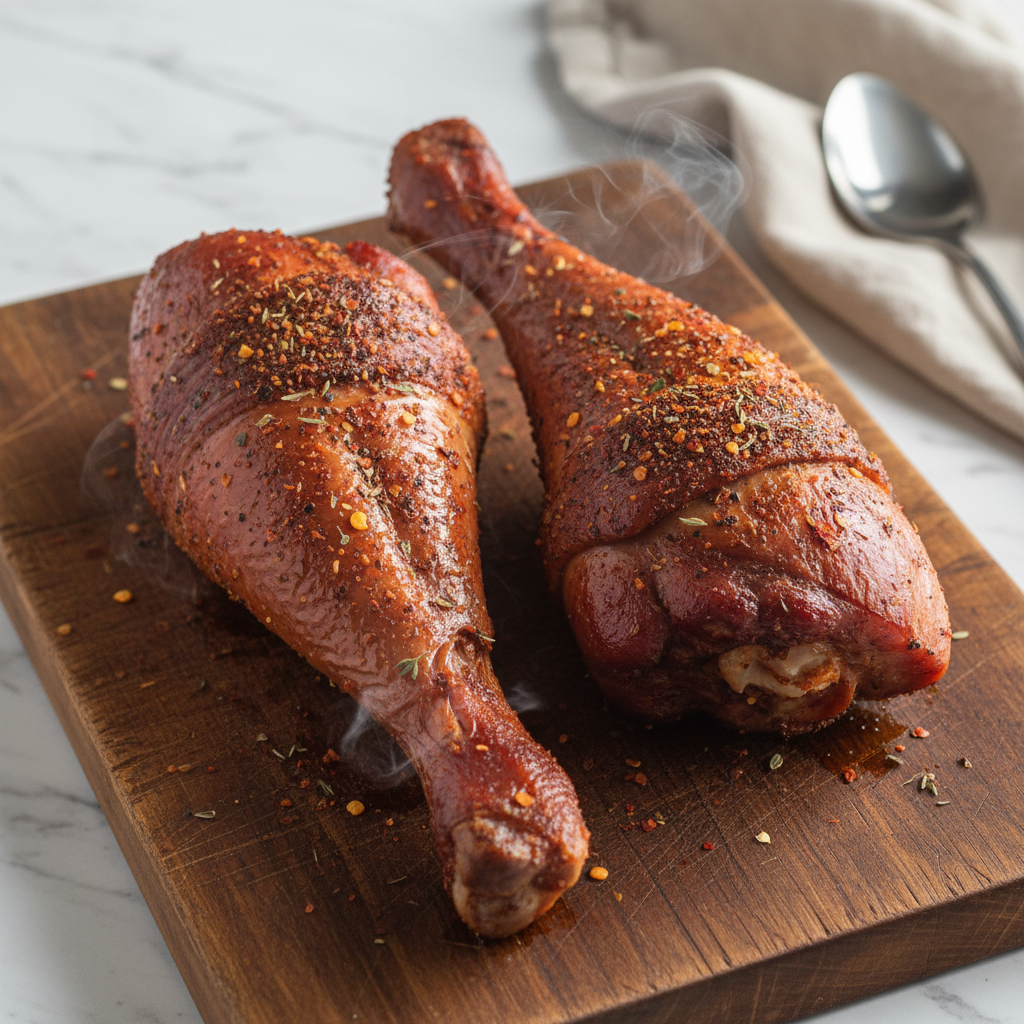
Leftover smoked turkey is fantastic in sandwiches, salads, soups, or casseroles. The smoky flavor adds a new dimension to any dish. You can even use the bones and carcass to make a smoky broth, which is a great base for soups and stews. Think of it like a whole bird version of a Smoked Turkey Legs Recipe, with tons of possibilities.
Tips
Here are a few extra tips to help you get the best results with your Smoked Spatchcock Turkey.
- Choose Your Wood Wisely: The type of wood you use for smoking has a big impact on the final flavor. For a milder taste, go with apple or cherry. For a stronger, more traditional smoke flavor, hickory or mesquite are good choices.
- Thermometer Is Key: I can’t say this enough. A reliable digital meat thermometer is your best friend. Cooking to temperature, not to time, is the only way to guarantee a perfectly cooked, juicy bird.
- Thaw Completely: Make sure your turkey is fully thawed before you start the brining process. A partially frozen bird will not cook evenly. It can take several days in the fridge for a large turkey to thaw.
- Carving Is Easy: Carving a spatchcocked turkey is much simpler than a whole one. You can easily remove the legs and thighs first, then slice the breast meat directly off the bone.
- Save the Drippings: Place a drip pan under the turkey in the smoker to catch any drippings. These are pure gold and can be used to make a delicious smoky gravy to serve alongside your turkey.
Conclusion
Making a Smoked Spatchcock Turkey is a rewarding experience that delivers on every front. It gives you juicy meat, crispy skin, and a deep smoky flavor that is hard to beat. Plus, it cooks faster and more evenly than a traditional whole turkey, making your life a little easier.
This method might seem different at first, but it is straightforward and very forgiving for beginners. Give this recipe a try for your next holiday meal or special gathering. It is a wonderful way to create a memorable centerpiece that everyone will love. Happy smoking!
FAQ
What Kind Of Wood Is Best For Smoking Turkey?
For turkey, you generally want a milder wood so it does not overpower the flavor of the meat. Fruitwoods like apple and cherry are popular choices because they add a subtle sweetness. Pecan and alder are also great options. Hickory can be used for a stronger, more traditional smoke flavor, but use it sparingly.
Can I Make This Recipe Without A Smoker?
Absolutely. You can achieve a similar result on a standard charcoal or gas grill. Set up your grill for indirect cooking, with the heat on one side and the turkey on the other. Add a smoke box or a foil packet filled with soaked wood chips over the hot side to generate smoke.
How Do I Know When The Turkey Is Done?
The only reliable way to know is by using an instant read meat thermometer. The turkey is safe to eat when the breast reaches an internal temperature of 165°F (74°C). We recommend pulling it from the smoker around 157°F to 160°F, as the temperature will rise during the resting period.
Is Dry Brining Necessary?
While not strictly necessary, dry brining makes a huge difference in both the flavor and texture of the turkey. It helps the meat retain moisture, seasons it deeply, and is key to achieving that super crispy skin. If you are short on time, you can skip it, but I highly recommend making time for it.
What Should I Do With The Turkey Backbone?
Do not throw it away! The backbone is full of flavor and collagen. You can roast it and then simmer it with some vegetables like onions, carrots, and celery to make a rich, flavorful turkey stock. This stock is perfect for making gravy or as a base for soups. It is a technique often used in Smoked Turkey Necks Recipes.
Smoked Spatchcock Turkey
This Smoked Spatchcock Turkey recipe delivers a moist, evenly cooked bird with incredibly crispy skin. By flattening the turkey, it cooks faster and absorbs a rich, smoky flavor, making it a wonderful centerpiece for any holiday or gathering.
Ingredients
Instructions
- Pat the turkey completely dry and rub kosher salt all over the skin. Place on a wire rack over a sheet pan and refrigerate, uncovered, for 24 to 48 hours. Do not rinse the salt off.
- Preheat your smoker to 225°F (107°C). Choose a mild wood like apple or cherry for flavor.
- Place the turkey breast-side down. Using sturdy kitchen shears, cut along both sides of the backbone to remove it. Flip the turkey over and press firmly on the breastbone to flatten it.
- In a small bowl, mix brown sugar, smoked paprika, black pepper, garlic powder, onion powder, sage, thyme, and rosemary. Rub this seasoning mixture all over the turkey, including under the skin.
- Place the turkey in the smoker, skin-side up. Cook for 3-4 hours, or until the internal temperature of the breast reaches 130°F (54°C).
- Remove the turkey and increase the smoker temperature to 400°F (204°C). Brush the turkey skin with olive oil and return it to the smoker. Cook until the breast temperature reaches 157-160°F.
- Transfer the turkey to a cutting board, tent loosely with foil, and let it rest for 30-45 minutes before carving. This allows the juices to redistribute for a moist result.
Notes
The 24-48 hour dry brining period is important for a moist, flavorful turkey and crispy skin.
Using a reliable digital meat thermometer is the best way to ensure the turkey is cooked properly without drying it out.
Place a drip pan under the turkey in the smoker to catch the drippings for a flavorful gravy.
Ensure your turkey is completely thawed before you begin; this can take several days in the refrigerator.
Nutrition
Calories
Sugar
Fat
Carbs