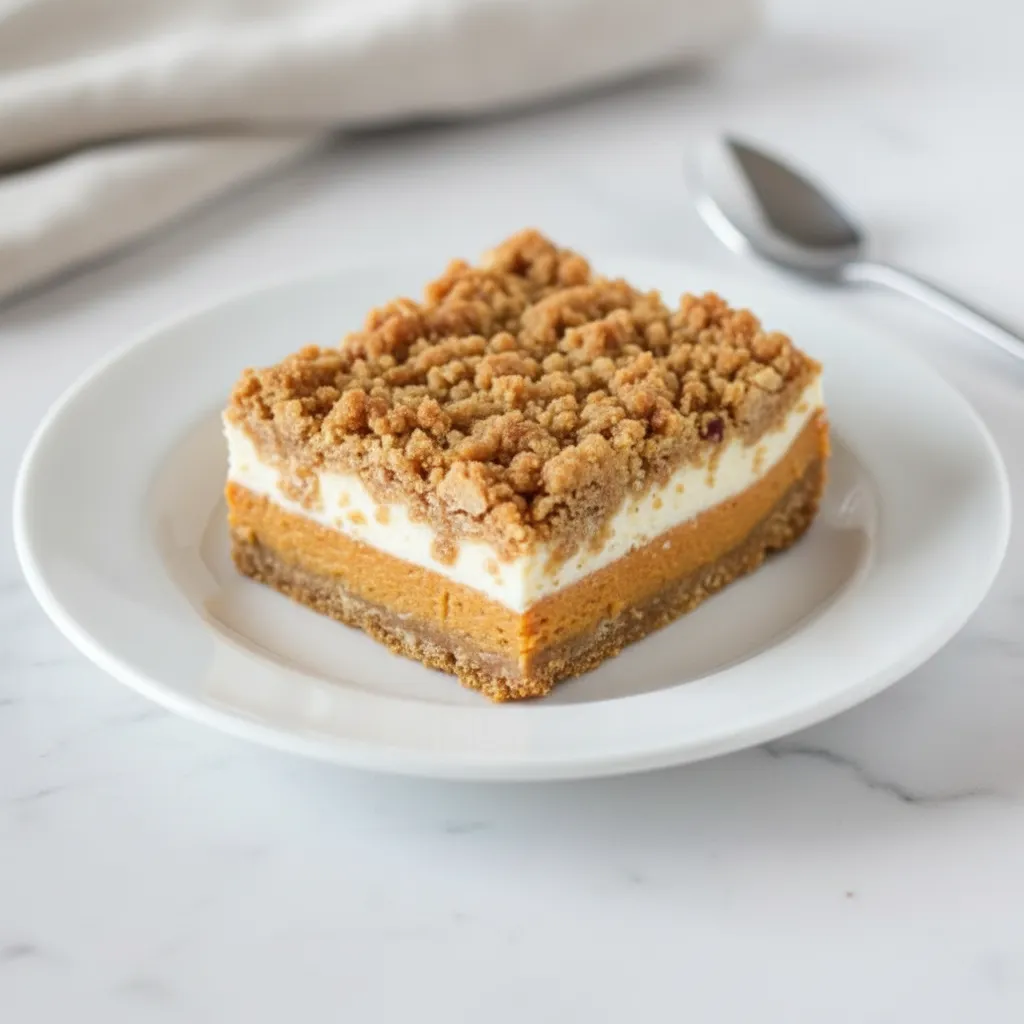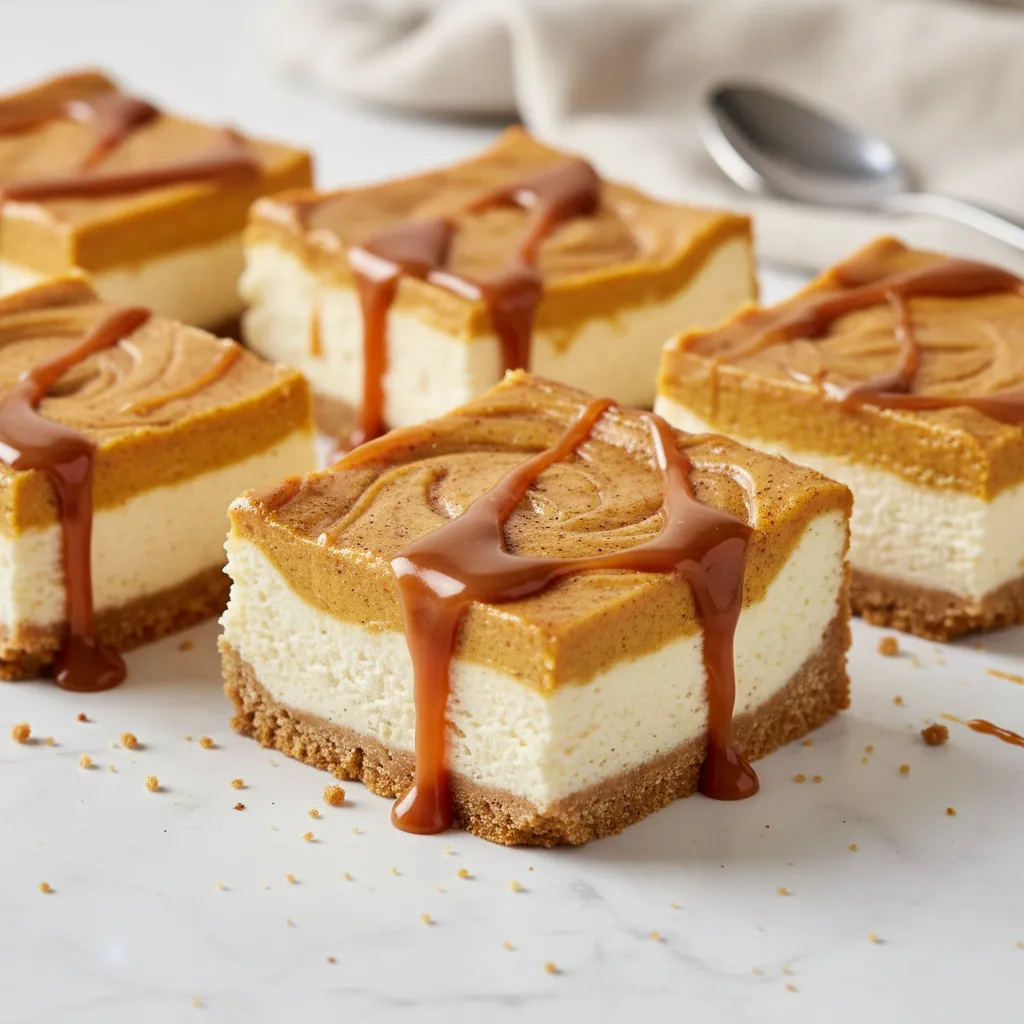
Thanksgiving is all about tradition, family, and of course, the food. While pumpkin pie is a classic, sometimes you want something a little different, something that makes everyone at the table pause and say, “Wow.” That’s where this Showstopper Pumpkin Swirl Cheesecake for Thanksgiving comes in. It’s the dessert that bridges the gap between classic holiday flavors and a truly memorable culinary experience. It has the creamy, tangy goodness of a classic cheesecake and the warm, spiced flavor of pumpkin pie, all swirled together into one beautiful dessert.
This isn’t just another cheesecake recipe; it’s a centerpiece for your holiday table. The beautiful swirls of pumpkin and plain cheesecake batter create a stunning marbled effect that looks incredibly impressive but is surprisingly straightforward to achieve. Whether you’re a seasoned baker or trying your hand at cheesecake for the first time, this guide will walk you through every step to ensure a rich, creamy, and crack-free result. Get ready to add a new favorite to your collection of Fall Cheesecake Recipes.
Jump To:
Why You’ll Love This Recipe
Honestly, what’s not to love about a dessert that combines two holiday favorites into one? This Pumpkin Swirl Cheesecake is the best of both worlds. You get the rich, velvety texture of a New York-style cheesecake combined with the cozy, spiced flavor of pumpkin. It’s a fantastic alternative to traditional pumpkin pie, offering a different texture that many people prefer.
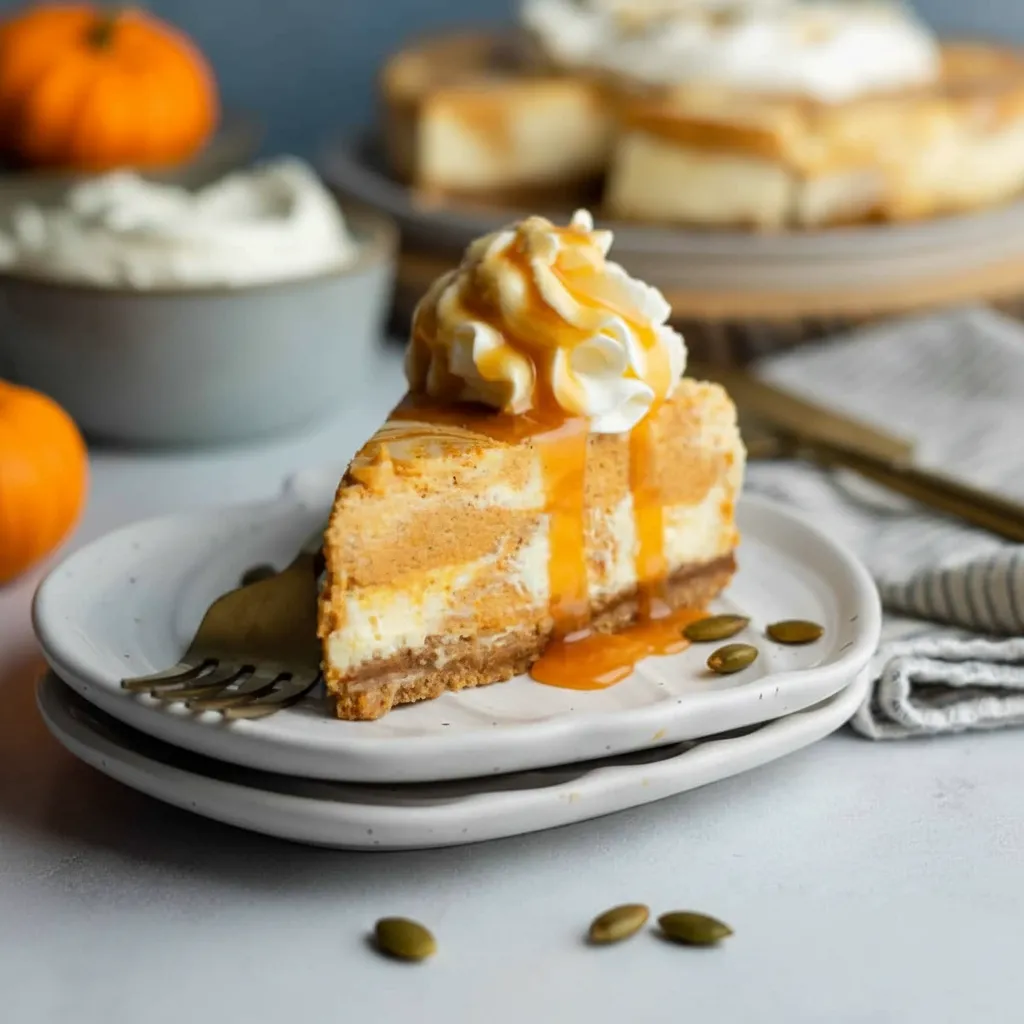
The visual appeal is a huge part of the fun. The swirling pattern of the two batters is simply gorgeous, making it look like you spent hours crafting a complicated dessert. But here’s the thing—it’s much easier than it looks! The recipe uses a water bath (don’t worry, I’ll explain it) which is the key to getting that super creamy texture and preventing those dreaded cracks. It’s a reliable method that delivers a bakery-quality Thanksgiving Cheesecake every single time. Plus, you can make it ahead of time, which is a lifesaver when you’re juggling a full Thanksgiving menu.
Ingredients
Here’s what you’ll need to gather for this delicious pumpkin cheesecake. I’ve broken it down by component to make your prep even easier.
For the Graham Cracker Crust
- 2 cups gluten-free graham cracker crumbs (or gluten-free crunchy gingersnap crumbs for an extra kick)
- ¼ cup granulated sugar
- 6 tablespoon butter, melted
For the Cheesecake Filling
- 24 ounces cream cheese, 3 (8-ounce) packages, softened
- 1-½ cups granulated sugar
- 3 tablespoons cornstarch
- ½ cup sour cream
- 3 large eggs
- 1 Tablespoon vanilla extract
For the Pumpkin Filling
- 15 ounces pumpkin puree
- 1-½ teaspoon ground cinnamon
- 1-½ teaspoon pumpkin pie spice
Optional Garnishes
- Fresh whipped cream
- Caramel sauce
- Roasted pepitas
Step-By-Step Instructions
Ready to bake? Let’s walk through this process together. Take your time, and enjoy the process of creating something truly special.
Step 1: Prepare the Crust
First things first, preheat your oven to 350°F. Grab a 9-inch springform pan and line the bottom with parchment paper. This little step makes removing the cheesecake so much easier later on. Give the pan a quick spray with non-stick spray. In a medium bowl, combine your graham cracker crumbs and sugar. Pour in the melted butter and stir until it looks like wet sand. Press this mixture firmly and evenly into the bottom of your prepared pan. Bake it for 10 minutes, then take it out and let it cool a bit. Now, turn your oven temperature way down to 250°F. This low and slow approach is key.
Step 2: Make the Cheesecake Filling
While the crust cools, let’s make the filling. In a large bowl, use a hand mixer or stand mixer to blend the softened cream cheese, sugar, and cornstarch until it’s completely smooth. Scrape down the sides of the bowl to make sure everything is incorporated. Next, mix in the sour cream. Then, add the eggs one at a time, mixing on low speed just until each one is combined. Don’t overmix here! Finally, stir in the vanilla extract.
Step 3: Create the Pumpkin Mixture
In a separate bowl, whisk together the pumpkin puree, cinnamon, and pumpkin pie spice. Now, take about 2 cups of the plain cheesecake filling you just made and gently fold it into the pumpkin mixture. Stir until it’s smooth and has a lovely, even orange color. You now have two beautiful bowls of batter: one plain and one pumpkin.
Step 4: Assemble the Cheesecake
This is the fun part! Take your cooled springform pan and wrap it securely in two layers of heavy-duty aluminum foil. Make sure the foil comes up the sides and that there are no gaps or holes—we’re about to give this cheesecake a bath, and we don’t want any water getting in. Now, start dropping alternating spoonfuls of the plain and pumpkin cheesecake batters onto the crust. There’s no right or wrong way to do this; just alternate big dollops of each. Once all the batter is in the pan, take a butter knife or a spatula and gently swirl the mixtures together a few times to create that beautiful marbled effect. Be careful not to go too deep and disturb the crust.
Step 5: Bake in a Water Bath
Get a large pot of water boiling on the stove. Place your foil-wrapped springform pan inside a larger roasting pan. Carefully pour the boiling water into the roasting pan until it comes about halfway up the sides of the springform pan. Be very careful not to splash any water into the cheesecake itself. Now, very carefully transfer the whole setup into your preheated 250°F oven. Bake for 1-½ to 2 hours. You’ll know it’s done when the edges are set but the center still has a slight jiggle to it.
Step 6: Cool and Chill
Patience is a virtue, especially with cheesecake! Once it’s done baking, turn off the oven but leave the cheesecake inside with the door closed for 1 hour. This slow cooling process helps prevent cracks. After an hour, remove the cheesecake from the oven and the water bath, take off the foil, and let it cool on a wire rack until it reaches room temperature. Then, cover it and transfer it to the refrigerator to chill for at least 4-6 hours, but overnight is even better. Once it’s fully chilled, you can run a knife around the edge and release the springform pan. Garnish with whipped cream, a drizzle of caramel, and some roasted pepitas right before serving.


How To Store Leftovers
If you’re lucky enough to have any leftover Pumpkin Swirl Cheesecake, storing it properly is key to keeping it fresh. The best way is to keep it in the refrigerator. You can either place it in an airtight container or keep it on the springform pan base and cover it tightly with plastic wrap. It will stay delicious for up to 4-5 days in the fridge.
You can also freeze this cheesecake! For best results, freeze individual slices. Place the slices on a baking sheet and freeze until firm. Then, wrap each slice in plastic wrap and then in aluminum foil. They’ll keep well in the freezer for up to a month. When you’re ready for a slice, just thaw it in the refrigerator overnight. It’s a great way to enjoy a little bit of Thanksgiving weeks later.
Conclusion
And there you have it—a truly Showstopper Pumpkin Swirl Cheesecake for Thanksgiving that is sure to become a new holiday tradition. It’s a dessert that not only tastes incredible but also looks stunning on any dessert table. It brings together the cozy spices of fall with the decadent creaminess of a classic cheesecake, creating a balanced and satisfying treat. I hope you and your loved ones enjoy every single bite of this festive Thanksgiving Cheesecake. Happy baking!
FAQ
Can I make this with regular graham cracker crumbs?
Absolutely! This recipe was written with a gluten-free option, but you can easily substitute regular graham cracker crumbs in the exact same amount. The steps for the crust remain the same.
Why did my cheesecake crack?
Cracks in cheesecake are usually caused by a few things: overmixing the batter (which incorporates too much air), baking at too high a temperature, or cooling it too quickly. Using the low oven temperature and the water bath, and then letting it cool slowly in the turned-off oven, are the best ways to prevent cracks.
Do I really need to use a water bath?
I highly recommend it. A water bath (or bain-marie) adds moisture to the oven and helps the cheesecake bake gently and evenly. This is what gives you that creamy, smooth texture and helps prevent cracking. It might seem like an extra step, but it’s worth the effort for a great result.
Can I make this cheesecake ahead of time?
Yes, this is a great make-ahead dessert! You can bake it up to two days before you plan to serve it. Just keep it covered and refrigerated. In fact, the flavor and texture are often even better after chilling for a full day, as it gives the flavors time to meld together.