Have you ever spent hours preparing for a big holiday meal, only to have the turkey come out a little… disappointing? You know, the breast meat is dry while the thighs are still not quite done. It’s a common kitchen headache. Well, what if I told you there’s a better way? A method that gives you a stunningly juicy bird with perfectly crisp skin all over, and it cooks in a fraction of the time. Let me introduce you to your new favorite technique: the Spatchcock Turkey Oven method.
It might sound fancy, but it’s honestly so simple. By removing the backbone and flattening the bird, you create a more even surface. This allows everything to cook at the same rate. No more guesswork, no more uneven results. Just a delicious, crowd pleasing main course that will have everyone asking for your secret. Let’s get started!
Jump To:
Why You’ll Love This Recipe
Honestly, there are so many reasons to fall in love with making a spatchcock turkey. The biggest win is the cooking time. A traditional turkey can take what feels like an eternity to roast. This method seriously cuts that time down, which means less stress for you on a busy cooking day.
Then there’s the taste and texture. Because the turkey is flat, the heat circulates more evenly around it. This means the dark meat and the white meat finish cooking at the same time. The result is incredibly moist and tender meat across the entire bird. You can finally say goodbye to dry turkey breast forever.
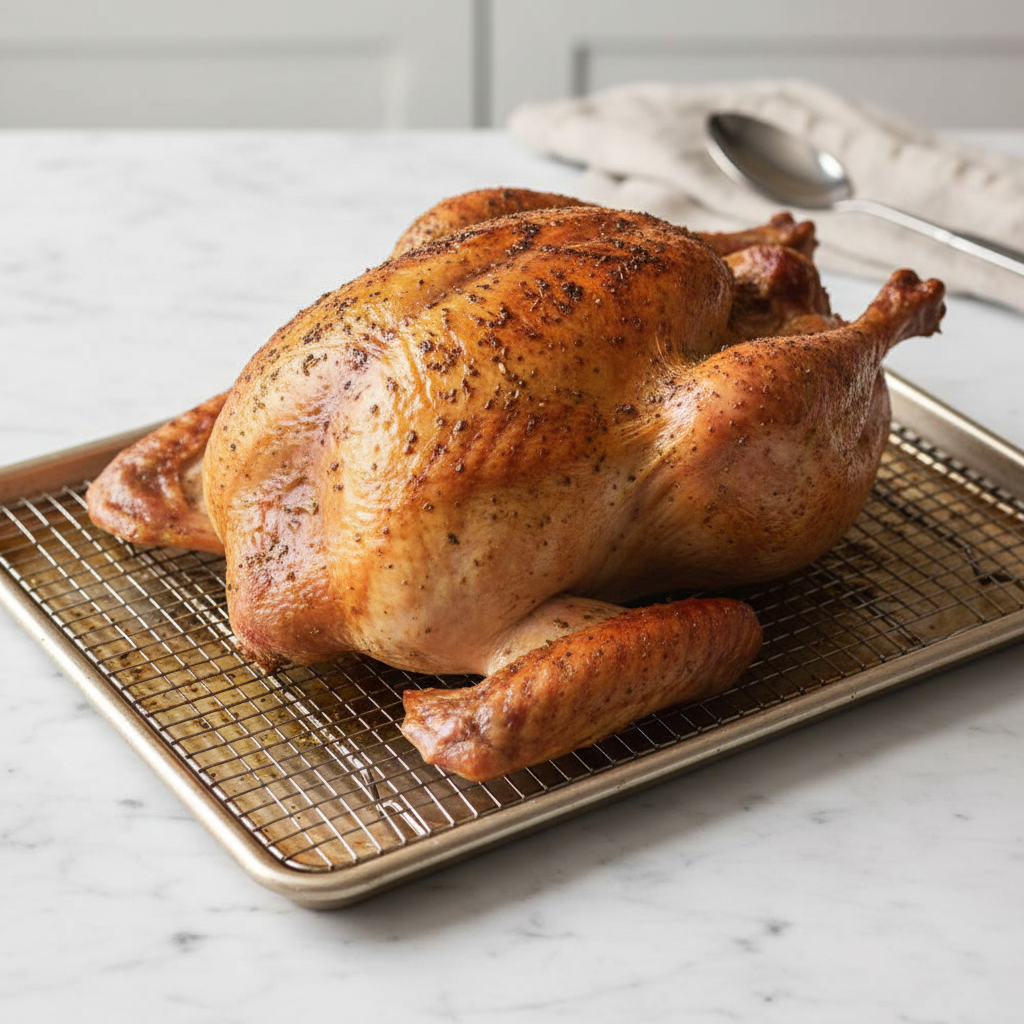
And we have to talk about that skin. Oh, the skin! With a traditional turkey, the underside often gets soggy. With a Spatchcock Turkey Oven recipe, almost all the skin is exposed to the direct heat of the oven. This creates wall to wall crispy, golden brown, and absolutely delicious skin. It’s truly a game changer for any holiday feast.
Finally, it’s just plain easier to handle. Carving a flattened turkey is much more straightforward than tackling a traditionally shaped bird. This is one of those Oven Roasted Turkey Recipes Thanksgiving will thank you for. It looks impressive and tastes amazing, all with less work. What’s not to love?
Ingredients
The beauty of this recipe is its simplicity. You don’t need a long list of complicated ingredients to make an amazing turkey. It’s all about the technique.
- 2 tablespoons extra virgin olive oil
- 1 tablespoon coarse salt
- 1 teaspoon freshly ground pepper
- 1 whole fresh turkey (about 12 pounds)
Step By Step Instructions
Alright, are you ready to learn How To Spatchcock A Turkey? Let’s walk through this together. I promise it’s easier than it looks. We’ll break it down into simple parts.
Step 1: Preheat Oven And Mix Your Rub
First things first, get your oven roaring hot. You’ll want to preheat it to 450 degrees Fahrenheit. That high heat is key to getting that beautifully browned, crispy skin we were just talking about. While the oven is heating up, grab a small bowl.
In that bowl, simply stir together your extra virgin olive oil, coarse salt, and freshly ground pepper. That’s it! This simple mixture is all you need to bring out the natural flavor of the turkey and help the skin get nice and crisp.
Step 2: Prepare The Turkey
Now for the bird. Take your turkey out of its packaging and give it a good rinse, inside and out, under cool running water. After rinsing, it’s super important to pat it completely dry with paper towels. A dry surface is essential for achieving that crispy skin. Don’t be shy with the paper towels!
Once it’s dry, place the turkey on a large cutting board with the breast side down. The backbone should be facing up towards you. This is the starting position for the main event.
Step 3: Cut Out The Backbone
This is the part that defines the spatchcock turkey method. You’ll need a good, sturdy pair of poultry shears. Starting at the tail end of the turkey, begin cutting along one side of the backbone. You’ll be cutting through the rib bones, so you will need to use some muscle.
Continue cutting all the way up to the neck. If you hit a particularly tough spot, try using just the tip of the shears to snip through it. Once one side is done, repeat the exact same process on the other side of the backbone. When you’re finished, you can lift the backbone right out.
Don’t throw that backbone away! It is packed with flavor and is fantastic for making a rich turkey stock or gravy. Set it aside along with the giblets for later.
Step 4: Flatten The Bird
With the backbone removed, grab the two newly cut edges and open the turkey up, kind of like a book. Take a moment to trim off any large, excess pieces of fat you see. Now, flip the turkey over so the breast side is up.
Here comes the satisfying part. Place the heel of your hand on one side of the breast, right near the breastbone. Push down firmly and decisively until you hear a good crack. That’s the breastbone breaking, which will allow the turkey to lie completely flat. Repeat this on the other side of the breast.
Pull the thighs outward so the turkey lies as flat as possible. Tuck the wing tips under the body to secure them and prevent them from burning. For extra leverage when pressing down, standing on a small step stool can really help.
Step 5: Season And Rest
Carefully transfer your flattened turkey to a large, rimmed baking sheet. Having it on the baking sheet makes moving it in and out of the oven much easier. Now, just let it stand at room temperature for about 30 minutes.
Allowing the turkey to sit for a bit helps take the chill off, leading to more even cooking. Once the 30 minutes are up, take that olive oil mixture you made earlier. Using your hands or a brush, coat the entire turkey with it. Make sure you get it everywhere, even under the skin of the breast and thighs where you can.
Step 6: Roast To Perfection
It’s time for the Spatchcock Turkey Oven magic. Place the baking sheet in your preheated 450 degree oven. Let it roast for about 1 hour and 10 minutes. The exact time will depend on your oven and the size of your bird, so keep an eye on it.
About halfway through the cooking time, rotate the baking sheet 180 degrees. This ensures even browning. You should also baste the turkey twice during the roasting process with the pan juices. This helps keep the meat moist and adds more flavor to the skin.
The only sure way to know when your turkey is done is by using an instant read thermometer. You want to insert it into the thickest part of the thigh, making sure not to touch the bone. The turkey is ready when the thermometer reads 165 degrees Fahrenheit.
Step 7: The All Important Rest
Once it reaches the correct temperature, pull the turkey from the oven. I know it looks and smells amazing, but do not cut into it yet! This step is critical. You need to let the turkey stand for 20 minutes before carving.
This resting period allows the juices, which have moved to the surface during cooking, to redistribute throughout the meat. If you skip this, all that delicious moisture will pour out onto your cutting board instead of staying in the turkey. Patience is a virtue here!
Step 8: Carve Like A Pro
After the rest, it’s time to carve your beautiful spatchcock turkey. Grab a sharp chef’s knife. First, remove the legs. Cut through the skin and meat where the thigh meets the breast. Pulling the leg outward slightly will help you see exactly where to cut through the joint.
Next, separate the drumstick from the thigh by cutting through that joint. A little trick is to look for a white line of fat on the meat side; it often marks the perfect spot to cut. Place the drumsticks on a serving platter.
For the thigh meat, find the thigh bone running through the center. Gently cut around it to remove it, then slice the boneless thigh meat into nice pieces. Add these to the platter. Now for the wings. Find the joint connecting the wing to the breast and cut through it. You can separate the drumette from the flat if you like.
Finally, the breast meat. Slice along both sides of the breastbone to remove each breast half in one piece. Then, place the breast meat on your cutting board and slice it against the grain. Arrange everything beautifully on your platter and get ready for the compliments!
How To Store Leftovers
If you happen to have any leftovers from your delicious Oven Roasted Turkey Recipes Thanksgiving feast, storing them is simple. First, let the turkey cool down to room temperature completely. You don’t want to put hot food in the refrigerator.
Once cooled, you can store the meat in airtight containers or wrap it tightly in plastic wrap or aluminum foil. Stored properly in the fridge, your leftover turkey will be good for about 3 to 4 days. It’s great for sandwiches, soups, or salads!
For longer storage, you can freeze it. Place the meat in freezer safe bags or containers, removing as much air as possible. It will maintain good quality in the freezer for a few months.
Tips
Want to make your Spatchcock Turkey Oven experience even better? Here are a few extra tips. First, invest in a good pair of poultry shears. They will make the job of cutting out the backbone so much easier than trying to use a knife. It’s a tool you’ll use for years to come.
Consider a dry brine. The night before you plan to cook, rub the turkey all over with salt and let it sit uncovered in the fridge. This draws moisture out of the skin, making it extra crispy, and seasons the meat deeply. Just be sure to skip the salt in the oil rub if you do this.
Don’t guess on the temperature. A reliable instant read thermometer is a cook’s best friend. It is the only way to ensure your turkey is cooked safely and perfectly without drying it out. It takes all the stress out of the process.
Finally, use those pan drippings! After you remove the turkey to rest, there will be beautiful browned bits and juices in the bottom of the baking sheet. You can easily turn this into a quick and flavorful gravy to serve alongside your turkey.
Conclusion
There you have it! A straightforward guide to making the best turkey of your life using the Spatchcock Turkey Oven method. It’s faster, it ensures juicy meat and crispy skin, and it’s surprisingly easy to do. No more holiday cooking stress or disappointing results.
Whether you’re a seasoned cook or a beginner in the kitchen, this technique is a reliable way to get a fantastic result every single time. Give this Spatchcock Turkey Thanksgiving recipe a try this year. I’m confident you’ll be converted for life. Happy cooking!
FAQ
Do I Need Special Equipment For This?
The one piece of equipment that is highly recommended is a sturdy pair of poultry shears. They are specifically designed to cut through bone and cartilage, making the process of removing the turkey’s backbone much safer and easier than using a knife. A large rimmed baking sheet and an instant read thermometer are also essential.
Can I Use A Frozen Turkey?
Yes, you absolutely can use a frozen turkey, but it must be fully thawed before you begin. The safest way to thaw a turkey is in the refrigerator. It takes about 24 hours for every 4 to 5 pounds of turkey. Never thaw a turkey at room temperature. Once it’s completely thawed, you can proceed with the recipe as written.
What Size Turkey Works Best For Spatchcocking?
This method works best for small to medium sized turkeys, typically in the 10 to 14 pound range. A bird in this size range will fit comfortably on a standard home baking sheet. Larger turkeys can be more difficult to handle, and their backbones can be much tougher to cut through. You might also have trouble fitting a very large bird in your oven once flattened.
My Oven Isn’t Big Enough For A Baking Sheet. What Can I Do?
If a large rimmed baking sheet won’t fit, you can use a large roasting pan instead. The key is to make sure the turkey can still lie flat. You can even place the turkey on a wire rack inside the roasting pan to help the heat circulate underneath for even crispier skin. Just ensure there is enough space for the hot air to move around the bird.
Easy Spatchcock Turkey Oven Recipe
This spatchcock turkey method delivers a stunningly juicy bird with perfectly crisp, golden-brown skin. By flattening the turkey, it cooks evenly and in a fraction of the time, making your holiday meal both delicious and stress-free.
Requirements
Ingredients
Instructions
- Preheat your oven to 450°F. In a small bowl, mix together the olive oil, coarse salt, and freshly ground pepper.
- Rinse the turkey and pat it completely dry with paper towels. Place it breast-side down on a large cutting board.
- Using sturdy poultry shears, cut along both sides of the backbone to remove it. You can save the backbone for making stock.
- Flip the turkey over so the breast-side is up. Press down firmly on the breastbone until you hear a crack, allowing the turkey to lie flat. Tuck the wing tips under the body.
- Transfer the flattened turkey to a large, rimmed baking sheet and let it stand at room temperature for 30 minutes.
- Rub the olive oil mixture all over the turkey, making sure to get it under the skin of the breast and thighs.
- Roast for about 1 hour and 10 minutes, rotating the baking sheet halfway through. Baste the turkey twice with pan juices. The turkey is done when an instant-read thermometer inserted into the thickest part of the thigh reads 165°F.
- Remove the turkey from the oven and let it rest for 20 minutes before carving. This allows the juices to redistribute for a moist result.
Notes
A good pair of poultry shears will make cutting out the backbone much easier than using a knife.
For extra crispy skin, consider a dry brine. The night before cooking, rub the turkey all over with salt and let it sit uncovered in the fridge.
A reliable instant-read thermometer is the best way to ensure your turkey is cooked safely and perfectly without drying it out.
Don’t discard the pan drippings! After the turkey is done, use the browned bits and juices to make a quick and flavorful gravy.
Nutrition
Calories
Sugar
Fat
Carbs


