There’s something almost magical about authentic gelato. It’s that dense, silky-smooth texture and intensely vibrant flavor you remember from a summer holiday or a special trip to a real Italian gelateria. For a long time, I thought that kind of quality was impossible to make at home without some huge, expensive machine. But then the Ninja Creami came along, and honestly, it changed everything. If you’ve been dreaming of making your own incredible frozen desserts, you’re in the right place. These Ninja Creami gelato recipes are your ticket to creating scoop-shop-worthy treats right in your own kitchen.
It’s way easier than you think. We’ll start with a perfect, foolproof gelato base and then explore some seriously delicious flavor variations. Get your Creami pint ready!
Jump To:
What is Gelato? (And How Is It Different From Ice Cream?)
 18")
So, what’s the big deal about gelato anyway? Isn’t it just fancy ice cream? Not quite. While they’re both delicious frozen treats, they have a few key differences in their DNA that completely change the experience.
First up, fat content. Traditional American ice cream has a high percentage of butterfat because it’s made with a lot of heavy cream. Gelato, on the other hand, uses more whole milk and less cream. This might sound backward—wouldn’t less fat mean less creamy? Here’s the thing: with less butterfat coating your tongue, the actual flavors of the ingredients can shine through more intensely. It’s a cleaner, more direct flavor punch.
Next is air, or what the pros call “overrun.” Ice cream is churned quickly, which whips a lot of air into the mixture—sometimes up to 50% of its final volume is just air! Gelato is churned much more slowly. This process incorporates far less air, resulting in a denser, richer, and more satisfying texture. You get more flavor and substance in every spoonful.
Finally, there’s the serving temperature. Gelato is traditionally served a bit warmer than ice cream. This isn’t a mistake; it’s by design. The slightly warmer temperature keeps it from being rock-hard, making its texture soft and silky, and it also helps your taste buds perceive the flavors more fully.
Print 19")
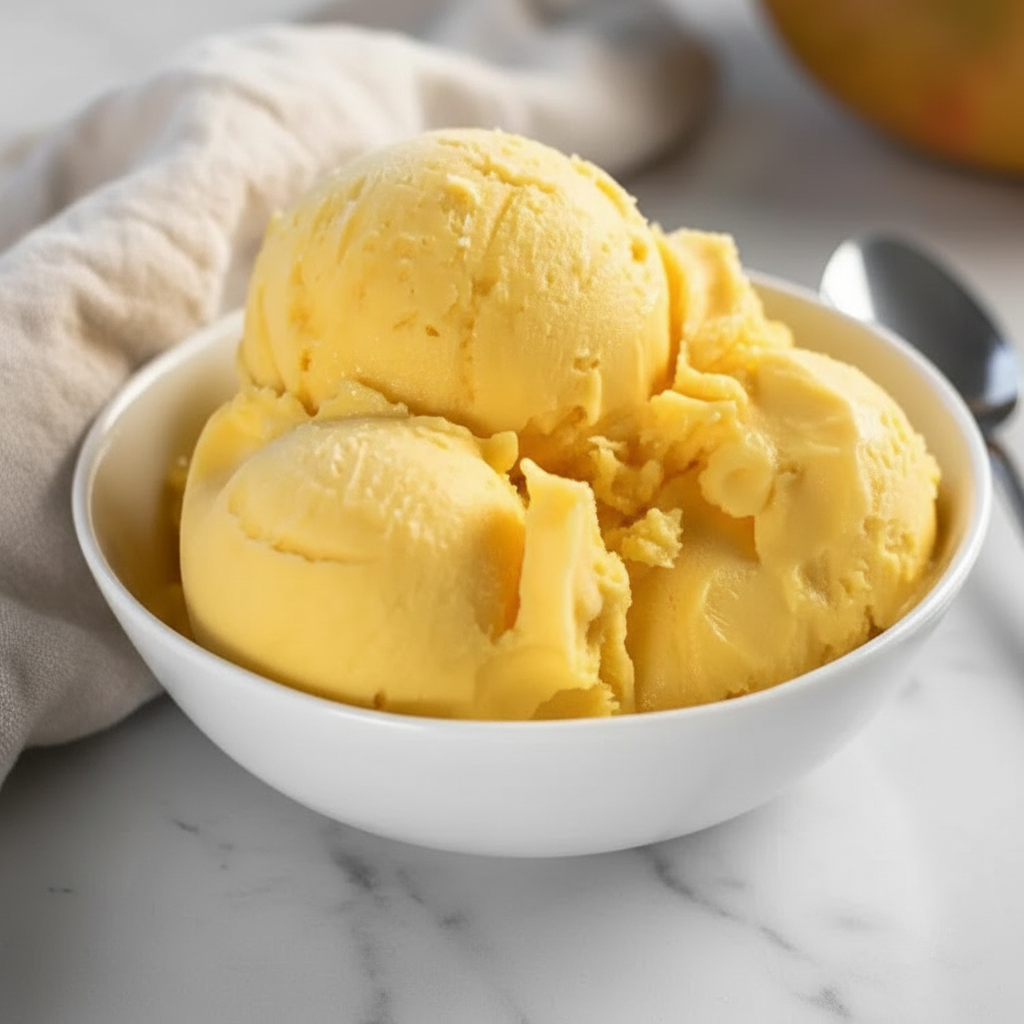
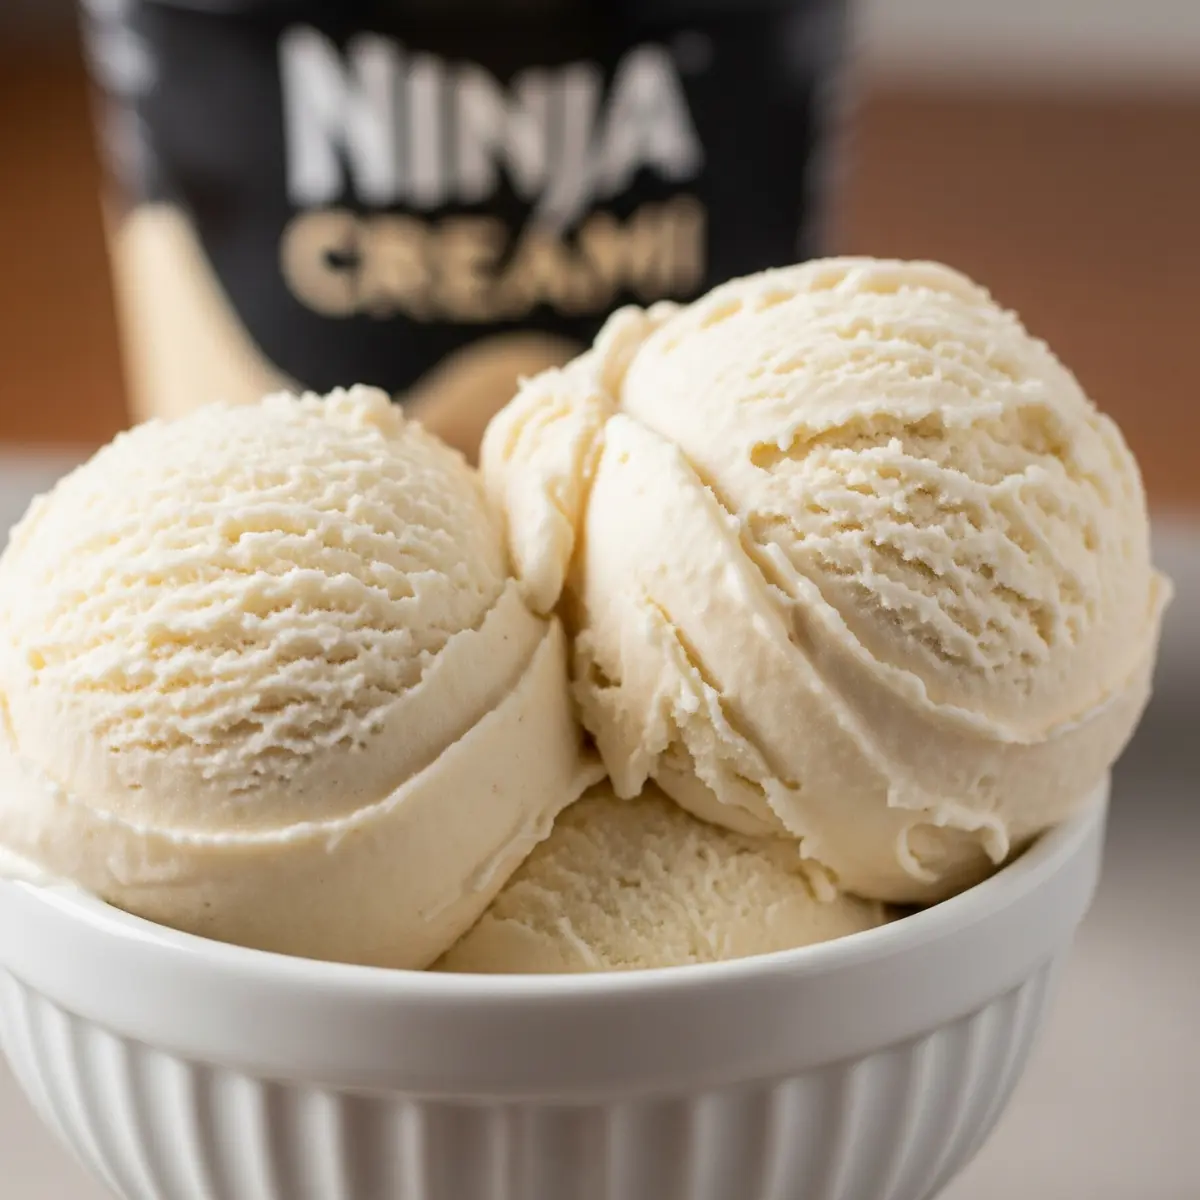
Vanilla Bean Gelato with Cherry Sauce
A classic vanilla bean gelato made ultra-creamy in the Ninja Creami, served with a rich, dark cherry sauce.
- Total Time: 24 hours 30 minutes
- Yield: 1 pint 1x
Ingredients
1 tablespoon cream cheese
1/3 cup granulated sugar
1 teaspoon vanilla bean paste
1/2 cup heavy cream
1 cup whole milk
For the Cherry Sauce:
1 cup frozen dark cherries
2 tablespoons sugar
1 tablespoon lemon juice
Instructions
1. Microwave the cream cheese in a bowl for 10 seconds until soft.
2. Whisk in the sugar and vanilla bean paste until smooth.
3. Slowly whisk in the heavy cream, then the whole milk, until fully combined.
4. Pour the mixture into the Ninja Creami pint up to the max fill line and freeze for 24 hours.
5. Make the sauce by simmering cherries, sugar, and lemon juice for 10-15 minutes until thickened. Let it cool.
6. Process the frozen pint in the Ninja Creami on the ‘GELATO’ setting. If crumbly, add 1 tablespoon of milk and ‘RE-SPIN’.
7. Serve scoops of gelato drizzled with the dark cherry sauce and garnished with a few whole cherries.
Notes
Using vanilla bean paste provides the best flavor and a beautiful speckled appearance.
Ensure the base is frozen completely solid for the best texture.
The cherry sauce can be made ahead and stored in the refrigerator.
- Prep Time: 15 minutes
- Freeze Time: 24 hours
- Cook Time: 15 minutes
- Category: Ninja Creami Recipes
- Method: Frozen
- Cuisine: Italian
- Diet: Vegetarian
Nutrition
- Serving Size: 1/2 cup
- Calories: 280
- Sugar: 25g
- Sodium: 50mg
- Fat: 18g
- Saturated Fat: 11g
- Unsaturated Fat: 6g
- Trans Fat: 0g
- Carbohydrates: 28g
- Fiber: 1g
- Protein: 4g
- Cholesterol: 55mg
 20")
 22")
 23")
 24")
Ninja CREAMi, Ice Cream Maker, Ice Cream, Gelato, Sorbet ,Milkshakes, Mix-ins, Smoothie Bowls & More, 7-in-1, Ice Cream Pints, Pint lid, Healthy Ice Cream, Compact, Perfect for Kids, Black, NC299AMZ
As an Amazon Associate, I earn from qualifying purchases. Pricing and availability may change.
Why Use the Ninja Creami for Gelato?
 25")
This is where the Ninja Creami becomes a real superstar for homemade gelato. Traditional ice cream makers work by churning a liquid base while freezing it. The Ninja Creami flips that process on its head. You freeze a solid block of your base in the Creami pint for 24 hours, and then the machine’s powerful paddle shaves and churns those ice crystals into an unbelievably smooth and creamy texture.
This unique method is perfect for making gelato because it naturally creates that low-overrun, dense texture we love. It breaks down the frozen base into such fine particles that the result is incredibly smooth, mimicking the texture of slowly churned, authentic creamy gelato without the fuss.
The Perfect Ninja Creami Gelato Base Recipe
 26")
Every great gelato starts with a solid foundation. This is my go-to gelato base recipe. It’s simple, reliable, and the perfect canvas for almost any flavor you can dream of. Master this, and you’re halfway to gelato heaven.
Ingredients You’ll Need
- Cream Cheese (1 tablespoon, softened): This is the secret weapon! It acts as a stabilizer, preventing ice crystals and giving the gelato an amazing, smooth mouthfeel without needing egg yolks USDA FoodData Central.
- Granulated Sugar (1/3 cup): Provides sweetness and also helps with the final texture.
- Vanilla Extract (1 teaspoon): For that classic, warm flavor foundation. A good quality vanilla extract makes a difference.
- Heavy Cream (1/2 cup): Adds the necessary fat for a rich, creamy consistency.
- Whole Milk (1 cup): Forms the bulk of our base, keeping it true to gelato’s milk-forward profile.
Step-by-Step Instructions
- Melt the Cream Cheese: Place the softened cream cheese in a microwave-safe bowl and microwave for about 10-15 seconds until it’s just melted. You don’t want it hot, just liquid.
- Mix the Base: Add the sugar and vanilla extract to the bowl with the cream cheese. Whisk vigorously until the sugar is completely dissolved and the mixture is smooth. There should be no lumps!
- Combine the Dairy: Slowly whisk in the heavy cream until combined, then do the same with the whole milk. Keep whisking until everything is homogenous and silky.
- Fill and Freeze: Pour the mixture into your Ninja Creami pint. Be careful not to fill past the MAX FILL line. Secure the lid and place the pint on a level surface in your freezer. Freeze for at least 24 hours. The base needs to be frozen solid for the machine to work its magic.
- Process: Once frozen, remove the pint from the freezer, take off the lid, and place it in the outer bowl. Secure the Creamerizer™ Paddle lid and lock it into your Ninja Creami machine. Select the “GELATO” setting and let it run.
- Check and Re-Spin (If Needed): After the first spin, your gelato might look a little crumbly or powdery. Don’t worry, that’s normal! Just add a tablespoon of whole milk, put it back in the machine, and hit the “RE-SPIN” button. You might need to re-spin twice, but the result will be a perfectly smooth and creamy gelato.
Pro Tips for the Creamiest Gelato
- Don’t Skimp on Fat: Using whole milk and heavy cream is crucial. The fat content is essential for a creamy, non-icy texture.
- Ensure it’s REALLY Frozen: If your base isn’t frozen solid all the way through, you’ll get a soupy result. 24 hours is the gold standard.
- Chill Your Mix-Ins: If you’re adding things like chocolate chips, nuts, or cookie pieces after processing, make sure they are cold. Adding room-temperature mix-ins can cause the gelato to melt slightly. Use the “MIX-IN” function for best results.
 27")
 28")
 29")
5 Easy Ninja Creami Gelato Recipe Variations
 30")
Once you have the base down, it’s time to play! This base recipe is the perfect starting point for countless flavors. Here are a few of my favorite Ninja Creami gelato recipes to get you started.
Classic Chocolate Gelato
For the chocoholics, this one is pure bliss. It’s rich, decadent, and deeply chocolatey.
- How to Make It: Follow the base recipe, but when you whisk the sugar into the cream cheese, also add 2 tablespoons of unsweetened cocoa powder and a tiny pinch of salt. A 1/4 teaspoon of espresso powder can also be added to deepen the chocolate flavor, but it’s optional! Proceed with the recipe as written.
Fresh Lemon Gelato
Bright, zesty, and incredibly refreshing. This is the perfect dessert for a warm summer evening.
- How to Make It: Follow the base recipe, but add the zest of one large lemon and 2 tablespoons of fresh lemon juice to the mixture when you add the vanilla extract. This gelato recipe is a real crowd-pleaser.
Rich Coffee Gelato
Get your caffeine fix in dessert form. This has the intense, aromatic flavor of a great cup of coffee.
- How to Make It: In the base recipe, reduce the whole milk to 3/4 cup. Then, add 1/4 cup of strongly brewed, chilled coffee or espresso. Whisk it in with the milk and cream. For an even bigger kick, you can dissolve 1 tablespoon of instant espresso powder into the warm cream cheese mixture.
Dairy-Free (Vegan) Vanilla Bean Gelato
You don’t need dairy for a rich and creamy experience! The key is using full-fat plant-based milk.
- Ingredients: Replace the dairy with 1 cup of full-fat canned coconut milk and 1/2 cup of a creamy oat milk or cashew milk. Use 1 tablespoon of a vegan cream cheese alternative. Instead of just vanilla extract, use the seeds from half a vanilla bean for that beautiful speckled look and intense flavor.
- How to Make It: Follow the same process as the base recipe, just with the substituted ingredients. The high-fat content of the coconut milk ensures a wonderfully smooth result.
High-Protein Chocolate Gelato
Who says dessert can’t be part of your fitness goals? This is a great way to satisfy a sweet tooth and get some extra protein.
- How to Make It: Start with the Classic Chocolate Gelato variation. Then, whisk in one scoop of your favorite chocolate or vanilla protein ice cream powder along with the cocoa powder. Make sure it dissolves completely to avoid a chalky texture. Some protein powders (NIH Office of Dietary Supplements) absorb more liquid, so you might need to add an extra splash of milk during the re-spin process.
How to Store Homemade Gelato
Honestly, homemade gelato is at its absolute peak right after it’s made. The texture is perfect. But if you have leftovers, you’ll want to store them properly. (USDA FoodSafety.gov)
Transfer the gelato from the Creami pint to an airtight, freezer-safe container. A great trick is to press a piece of plastic wrap or parchment paper directly onto the surface of the gelato before putting the lid on. This helps prevent pesky ice crystals from forming. It should keep for about a week, but the texture might become harder over time. If it does, you can let it sit on the counter for 5-10 minutes to soften before scooping.
Ninja Creami Gelato Troubleshooting
Sometimes things don’t go perfectly, and that’s okay! Most Ninja Creami issues are super easy to fix.
“My gelato is powdery or crumbly!”
This is the most common result after the first spin. It just means the base is very cold and dry. The solution is simple: add one tablespoon of milk (or a liquid that matches your recipe) and use the “RE-SPIN” function. It usually comes out perfectly creamy after that.
“My gelato is icy, not creamy.”
This usually points to an issue with the base itself. It could be that there wasn’t enough fat or sugar in your recipe. Make sure you’re using whole milk and heavy cream and the correct amount of sugar, as these are crucial for a smooth texture. Also, ensure your freezer is cold enough and the pint was frozen for a full 24 hours.
“My gelato is too hard to scoop.”
If you’ve stored leftovers, they can freeze harder than store-bought gelato because they lack commercial stabilizers. Just let the container sit at room temperature for about 10 minutes before serving.
Just a quick note from me to you. My name is Alex, and I’m a home cook who fell completely in love with the creative freedom the Ninja Creami offers. I’ve churned through dozens of test batches (it’s a tough job, I know) to fine-tune these recipes, so I really hope they bring a little bit of joy and deliciousness to your kitchen!