What if you could make a frozen custard in your Ninja Creami so rich and creamy, you’d never go back to regular ice cream again? Honestly, once you master this simple ninja creami custard recipe, you’ll realize that luxe, scoop-shop-quality dessert is totally achievable right in your own kitchen. No fancy equipment, no impossible-to-find ingredients—just pure, velvety goodness.
For years, I thought real frozen custard was one of those treats you could only get from a special shop with a giant, churning machine. It seemed too complex for a home cook. But then the Ninja Creami came along and, well, it changed the game. This little powerhouse can turn a simple, chilled base into the most incredible frozen desserts.
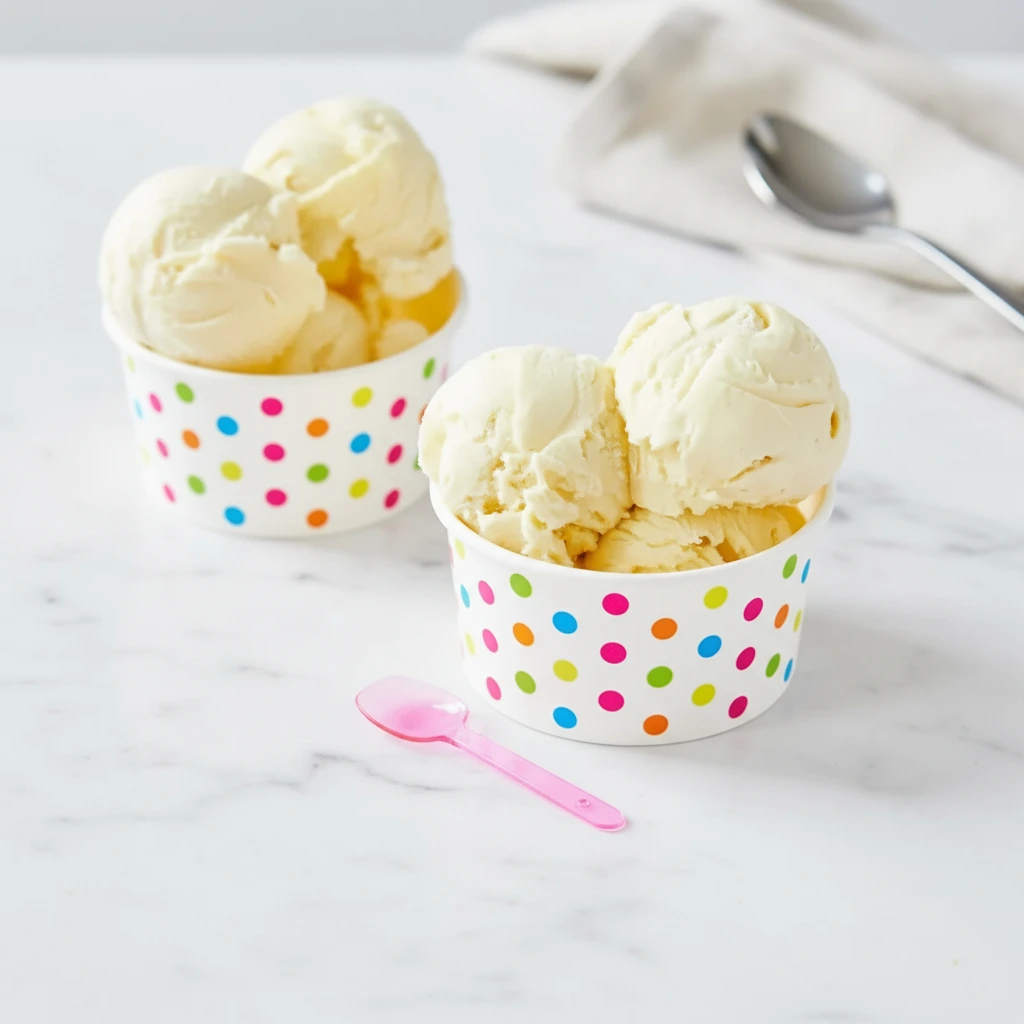
We’re not just making vanilla ice cream today. We’re elevating it. We’re making a custard, which means we’re using egg yolks to create a dessert that’s denser, richer, and impossibly smooth. If you’re ready to make the best frozen dessert of your life, you’re in the right place.
Why Trust This Recipe? Hey there! I’m a recipe developer and a self-proclaimed frozen dessert fanatic with over a decade of experience in my home kitchen. I’ve churned, spun, and frozen just about everything, and I’ve spent countless hours perfecting recipes specifically for machines like the Ninja Creami. This recipe isn’t just something I threw together; it’s the result of tons of testing to get that perfect balance of creamy, rich, and delicious. My goal is to give you a foolproof guide that works every single time.
Jump To:
Why You’ll Love This Ninja Creami Custard Recipe

Let’s get right to it. Why will this become your new favorite recipe? It’s pretty simple, really.
First off, the texture is out of this world. We’re talking supremely creamy and smooth. Because of the egg yolks in the custard base, it has less air than traditional ice cream, making it feel more luxurious and satisfying. There are no pesky ice crystals here, just pure, velvety bliss.
Second, it’s insanely flavorful. The fat from the yolks is a fantastic carrier for flavor, so the vanilla in this recipe doesn’t just whisper—it sings. It’s a deep, rich, and authentic taste that you just don’t get from most store-bought pints.
And finally, it’s surprisingly easy. The word “custard” might sound intimidating, but it’s really just a few extra minutes at the stove. This recipe walks you through it step-by-step. For the minimal effort it takes, the payoff is huge. It’s a budget-friendly way to get a truly gourmet treat.
Recommended Tools

Ninja NC501 CREAMi Deluxe Machine
Buy
Silicone Spatula 3-piece Set
Buy
Stainless Steel Measuring Cups & Spoons Set
Buy
Glass Meal Prep StorageContainers
BuyAs an Amazon Associate, I earn from qualifying purchases.

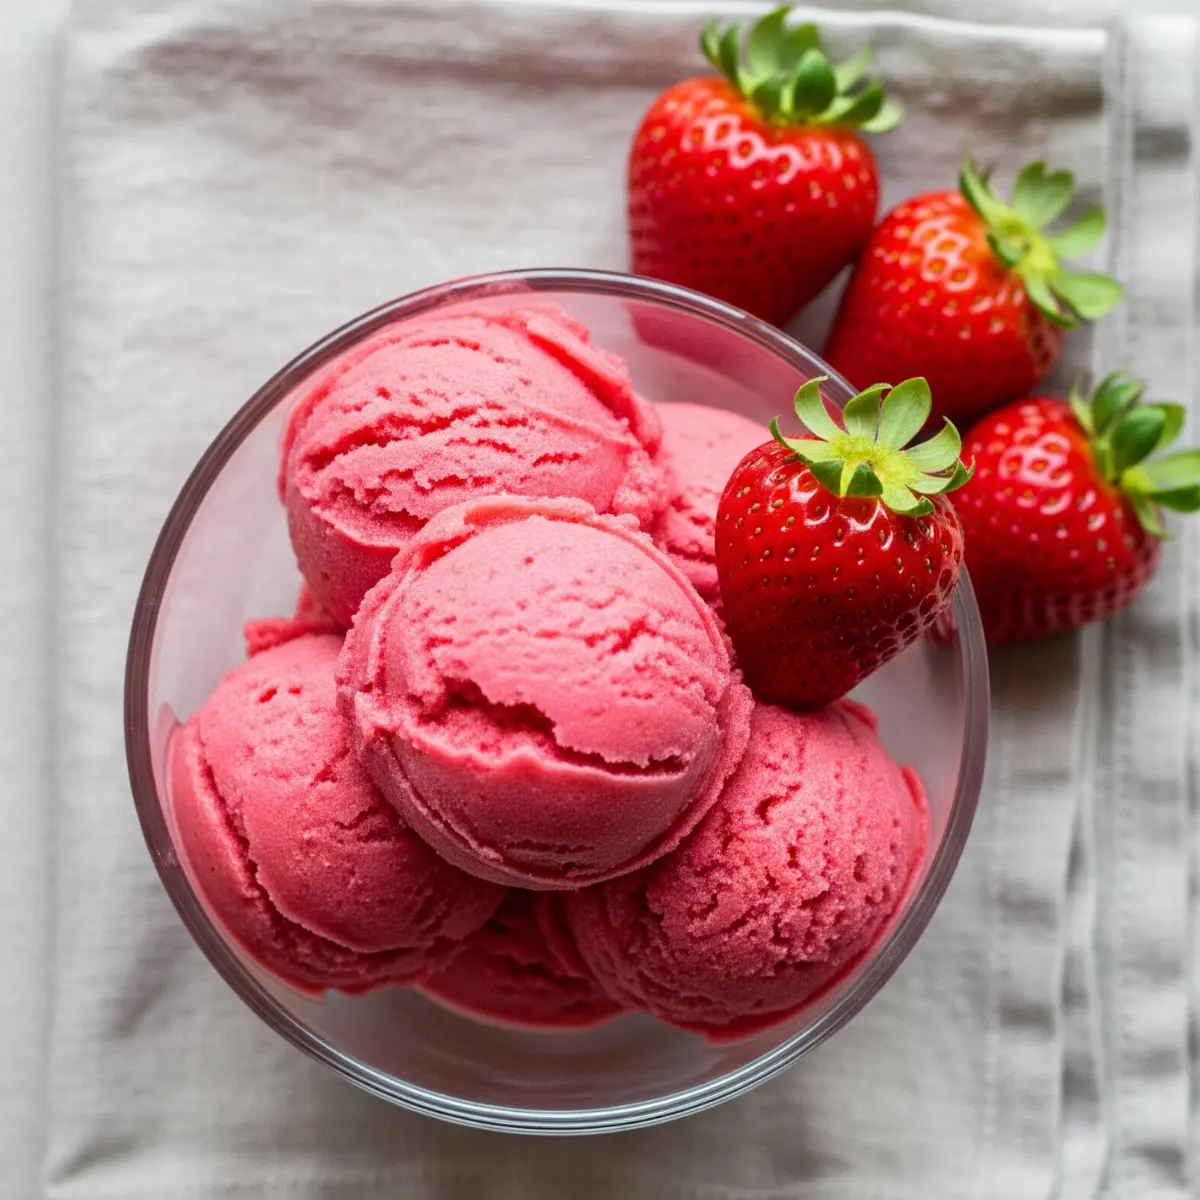
Ninja Creami Custard Recipe
A homemade Vanilla Frozen Custard recipe that is creamy, smooth, cold — and almost indistinguishable from Shake Shack’s famous frozen custard!
- Total Time: 4 hours 30 minutes
- Yield: 2 pints 1x
Ingredients
2 cups (16floz/480ml) heavy cream
1 cup (8floz/240ml) whole milk
5 large egg yolks
⅔ cup (5oz/142g) granulated sugar
¼ teaspoon salt
1 tablespoon pure vanilla extract
Instructions
1. Heat the cream and milk in a heavy saucepan over medium heat. Stir occasionally to prevent sticking. Heat just until mixture starts to simmer, about 8-10 minutes. Remove from heat.
2. In a separate bowl, whisk the egg yolks, sugar, and salt together until pale yellow and fluffy.
3. Whisk a ladleful of the hot milk-cream mixture into the egg yolk mixture. Repeat with another ladleful, whisking thoroughly. This tempering process keeps the eggs from cooking. Gradually add the remaining milk-cream mixture and whisk.
4. Pour the custard base back into the saucepan. Over medium-low heat, gently cook until the custard thickens and coats the back of a wooden spoon, around 8-10 minutes.
5. Once thickened, pour the custard through a sieve to remove any lumps. Whisk in the vanilla extract.
6. Set aside to cool. Once cooled, cover and refrigerate until very cold, preferably overnight. The colder the custard, the faster it churns.
7. Pour the chilled custard mixture into your Ninja Creami pint or ice cream maker and process according to the manufacturer’s instructions until it reaches a soft-serve consistency, about 20 minutes.
8. Transfer to a freezable container, cover, and freeze until firm enough to scoop, at least 4 hours.
Notes
Make the custard up to 2 days in advance for a richer flavor.
Use full-fat milk and cream for the best results.
Ensure egg yolks are at room temperature before starting.
Don’t be shy with the salt and vanilla!
- Prep Time: 20 minutes
- Cook Time: 10 minutes
- Category: Dessert
- Method: Frozen, Churned
- Cuisine: American
- Diet: Vegetarian
Nutrition
- Serving Size: 1 scoop
- Calories: 250
- Sugar: 20g
- Sodium: 80mg
- Fat: 18g
- Saturated Fat: 10g
- Unsaturated Fat: 7g
- Trans Fat: 0g
- Carbohydrates: 22g
- Fiber: 0g
- Protein: 4g
- Cholesterol: 120mg
What is Frozen Custard?

So, what exactly makes frozen custard different from the regular ice cream you grew up with? It all comes down to two little things: egg yolks and air.
At its core, frozen custard is a type of ice cream with a base made from milk, cream, sugar, and, crucially, egg yolks. Legally, in the U.S., a product must contain at least 1.4% egg yolk solids by weight to be called frozen custard. This might not sound like much, but it makes all the difference in the world. The yolks add fat and act as a natural emulsifier, which results in that signature dense, creamy, and smooth texture.

The other factor is “overrun,” which is a fancy way of saying how much air is churned into the mixture as it freezes. Traditional ice cream can have up to 100% overrun, meaning it can be half air! Frozen custard, on the other hand, is churned slowly in a special machine that incorporates very little air, usually around 20-30%. This is why it’s so much denser and heavier. While the Ninja Creami doesn’t churn in the traditional sense, its process of shaving and mixing a frozen block achieves a similar low-overrun, high-density result that’s perfect for a custard base.
A Tale of Two Custards: French vs. Philadelphia Style

When you start looking into homemade ice cream, you’ll hear two terms thrown around a lot: “French-style” and “Philadelphia-style” (or American-style).
- French-Style (That’s Us!): This is the style we’re using today. It’s defined by its use of egg yolks to create a rich, cooked custard base. It’s decadent, ultra-creamy, and has a wonderfully deep flavor. It takes a bit more effort because you have to cook and temper the eggs, but the final product is unmatched in its luxuriousness. This is the foundation of a true frozen custard.
- Philadelphia-Style: This style is egg-free. It’s a simpler, no-cook base made from just milk, cream, sugar, and flavorings. It’s quicker to make and produces a lighter, cleaner, and more straightforward milky flavor. It’s essentially what most of us think of as standard homemade ice cream. It’s delicious in its own right, but it doesn’t have the same density and richness as a French-style custard.
Both are great, but if you’re after that classic, velvety frozen custard experience, French-style is the only way to go.


Ingredients for Custard Base
You don’t need a long list of fancy ingredients to make something amazing. Here’s what you’ll need for the perfect custard base:
- Heavy Cream: This is the backbone of our recipe. It provides the fat content needed for a creamy, not icy, result. Don’t skimp here and use half-and-half; you need the fat.
- Whole Milk: We use this along with the cream to get the perfect liquid balance. The combination gives us richness without being overwhelmingly heavy.
- Granulated Sugar: For sweetness, of course. Sugar does more than just sweeten, though; it also lowers the freezing point of the base, which is crucial for preventing a rock-solid, icy texture.
- Egg Yolks: The magic ingredient! You’ll need just the yolks, not the whites. They bring the richness, the creaminess, and that classic custard flavor.
- Vanilla Extract: Use the best quality you can afford. Since vanilla is the star of the show, a good-quality pure vanilla extract or even vanilla bean paste will make a huge difference.
- A Pinch of Salt: Don’t skip this! A tiny bit of salt won’t make your custard salty, but it will enhance all the other flavors and balance the sweetness.
How to Make Ninja Creami Custard
Alright, let’s get down to business. Making the custard base is the most important part. Take your time here, and you’ll be rewarded.
Instructions
- Prep Your Station: Separate your egg yolks into a medium-sized bowl and set it aside. Have a fine-mesh sieve ready.
- Heat the Dairy: In a medium saucepan, combine the heavy cream, whole milk, half of the sugar, and the salt. Heat over medium heat, stirring occasionally, until it’s steaming and small bubbles are forming around the edges. Don’t let it come to a rolling boil.
- Temper the Eggs: While the milk mixture is heating, whisk the remaining sugar into the egg yolks until the mixture is pale yellow and slightly thickened. This is key. Once the milk is hot, slowly—and I mean slowly—drizzle about a cup of the hot liquid into the egg yolk mixture while whisking constantly. This is called tempering, and it gently raises the temperature of the yolks so they don’t scramble when you add them to the hot pan.
- Combine and Cook: Pour the tempered egg yolk mixture back into the saucepan with the rest of the hot milk. Return the saucepan to the stove and cook over low heat, stirring constantly with a wooden spoon or spatula. You need to keep the liquid moving and scrape the bottom of the pan.
- Thicken the Custard: Continue cooking for about 5-8 minutes, or until the custard thickens enough to coat the back of your spoon. A good way to test this is to run your finger across the back of the spoon; if the line holds and doesn’t run, it’s done. The temperature should be around 170-175°F (77-79°C). Do not let it boil, or the eggs will curdle.
- Strain and Chill: Immediately remove the custard from the heat and pour it through the fine-mesh sieve into a clean bowl. This will catch any small bits of cooked egg and ensure your final product is perfectly smooth. Stir in the vanilla extract.
- Cool It Down: Let the custard cool at room temperature for about 30 minutes. Then, cover it with plastic wrap, pressing the wrap directly onto the surface of the custard to prevent a skin from forming.
- Refrigerate: Chill the base in the refrigerator for at least 4 hours, but preferably overnight. It needs to be completely cold before going into the Ninja Creami.
- Freeze: Pour the chilled custard base into your Ninja Creami pint container, making sure not to fill past the max fill line. Secure the lid and freeze on a level surface for 24 hours.
- Spin!: Once fully frozen, place the pint into the outer bowl, attach the lid, and lock it into your Ninja Creami machine. Select the “Ice Cream” function.
- Re-Spin if Needed: If the texture is a bit crumbly after the first spin (which is common!), add a tablespoon of milk or cream and use the “Re-Spin” function. This usually does the trick and makes it perfectly creamy.
Notes
- Patience is Key: The chilling and freezing times are not suggestions! A thoroughly chilled base and a fully frozen pint are essential for the best texture. Don’t rush these steps.
- Flavor Variations: This vanilla base is your canvas. Feel free to experiment! Once you’ve mastered this, you could try making a [Chocolate Custard Recipe] for a different treat.
- Storage: If you have leftovers, smooth the top flat in the pint container and pop it back in the freezer. You may need to re-spin it before enjoying it again.
Tips for the Best Homemade Custard
You’re already on your way to dessert perfection, but here are a few extra tips to make sure every batch is a home run.
- Don’t Scramble the Eggs: The most crucial part of making custard is the tempering process. Seriously, pour that hot milk slowly and keep whisking. If you go too fast, you’ll end up with sweet scrambled eggs. If you do see a few curds, don’t panic—that’s what the sieve is for!
- Use Quality Ingredients: With a recipe this simple, the quality of your ingredients really shines through. Using good heavy cream and pure vanilla extract will make a noticeable difference in the final flavor.
- Chill, Chill, and Chill Some More: I can’t say this enough. The custard base must be completely cold before you freeze it. A cold base freezes faster and results in a creamier texture. Freezing it for the full 24 hours is also non-negotiable for the Ninja Creami to work its magic.
Troubleshooting Common Ninja Creami Issues
Sometimes things don’t go perfectly, and that’s okay! Here’s how to fix a couple of common problems.
- “My ice cream is dry or crumbly!”: This is the most common issue and it’s totally normal. It usually just means the base is very cold and low in fat. The fix is simple: add a tablespoon of milk or heavy cream and hit the “Re-Spin” button. It almost always comes out perfectly creamy on the second try.
- “My ice cream is icy.”: This usually happens if the base wasn’t chilled enough before freezing, or if there isn’t enough fat or sugar in the recipe. This custard recipe has enough fat and sugar to prevent that, but make sure you follow the measurements and chilling times exactly. If you try to cut back on sugar or use lower-fat dairy, you’re more likely to get ice crystals.
- “The center of my pint has a peak after freezing.”: This can happen sometimes if your freezer temperature fluctuates. It’s not a big deal. Just shave it down with a spoon before you spin it so the top is level.
Frequently Asked Questions
What is frozen custard?
The main difference comes down to egg yolks and air. Frozen custard must contain at least 1.4% egg yolk solids, which makes it richer and creamier. It’s also churned with much less air than regular ice cream, making it denser.
What’s the difference between ice cream, gelato, and frozen custard?
It boils down to three factors: fat content, egg yolks, and air. Ice cream has a good amount of fat and air. Gelato has less fat and much less air, making it denser. Frozen custard is the richest of all, with a high fat content and a requirement of at least 1.4% egg yolk, which makes it incredibly dense and creamy.
Can I make this recipe without an ice cream maker?
This specific recipe is designed for the Ninja Creami. While you can make “no-churn” versions of ice cream, a true custard needs to be processed in a way that breaks down the frozen base into a creamy texture. Without a machine like the Ninja Creami or a traditional ice cream maker, it would be very difficult to get the right consistency.
How long does homemade frozen custard last in the freezer?
Homemade frozen custard is best enjoyed within the first week or two. Because it doesn’t have the commercial stabilizers and preservatives found in store-bought ice cream, it can be more prone to developing ice crystals over time. For the best texture, store it in an airtight container (USDA) with plastic wrap pressed against the surface.