What if you could make perfectly creamy, scoop-shop-worthy ice cream at home with just a few simple ingredients? If you’ve got a Ninja Creami, you’re already halfway there. But the secret, the real game-changer, isn’t just the machine—it’s having a flawless ninja creami base recipe. This is the foundation that turns good homemade ice cream into something truly spectacular. Forget gritty, icy, or just plain disappointing results. We’re about to walk through the one recipe that will become your go-to for every single flavor you can dream up.
Jump To:
The Only Ninja Creami Base Recipe You’ll Ever Need

Honestly, once you nail the base, the sky’s the limit. This isn’t just another ice cream recipe; it’s the key to unlocking your machine’s full potential. Whether you’re craving a classic vanilla bean, a rich chocolate fudge, or a high-protein peanut butter swirl, it all starts right here.
Why This Base Recipe is the Perfect Foundation
So, what makes this particular mix so special? It all comes down to balance. We’re talking about the perfect ratio of fat, sugar, and stabilizers to create a texture that’s unbelievably smooth and never icy. It’s designed specifically for how the Ninja Creami works, which shaves and churns a frozen block instead of churning liquid like traditional machines. This foundation is sturdy enough to handle all sorts of mix-ins but simple enough that it doesn’t overshadow your star flavors. It’s your blank canvas.
Recommended Tools

Ninja NC501 CREAMi Deluxe Machine
Buy
Silicone Spatula 3-piece Set
Buy
Stainless Steel Measuring Cups & Spoons Set
Buy
Glass Meal Prep StorageContainers
BuyAs an Amazon Associate, I earn from qualifying purchases.

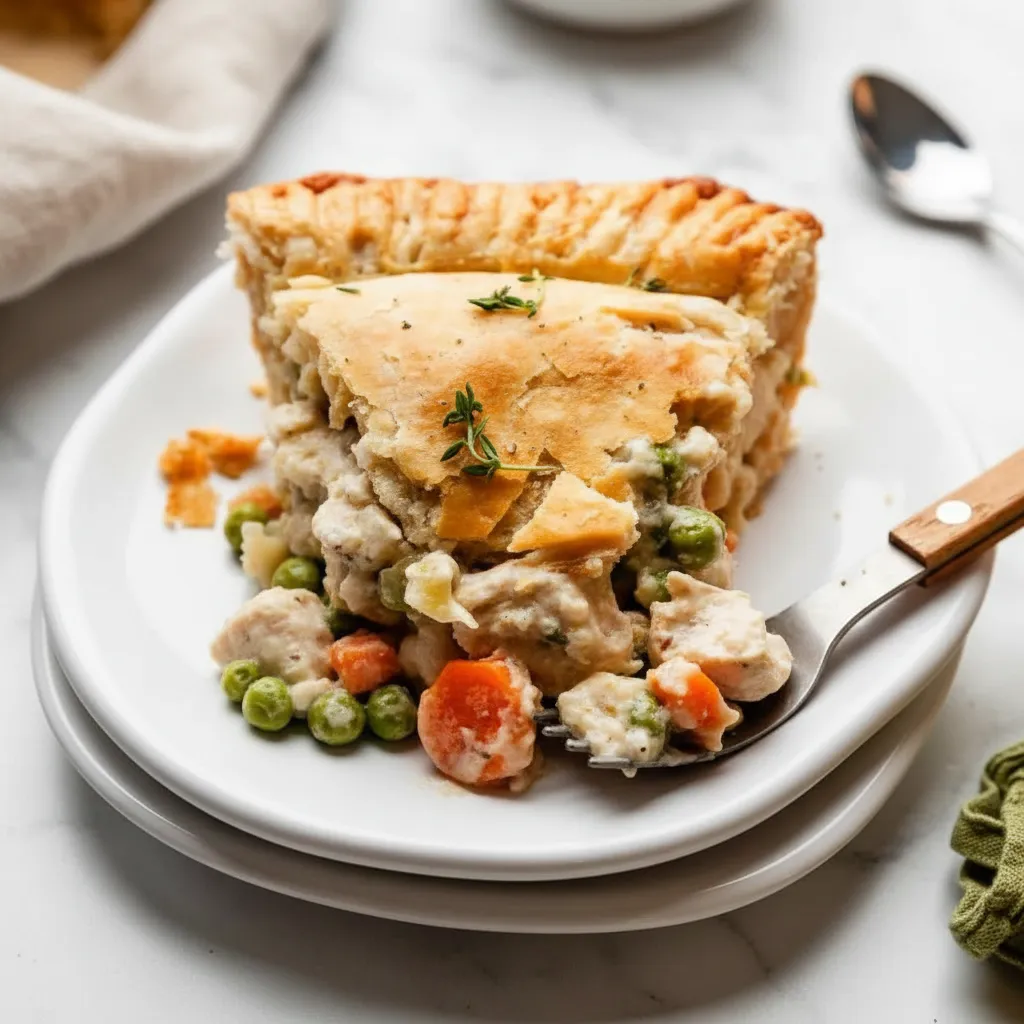
Ninja Creami Chocolate Ice Cream
If you have a Ninja Creami Deluxe Ice Cream Maker and you’re looking for great recipes to make, you can’t go wrong with this basic Ninja Creami Chocolate Ice Cream, which can be used as a base to make all kinds of different chocolate variations.
- Total Time: 24 hours 7 minutes
- Yield: 1 Pint 1x
Ingredients
1 tablespoon cream cheese (softened)
1/4 cup white sugar
1 teaspoon Vanilla extract
3 tablespoons cocoa powder
1/2 cup heavy whipping cream or half and half
1 cup whole milk
Instructions
1. Put the cream cheese in a mixing bowl. Microwave for 10 seconds if it’s not yet softened.
2. Add the sugar, vanilla extract, and cocoa powder. Whisk together until smooth.
3. Pour in the heavy cream and milk. Whisk to combine.
4. Pour the mixture into the Creami pint jar. Cover with the lid and freeze for 24 hours.
5. When ready, remove the pint jar from the freezer and secure it in the blending jar. Turn on the Ninja Creami. Slide the blending jar into the machine and lock it in to the right.
6. Select top, bottom, or full, depending on how much of the pint jar you want to mix. Select the ice cream setting with the dial. Press the dial in to start. It will take 2 minutes to blend.
7. When done, push the button on the left of the machine to release the blending jar, then slide it out of the machine and remove the lid.
8. If you want add-ins, create a hole in the center of the ice cream, plop in your add-ins. Put the blending jar back into the machine and press the add-ins button.
Notes
If your ice cream turns out powdery the first time, it’s because the ice cream is very cold. Put it back in the machine and run the Re-Spin cycle.
The higher the quality of the ingredients you use, the better the ice cream will turn out.
I’ve used half and half instead of whole cream a few times and it’s turned out really good, though not quite as creamy.
- Prep Time: 5 minutes
- Cook Time: 2 minutes
- Category: Dessert
- Method: Frozen
- Cuisine: American
- Diet: Vegetarian
Nutrition
- Serving Size: 1 Pint
- Calories: 840
- Sugar: 66g
- Sodium: 174mg
- Fat: 58g
- Saturated Fat: 36g
- Unsaturated Fat: 16g
- Trans Fat: 0g
- Carbohydrates: 75g
- Fiber: 6g
- Protein: 15g
- Cholesterol: 178mg
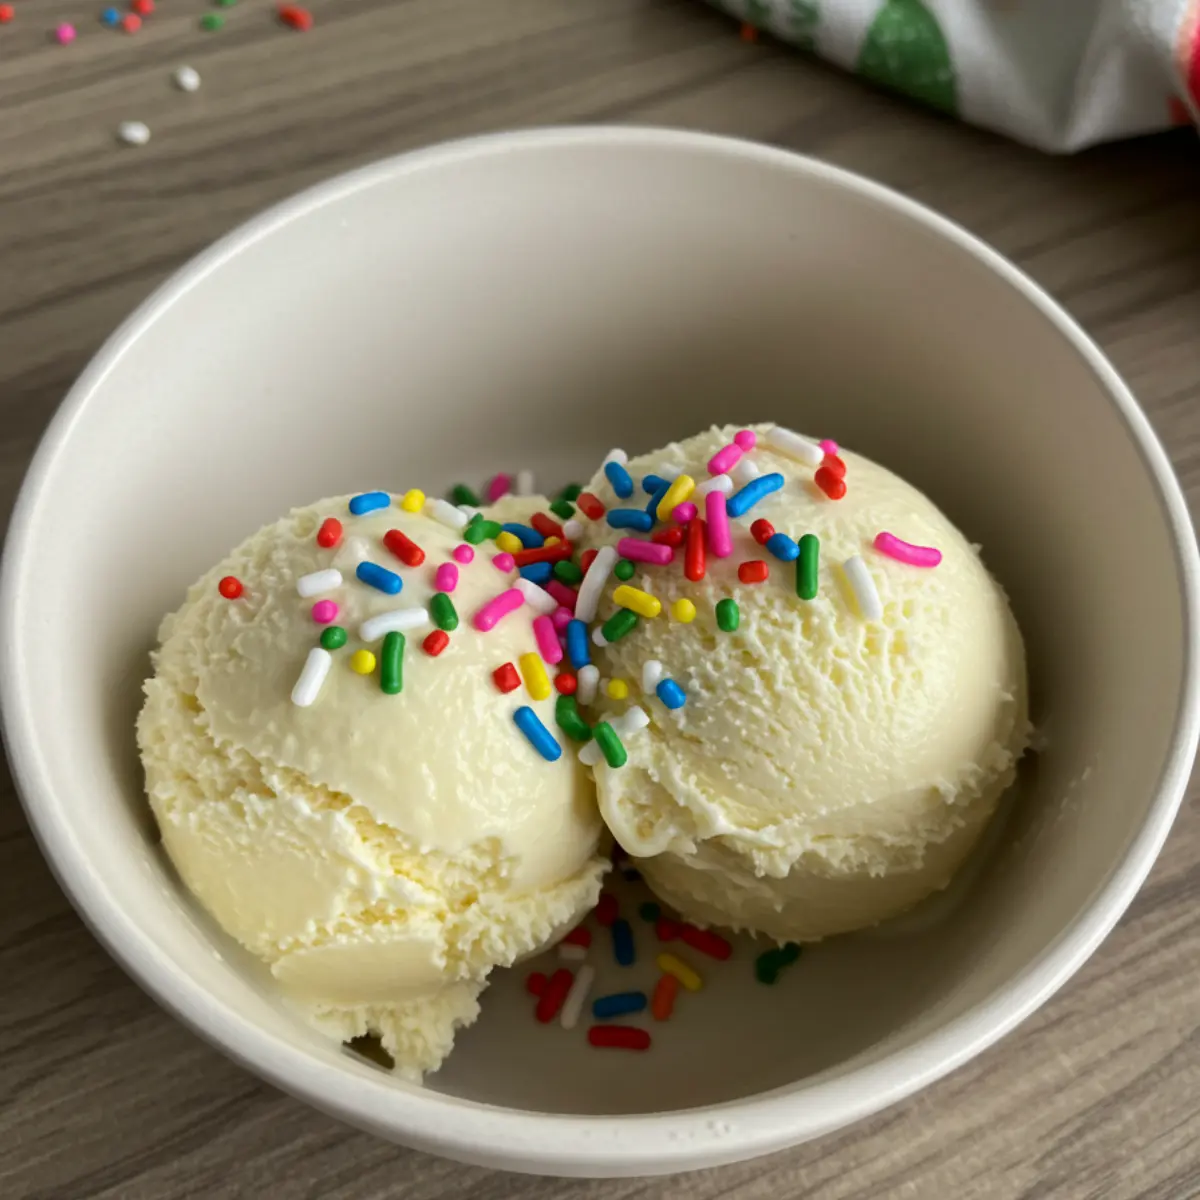
Key Ingredients for the Perfect Creamy Texture

You might be surprised by how simple the ingredient list is. No weird chemicals, no hard-to-find powders. Just a few kitchen staples that work together like magic.
Here’s what you’ll need:
- 1 ½ cups whole milk
- ½ cup heavy cream
- ⅓ cup granulated sugar
- 1 ½ ounces cream cheese, softened
- 1 teaspoon vanilla extract
- A pinch of salt
Understanding the Role of Each Ingredient

It’s tempting to just dump everything in a bowl and hope for the best, but knowing why you’re adding each component can help you troubleshoot and customize later on. It’s less like baking and more like a fun little science experiment.
Let me explain. The whole milk and heavy cream are the heart of our ice cream base, providing the necessary fat content for that rich, creamy mouthfeel. Skimping on the fat is a one-way ticket to an icy, disappointing pint.
The sugar does more than just add sweetness; it’s crucial for the texture. It lowers the freezing point of the mixture, which prevents large ice crystals from forming. This is why super-sweet ice cream is often incredibly soft.
Now, for the secret weapon: cream cheese. It might sound a little odd, but it’s a brilliant stabilizer (ICS). It adds a bit of fat and tang, but more importantly, its emulsifying properties give the final product a professional, gelato-like consistency that’s dense and smooth.
Finally, vanilla extract and a pinch of salt are your flavor enhancers. Salt doesn’t make the ice cream salty; it just makes all the other flavors, especially the sweetness and the vanilla, pop.


How to Make the Perfect Ninja Creami Base (Step-by-Step)

Alright, now for the fun part. Making this ninja creami base recipe is genuinely easy. There are just three simple steps between you and a freezer full of potential.
Step 1: Mix the Ingredients
First things first, make sure your cream cheese is properly softened. You can leave it on the counter for about 30 minutes or give it a very short trip in the microwave (like 10-15 seconds). This is super important for avoiding lumps.
In a medium bowl, whisk the softened cream cheese until it’s completely smooth. Then, slowly pour in the sugar and salt, and continue whisking until the mixture is glossy and well-combined.
Next, pour in the whole milk, heavy cream, and vanilla extract. Whisk everything together until you have a smooth, homogenous liquid. You shouldn’t see any little bits of cream cheese floating around. If you do, just keep whisking!
Pour the mixture into your Ninja Creami pint container, being careful not to fill past the max fill line. Secure the lid tightly.
Step 2: Freeze the Base for 24 Hours
This step requires a little patience, but it’s the most critical part of the process. Place the pint on a level surface in your freezer and leave it alone for at least 24 hours. Don’t try to rush this! The base needs to be frozen solid all the way through for the Creami to work its magic. A partially frozen base will result in a soupy mess.
Step 3: Process in the Ninja Creami
Once your base is a solid block, it’s time to spin. Remove the pint from the freezer, take off the lid, and place it in the outer bowl of your Ninja Creami. Secure the processing lid and lock it into the machine.
Press the “ICE CREAM” button and let the machine do its thing. The first spin might come out looking a little crumbly or powdery. Don’t panic! This is completely normal.
If it does look powdery, simply put the pint back in the machine and hit the “RE-SPIN” button. Sometimes it takes two or even three re-spins to get that perfect, scoopable consistency. If it’s still crumbly after a re-spin, add a tablespoon of milk or heavy cream before the next re-spin. This usually does the trick.
Flavor Variations & Mix-in Ideas
This base is your starting point for endless creativity. Once you’ve achieved that perfect creamy texture, you can either enjoy it as a fantastic vanilla ice cream or go wild with variations.
Classic Vanilla and Chocolate Base
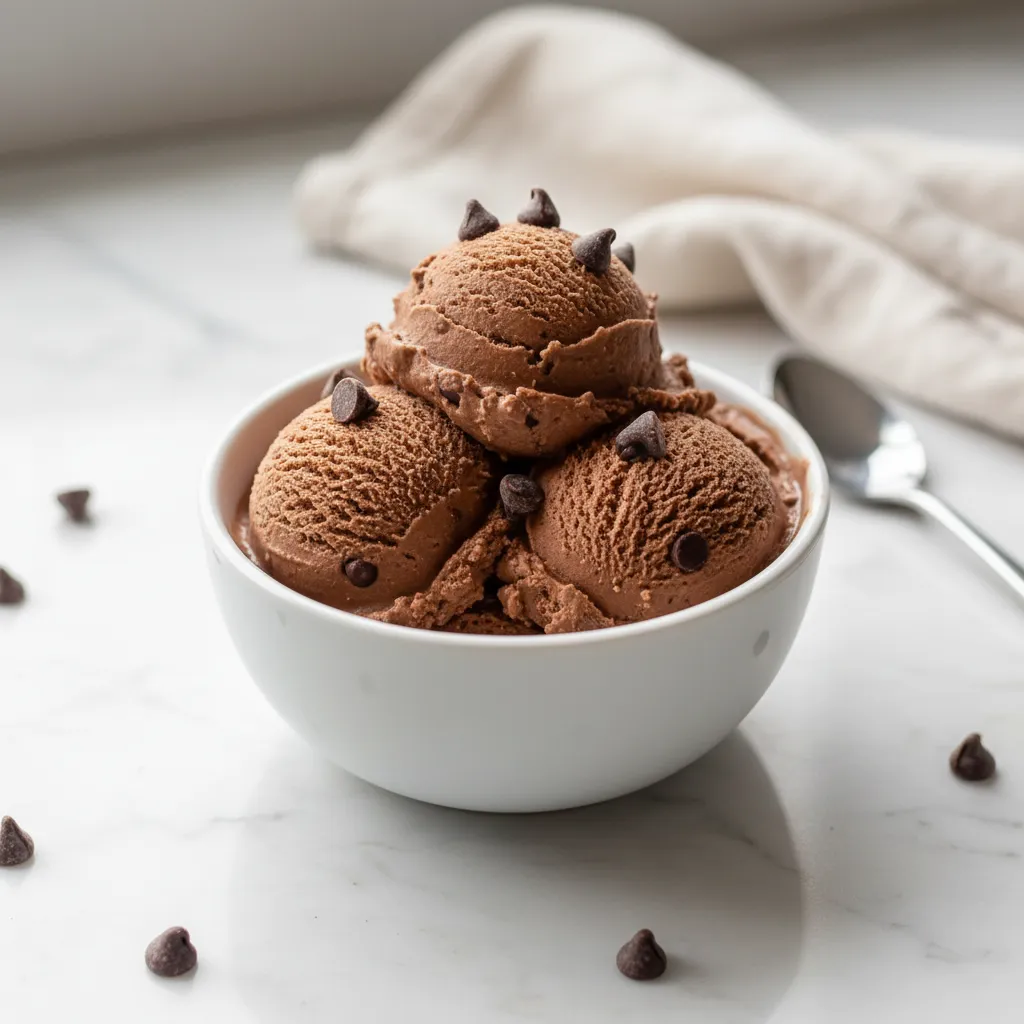
For an even richer vanilla flavor, you can use vanilla bean paste instead of extract. For a classic chocolate ice cream, just whisk in 2-3 tablespoons of unsweetened cocoa powder along with the sugar. It’s that simple. If you want to dive deeper, you can check out our dedicated Classic Vanilla Ice Cream Recipe and our Decadent Chocolate Ice Cream guide for more tips.
High-Protein Base Adjustments
Looking to make a protein ice cream? The adjustment is easy. You can substitute part of the milk with a pre-made protein shake or add a scoop of your favorite protein powder. If you add powder, make sure to blend it thoroughly to avoid any chalkiness. Vanilla or unflavored powders work best so they don’t fight with your other flavorings. Our full guide to Ninja Creami Protein Ice Cream has tons of flavor combinations.
Dairy-Free and Vegan Options
You can absolutely make this dairy-free! Swap the whole milk and heavy cream for full-fat canned coconut milk or a high-quality oat milk designed for frothing (like an oat milk barista blend). Use a dairy-free cream cheese alternative. The results are just as creamy and delicious.
Pro Tips for the Creamiest Results
- Don’t overfill the pint. Seriously, respect the max fill line. An overfilled pint won’t process correctly and can even damage your machine.
- Use full-fat ingredients. This isn’t the time to reach for skim milk. The fat content is essential for a creamy texture and to prevent iciness.
- Taste your base before you freeze it. Make sure it’s sweet and seasoned to your liking. It will taste slightly less sweet once frozen, so making it a tiny bit sweeter than you think you need is often a good idea.
- Let the pint sit out for a few minutes. If your base is frozen rock-solid, letting it sit on the counter for 5-10 minutes before spinning can make the process a little smoother.
Storing Your Ninja Creami Creations
If you have leftovers (which is a big “if”), you can simply level the top of the ice cream in the pint, put the lid back on, and pop it back in the freezer. When you’re ready for another scoop, you’ll likely need to re-spin it to get that creamy texture back. Just run it on the “ICE CREAM” or “RE-SPIN” cycle again.
Troubleshooting Common Issues (FAQ)
Sometimes things don’t go perfectly, and that’s okay! Most Ninja Creami problems are super common and easy to fix.
The most frequent complaint is that the ice cream comes out looking like dry, powdery sand after the first spin. As I mentioned earlier, this is totally normal. The machine is shaving very fine, frozen particles. The “RE-SPIN” function is designed specifically for this. It compacts and smooths those particles. Adding a splash of liquid (a tablespoon of milk or cream) helps the mixture come together if it’s being particularly stubborn.
Another common issue is an icy or grainy texture. This is almost always due to one of three things: not enough fat, not enough sugar, or an improperly frozen base. Ensure you’re using full-fat dairy and the right amount of sugar, and always, always freeze for the full 24 hours (FDA).