We have all been there. You are staring into the fridge at 5 PM and frantically searching for dinner ideas that will actually excite the family. It is easy to get stuck in a rut of making the same pasta or chicken dishes over and over again. Sometimes, the best meals come from mastering a simple, versatile base that you can transform into something amazing.
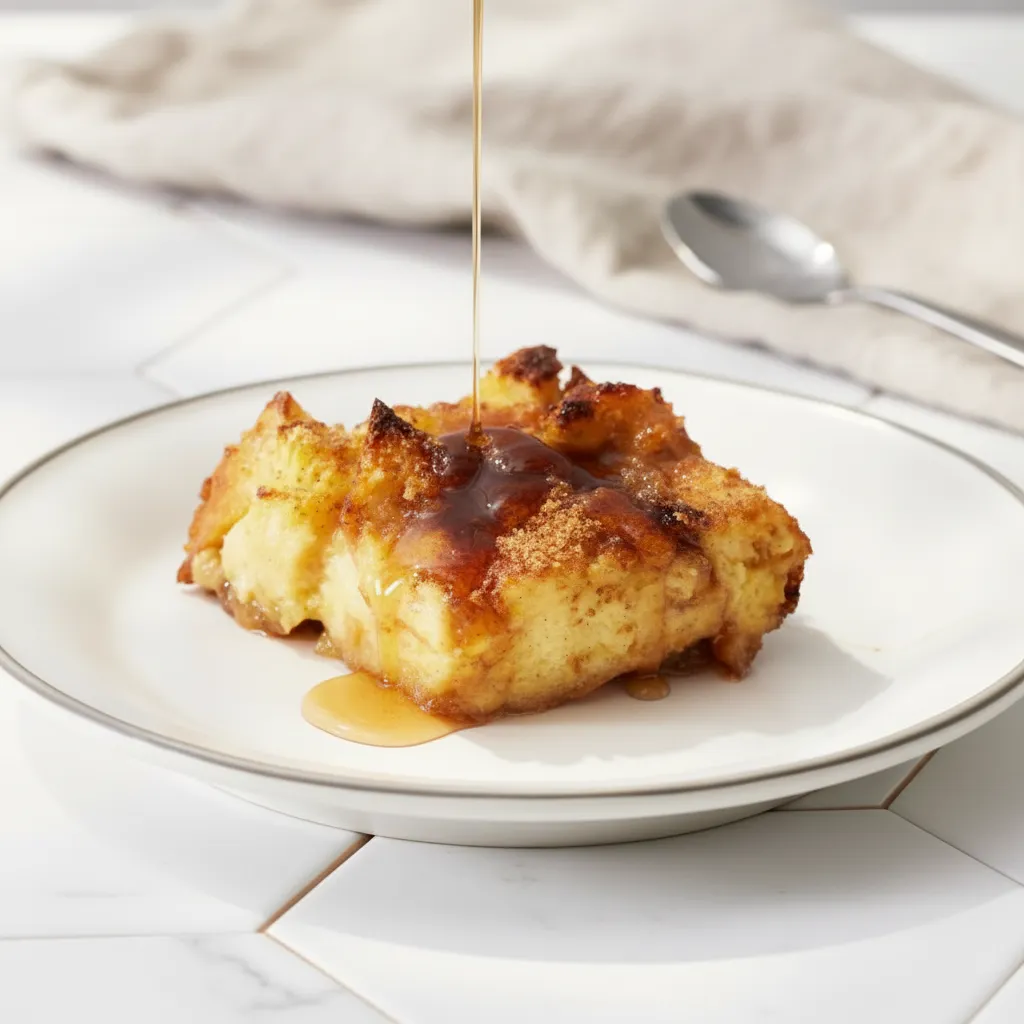
That is exactly where these golden fried buns come in. While you might think of doughnuts as just a sweet treat, this dough is incredibly neutral. It works beautifully as a savory side dish, a slider bun, or even a stuffed pocket of goodness. If you are hunting for unique dinner ideas that are budget-friendly and fun to make, you have found the right recipe.
Jump To:
Why You’ll Love This Recipe
Finding reliable dinner ideas that please both kids and adults can be a challenge. This recipe is a game changer because it is so incredibly adaptable. You can serve these buns plain as a decadent alternative to dinner rolls, or you can get creative with fillings. They are soft, slightly crisp on the outside, and melt in your mouth.
This recipe also fits perfectly into a variety of meal plans. Whether you are looking for Sunday Cooking Ideas to prep for the week or need something special for a holiday feast, this dough delivers. It is simple enough for beginners but yields bakery-quality results. Plus, making dough from scratch is a surprisingly relaxing way to unwind after a busy week.
Another reason to love this is its portability. These buns make excellent On The Go Foods for picnics or packed lunches the next day. You can fry up a batch on the weekend and have them ready for a Quick Simple Lunch throughout the week. They are sturdy enough to hold sandwiches but soft enough to tear apart by hand.
If you enjoy themed nights, this recipe is a must. You can glaze them with a spicy chili paste for Ideas For Korean Food Night, or serve them with honey butter for classic Southern Snacks. The possibilities are endless when you have a solid dough recipe in your back pocket. It truly opens up a world of new dinner ideas.
Ingredients
The beauty of this recipe lies in its simplicity. You likely have most of these items in your pantry right now, which makes it one of the most convenient dinner ideas to whip up on a whim. Here is what you will need to get started.
- 150 ml milk, lukewarm
- 70 ml water, lukewarm
- 7 g instant yeast
- 12 g honey
- 400 g all-purpose flour
- 7 g salt
- 30 g unsalted butter, room temperature
Step-By-Step Instructions
Making yeast dough might seem intimidating if you have never done it, but I promise it is straightforward. Follow these steps closely, and you will have fluffy buns that elevate your list of dinner ideas to a whole new level.
Step 1: Activate The Yeast
Grab a large mixing bowl or the bowl of your stand mixer. Pour in the lukewarm milk and lukewarm water. Add the honey and the instant yeast. Stir everything gently until it is combined. Now, let it stand for about 5 to 10 minutes. You want to see the mixture become foamy. This tells you the yeast is alive and ready to work.
Step 2: Form The Dough
Once your yeast mixture is bubbly, it is time to build the structure. Add the all-purpose flour, salt, and room temperature butter to the bowl. If you are using a stand mixer, attach the dough hook. Mix and knead on medium speed for about 8 to 10 minutes. If you are kneading by hand, prepare for a little workout. Knead on a clean surface for about 15 minutes. You are looking for a dough that is smooth and elastic.
Step 3: The First Rise
Form your kneaded dough into a nice round ball. Place it back into the bowl and cover it with a clean kitchen towel or plastic wrap. Find a warm spot in your kitchen free from drafts. Let the dough rest here until it has doubled in size. This usually takes between 1 to 1.5 hours depending on how warm your house is. This rising time is perfect for prepping other dinner ideas or side dishes.
Step 4: Shape The Buns
After the dough has risen, punch it down gently to release the air. Divide the dough into 10 equal pieces. Each piece should weigh approximately 65 to 70 grams. Roll each piece into a smooth ball on your countertop. If you want to add a savory filling like cheese or minced meat, flatten the ball, add your filling, and pinch the edges tightly to seal. Roll it seam side down to ensure it stays closed.
Step 5: Second Rise
Place your shaped buns on a tray lined with parchment paper. Leave some space between them so they can expand. Cover them loosely with a towel again. Let them rise for another 30 to 40 minutes. You want them to look puffy and airy. This second rise is crucial for that light texture we all love in our favorite dinner ideas.
Step 6: Fry To Perfection
Heat your frying oil in a deep pot to 175°C (350°F). Carefully place 2 or 3 buns into the hot oil at a time. Do not overcrowd the pot, or the temperature will drop too much. Fry them, turning occasionally, until they are a deep golden brown on all sides. This usually takes a few minutes per batch. Remove them with a slotted spoon and drain on paper towels.


How To Store Leftovers
If you manage not to eat all of these immediately, you are in luck. They store surprisingly well, making them great for future dinner ideas or snacks. Allow the buns to cool completely before storing them. If you seal them while they are warm, the steam will make them soggy.
Place the cooled buns in an airtight container or a zip-top bag. They will stay fresh at room temperature for about two days. If you need to keep them longer, you can freeze them for up to a month. Just wrap them individually in plastic wrap before bagging them.
To reheat, do not use the microwave if you can help it. It tends to make fried dough chewy. Instead, pop them in an oven or toaster oven at 350°F for about 5 minutes. This restores that crispy exterior and makes them taste freshly made. This trick is a lifesaver for Easy Sunday Meals where you just want to reheat and eat.
Tips
Creating the perfect fried bun is easy with a few insider tricks. First, temperature is everything. If your oil is too hot, the outside will burn before the inside is cooked. If it is too cool, the buns will absorb oil and become greasy. Use a kitchen thermometer to keep it right at 350°F. Consistent heat is the secret to successful frying for all your fried dinner ideas.
When kneading, do not rush the process. You want to develop the gluten so the buns can hold their shape and trap the gas from the yeast. If you are doing it by hand, put on some music and enjoy the rhythm. It is a great stress reliever. Proper kneading ensures that soft, pull-apart texture that pairs so well with soups and stews.
If you are exploring Fried Buns With Sauce as a concept, try dipping these in a savory gravy or a marinara sauce. The neutral dough soaks up flavors beautifully. This versatility is why this recipe is one of my top dinner ideas when I have guests with different tastes.
For those interested in Bun Breakfast Ideas, simply dust these with cinnamon sugar right after frying. It is amazing how the same dough can serve as a savory dinner roll one night and a sweet breakfast treat the next morning. It really maximizes your effort in the kitchen.
Finally, consider the size. The recipe notes say you can make mini buns. These are fantastic for appetizers or sliders. Mini buns are also great for Christmas Family Lunch Ideas where you want small, bite-sized portions so people can try a little bit of everything on the table.
Conclusion
I hope this recipe inspires you to try something new in the kitchen. We often get stuck thinking that bread and buns have to be baked in an oven, but frying offers a texture that is totally unique and comforting. It is one of those dinner ideas that feels special but is actually quite humble and affordable.
Whether you are making these for a quiet weeknight meal or as part of a larger feast, they are sure to bring a smile to everyone’s face. Cooking from scratch connects us to our food and our families in a way that takeout just cannot match. Plus, the smell of fresh dough frying is unbeatable.
So grab your flour, activate that yeast, and get cooking. Do not forget to experiment with fillings and dips to make it your own. Once you master this base, you will have dozens of new dinner ideas at your fingertips.
FAQ
Can I Bake These Instead of Frying?
Yes, you can bake them for a lighter version. However, the texture will be more like a traditional dinner roll than a doughnut. Bake at 375°F for about 15 to 18 minutes until golden. This is a great option if you are looking for lighter dinner ideas without the oil.
Can I Make the Dough Ahead of Time?
Absolutely. You can let the dough do its first rise in the refrigerator overnight. This slows down the yeast and actually develops more flavor. Just bring it to room temperature before shaping and doing the second rise. This is a huge time-saver for busy schedules.
What Savory Fillings Work Best?
For savory dinner ideas, try filling them with curried potatoes, minced beef and onions, or even just a cube of cheddar cheese. Ensure any cooked filling is completely cooled before you seal it inside the raw dough to prevent it from getting soggy.
Why Is My Dough Too Sticky?
Humidity can affect flour absorption. If the dough is unmanageable, add a tablespoon of flour at a time until it comes together. However, a slightly tacky dough often results in a softer bun, so try not to add too much extra flour if you can help it.
Golden Fried Buns
Finding reliable dinner ideas that please both kids and adults can be a challenge. These golden fried buns are a game changer because they’re incredibly adaptable. Serve them plain as a decadent alternative to dinner rolls, or get creative with savory or sweet fillings. They’re soft, slightly crisp on the outside, and melt in your mouth, making them perfect for weeknight meals, on-the-go snacks, or special family lunches.
Requirements


Ingredients
Instructions
- Grab a large mixing bowl or the bowl of your stand mixer. Pour in the lukewarm milk and lukewarm water. Add the honey and the instant yeast. Stir gently until combined. Let stand for 5-10 minutes until foamy.
- Once your yeast mixture is bubbly, add the all-purpose flour, salt, and room temperature butter to the bowl. If using a stand mixer, attach the dough hook and knead on medium speed for 8-10 minutes. If kneading by hand, knead on a clean surface for about 15 minutes until the dough is smooth and elastic.
- Form the kneaded dough into a round ball. Place it back into the bowl and cover with a clean kitchen towel or plastic wrap. Let it rest in a warm spot until doubled in size, usually 1 to 1.5 hours.
- After the dough has risen, punch it down gently to release the air. Divide the dough into 10 equal pieces (approx. 65-70 grams each). Roll each piece into a smooth ball. If adding a savory filling, flatten the ball, add filling, and pinch edges tightly to seal. Roll seam side down.
- Place shaped buns on a tray lined with parchment paper, leaving space between them. Cover loosely with a towel and let rise for another 30 to 40 minutes until puffy and airy.
- Heat frying oil in a deep pot to 175°C (350°F). Carefully place 2 or 3 buns into the hot oil at a time. Fry, turning occasionally, until deep golden brown on all sides (a few minutes per batch). Remove with a slotted spoon and drain on paper towels.
Notes
If you manage not to eat all of these immediately, they store surprisingly well. Allow the buns to cool completely before storing in an airtight container or zip-top bag at room temperature for about two days, or freeze for up to a month.
To reheat, use an oven or toaster oven at 350°F for about 5 minutes to restore the crispy exterior. Avoid the microwave, which can make them chewy.
Temperature is everything when frying. Use a kitchen thermometer to keep oil at 350°F. Too hot, they burn; too cool, they absorb oil and get greasy.
Don’t rush kneading. Develop the gluten for shape and texture. Proper kneading ensures a soft, pull-apart bun.
For savory options, try dipping in gravy or marinara. For sweet breakfast buns, dust with cinnamon sugar after frying.
Consider making mini buns for appetizers or sliders, great for parties or family lunches.
You can bake these at 375°F for 15-18 minutes for a lighter, more traditional dinner roll texture.
Dough can be made ahead: let first rise in the refrigerator overnight to develop more flavor. Bring to room temp before shaping and second rise.
For savory fillings, use cooled curried potatoes, minced beef and onions, or cheddar cheese. Cool fillings prevent soggy dough.
If dough is too sticky, add a tablespoon of flour at a time. A slightly tacky dough often results in a softer bun.
Nutrition
Calories
Sugar
Fat
Carbs