Hey there, home bakers! Are you ready to dive into something truly special and utterly delicious? We are talking about a classic treat that always brings smiles: a homemade Strawberry Shortcake Cake. Forget those fancy bakery versions; this recipe is all about simple joy and incredible flavor, right from your own kitchen.
This isn’t just any cake; it’s a celebration in every slice. Imagine tender cake layers, piles of fresh, juicy strawberries, and a fluffy, dreamy whipped topping. It’s perfect for a summer gathering, a special birthday, or just because you deserve a little something sweet. Let’s get baking, shall we?
Jump To:
Why You’ll Love This Recipe
Honestly, what’s not to love about a good Strawberry Shortcake Cake? This recipe is a real crowd pleaser and super easy to follow. You don’t need any professional equipment to make it happen, which is a huge win for beginners and budget conscious cooks alike.
It’s a truly comforting dessert that feels fancy without all the fuss. The fresh strawberries truly shine, giving you that taste of summer no matter the season. Plus, it is totally customizable. Want more berries? Go for it! Prefer a slightly sweeter topping? You’ve got the power.
This Strawberry Shortcake Cake is also fantastic for any occasion. Think about a Strawberry Shortcake Birthday Party. It’s a delightful centerpiece that guests will rave about. The simple elegance of a homemade cake just can’t be beat, trust me.
It’s also a wonderful way to enjoy fresh, seasonal produce. When strawberries are at their peak, this recipe is your best friend. It highlights their natural sweetness beautifully, making every bite a burst of pure happiness.
Ingredients
For the Cake
- 2 ¾ cups cake flour
- 2 teaspoons baking powder
- 1 cup (2 sticks) salted butter, room temperature
- 2 ½ cups granulated sugar
- 2 teaspoons vanilla extract
- 5 large egg whites, room temperature
- 1 cup milk, room temperature
For the Strawberries
- 2 pounds fresh strawberries, washed, hulled, and sliced
- 2 tablespoons granulated sugar
For the Whipped Topping
- 2 ounces cream cheese, room temperature
- ½ cup granulated sugar
- 2 cups heavy cream
- ½ teaspoon vanilla extract
- 1 pinch kosher salt
Step-By-Step Instructions
Cake Step 1: Preheat and Prep Your Pan
First things first, get your oven ready. Preheat it to 350°F. Grab a 10×15 inch sheet pan and line it with parchment paper. Make sure the paper goes up the sides. A little nonstick cooking spray on the parchment will help later.
Cake Step 2: Whisk Dry Ingredients
In a big bowl, whisk together your cake flour and baking powder. Give it a good mix so everything is combined evenly. Then, you can set this bowl aside for a moment.
Cake Step 3: Cream Butter, Sugar, and Vanilla
Using a stand mixer with the paddle attachment, cream together the softened butter, granulated sugar, and vanilla extract. You want this mixture to be light and fluffy, which usually takes about five minutes. Don’t forget to stop and scrape down the sides of the bowl as needed.
Cake Step 4: Add Egg Whites
With your mixer on the lowest speed, carefully add in the egg whites, one at a time. Beat well after each addition. Just like before, give the sides of the bowl a good scrape down to make sure everything gets incorporated.
Cake Step 5: Alternate Wet and Dry
Keep the mixer on low. Now, add one third of your flour mixture to the creamed butter mixture. Follow that with half of the milk. Then, another third of the flour mixture, the remaining milk, and finally, the rest of the flour mixture. Mix just until everything is combined. Scrape the bowl again if you need to.
Cake Step 6: Bake and Cool
Pour the batter into your prepared pan. Spread it out evenly. Bake for about 28 to 30 minutes, or until a toothpick inserted into the center comes out clean. Let the cake cool completely to room temperature on a wire rack.
Cake Step 7: Chill the Cake
Once your cake has cooled, transfer it to the freezer for 10 to 15 minutes, or until it feels firm. You can also pop it in the refrigerator for one to two hours, or even overnight if you cover it. Chilling makes the cake much easier to handle and move around.
Cake Step 8: Prep Strawberries and Topping
While your cake is baking and cooling, it is the perfect time to get those delicious strawberries ready and whip up your topping. This way, everything will be ready for assembly.
Strawberries Step 1: Sugar and Chill
In a medium sized bowl, gently mix your sliced strawberries with the granulated sugar. This simple step helps to bring out their natural juices and sweetness. Store them in the refrigerator until you are ready to assemble your Strawberry Shortcake Cake.
Whipped Topping Step 1: Chill Your Tools
This is a little trick for super fluffy whipped cream. Place the bowl and whisk attachment from your stand mixer into the freezer for about 15 minutes. A cold bowl really helps the cream whip faster and gives it more volume. It’s a game changer!
Whipped Topping Step 2: Cream Cheese and Sugar
Once your bowl is nice and chilly, add the room temperature cream cheese and sugar to it. Mix these on medium high speed until they are fully combined and there are no lumps left. You want a smooth, creamy base.
Whipped Topping Step 3: Add Heavy Cream
Turn the mixer off for a moment. Pour in your heavy cream. Resume mixing on medium speed until you see soft peaks forming. This is where the magic starts to happen, turning that liquid cream into something wonderful.
Whipped Topping Step 4: Scrape the Bowl
Using a rubber spatula, make sure to scrape the bottom and sides of the bowl. This ensures all of the cream cheese gets fully incorporated into your whipped cream. You want every bit of that creamy goodness.
Whipped Topping Step 5: Stiff Peaks
With the mixer back on medium speed, continue mixing until stiff peaks have formed. These are peaks that stand straight up and hold their shape firmly. This is the perfect consistency for holding up all those delicious strawberries.
Whipped Topping Step 6: Final Touches
Finally, add in the vanilla extract and a pinch of kosher salt. Be careful not to overmix at this stage; you want to keep that lovely, airy texture. Chill your topping until you are completely ready for assembly.
Assembly Step 1: Halve the Cake
Take your chilled cake out of the freezer or refrigerator. Gently pick up the edges of the parchment paper to remove the cake from the pan, then slide it onto your counter. Carefully slice the cake in half right down the middle, creating two rectangles. Place one of these cake halves onto your serving plate.
Assembly Step 2: First Layer of Goodness
Spread half of your prepared strawberries over that first cake layer. Then, top the strawberries with about one third of your delicious whipped cream cheese topping. This creates a wonderful base for your Strawberry Shortcake Cake.
Assembly Step 3: Stack and Finish
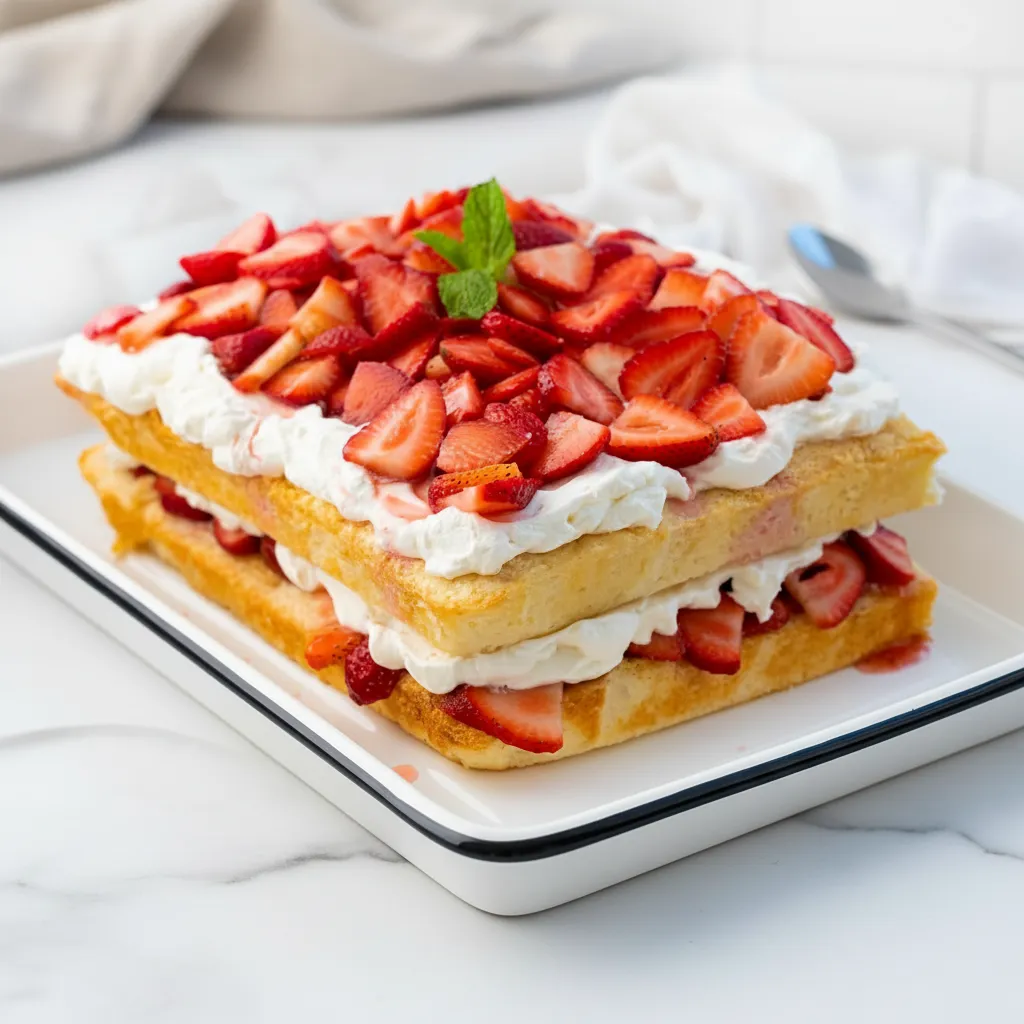
Carefully place the other cake layer right over the whipped topping. Now, top this second cake layer with the remaining whipped topping. Arrange the other half of your strawberries beautifully on top. Serve your magnificent Strawberry Shortcake Cake immediately and enjoy!


How To Store Leftovers
If you happen to have any leftovers of this amazing Strawberry Shortcake Cake, don’t worry, they store pretty well! The key is to keep it airtight. Cover any remaining cake with plastic wrap or place it in an airtight container.
Pop it into the refrigerator. It should stay fresh and delicious for about two to three days. The whipped topping might lose a little bit of its fluffiness over time, but the flavor will still be absolutely wonderful. It’s a great way to enjoy a sweet treat for a few days.
Tips
Making a fantastic Strawberry Shortcake Cake is all about a few simple tricks. For the best flavor, always use fresh, ripe strawberries. They are the star of the show, after all! If you can find local berries, even better.
Don’t skip chilling your mixing bowl and whisk for the whipped topping. This really makes a difference in getting that perfect, stiff peak consistency. It’s a small step that yields big results for your fluffy topping.
When mixing your cake batter, be careful not to overmix. Overmixing can lead to a tough cake, and we want ours to be tender and soft. Mix just until the ingredients are combined, then stop. This simple tip will give you a light and airy cake every time.
If you are planning a Strawberry Shortcake Birthday Party, consider making individual shortcakes instead of one big cake for easy serving. Just cut the sheet cake into squares or use a round cookie cutter for cute individual portions. This also works well for Strawberry Shortcake Party Ideas.
For an extra touch, you can lightly toast some shredded coconut and sprinkle it on top of your cake for added texture and a subtle tropical note. Or, if you are feeling playful, a light dusting of powdered sugar over the berries can look quite charming, adding to your Strawberry Cake Design.
Conclusion
There you have it, folks! A truly delightful and surprisingly easy recipe for a homemade Strawberry Shortcake Cake. This dessert is more than just a sweet treat; it’s a moment of joy, a taste of summer, and a testament to the simple pleasures of home baking.
Whether you are celebrating a special occasion or just craving something sweet, this recipe delivers. Go ahead, gather your ingredients, follow these steps, and get ready to impress everyone with your amazing baking skills. Happy baking!
FAQ
Can I use frozen strawberries?
While fresh strawberries are ideal for the best texture and flavor, you can use frozen ones in a pinch. Just thaw them completely and drain any excess liquid before mixing with sugar. They might be a bit softer, but still tasty.
What if I don’t have cake flour?
No cake flour? No problem! You can make your own. For every cup of all purpose flour, remove two tablespoons and replace them with two tablespoons of cornstarch. Sift it together a few times to get that light, fine texture.
Can I make the cake ahead of time?
Absolutely! You can bake the cake layers a day in advance. Once cooled, wrap them tightly in plastic wrap and store them at room temperature. The whipped topping can also be made a few hours ahead and kept chilled.
How can I achieve a beautiful Strawberry Cake Design?
For a stunning Strawberry Cake Design, arrange your top layer of strawberries artfully. You can create a pattern, pile them high in the center, or even add a few whole berries with their green tops for a pop of color. A sprinkle of fresh mint leaves also adds a lovely touch.
Homemade Strawberry Shortcake Cake
This homemade Strawberry Shortcake Cake features tender cake layers, fresh juicy strawberries, and a dreamy whipped topping. It’s a simple, comforting dessert perfect for any occasion, from summer gatherings to birthday parties.
Requirements


Ingredients
For the Cake
For the Strawberries
For the Whipped Topping
Instructions
- Preheat oven to 350°F. Line a 10×15 inch sheet pan with parchment paper and spray with nonstick spray.
- In a large bowl, whisk together cake flour and baking powder.
- Using a stand mixer, cream the softened butter, 2 ½ cups sugar, and 2 tsp vanilla extract until light and fluffy (about 5 minutes).
- On low speed, add egg whites one at a time, beating well after each. Scrape down the bowl.
- Alternate adding the flour mixture and milk, beginning and ending with the flour mixture. Mix just until combined.
- Pour batter into the prepared pan, spread evenly, and bake for 28-30 minutes, or until a toothpick comes out clean. Cool completely on a wire rack.
- While the cake cools, gently mix sliced strawberries with 2 tbsp sugar in a medium bowl. Refrigerate.
- For the topping, chill your mixer bowl and whisk for 15 minutes. Beat the cream cheese and ½ cup sugar until smooth.
- Add the heavy cream and mix on medium speed until soft peaks form. Scrape the bowl, then continue mixing until stiff peaks form. Mix in ½ tsp vanilla and a pinch of salt. Chill until assembly.
- Once the cake is cool and firm (chill in freezer for 15 mins if needed), lift it from the pan and slice in half to create two rectangles.
- Place one cake half on a serving plate. Top with half of the strawberries and about one-third of the whipped topping.
- Place the second cake layer on top. Cover with the remaining whipped topping and arrange the rest of the strawberries on top. Serve immediately.
Notes
For the best flavor, always use fresh, ripe strawberries.
Don’t skip chilling your mixing bowl and whisk for the whipped topping; it helps create perfect, stiff peaks.
Be careful not to overmix the cake batter to ensure a tender and soft cake.
Nutrition
Calories
Sugar
Fat
Carbs