Have you ever wished you could eat a warm cup of hot cocoa with a spoon? Well, what if I told you that you can? This delightful Hot Cocoa Dip Recipe is exactly that. It is a dreamy, creamy treat that captures all the comforting flavor of your favorite winter drink.
It is so simple to make and always a huge hit with both kids and adults. You are just a few minutes away from a fantastic snack that will have everyone asking for the recipe. Let’s get started!
Jump To:
Why You’ll Love This Recipe
First off, this recipe is incredibly easy. Seriously. There is no cooking or baking involved at all. If you can use an electric mixer, you can make this dip. It is a lifesaver when you need a last minute dessert.
It is also a total crowd pleaser. I bring this to holiday parties, family gatherings, and game nights, and the bowl is always empty by the end. It’s one of those Dessert Dips For Parties that people just gather around.
The texture is just wonderful. It is so light and fluffy, almost like a mousse. The combination of cream cheese, marshmallow fluff, and whipped cream creates a smooth and airy base for that rich chocolate flavor.
Plus, this Hot Cocoa Dip Recipe is so fun to serve. You can set out a big platter with all sorts of dippers. Think cookies, pretzels, fruit, and more. Everyone loves choosing their own adventure when it comes to dipping.
And who doesn’t love a good nostalgic treat? This Hot Cocoa Dip Recipe tastes just like childhood memories of sipping hot chocolate on a cold day. It’s pure comfort in a bowl, making it a fantastic addition to your recipe collection.
Honestly, the simplicity is the best part. You only need a handful of common ingredients to create something truly special. This Hot Cocoa Dip Recipe is proof that you don’t need to spend hours in the kitchen to make a memorable dessert.
Ingredients
The magic of this Hot Chocolate Dip Recipe comes from a few simple, yet powerful, ingredients. Here is what you will need to gather.
- 8 ounces cream cheese, softened
- 7 ounces marshmallow fluff (1 jar)
- ½ cup heavy whipping cream
- ½ cup hot cocoa mix
- 1 cup mini marshmallows
- ½ cup mini chocolate chips
A quick note on the cream cheese. Make sure it is fully softened to room temperature. This is key to getting a super smooth, lump free dip. Just leave it on the counter for an hour or so before you start.
Step By Step Instructions
Ready to see how simple this Hot Cocoa Dip Recipe is? Follow these easy steps, and you will have a delicious dip in no time at all. It’s almost too easy!
Step 1: Combine The Main Ingredients
First, find a large mixing bowl. You will want plenty of room so nothing splashes out. Add your softened cream cheese, the entire jar of marshmallow fluff, the heavy whipping cream, and your hot cocoa mix to the bowl.
Having all the main components together in one bowl is what makes this part of the process so quick. It’s a true one bowl wonder, which means less cleanup later. We all love that, right?
Step 2: Whip Everything Together
Now it is time to bring out your electric mixer. You can use a hand mixer or a stand mixer. Start on a low speed to get things combined, then turn it up to medium high. Whip the mixture for a few minutes.
You will see it transform into a smooth, slightly thickened, and fluffy dip. It should be light and airy. This whipping action is what gives our Whipped Hot Chocolate Recipe its amazing texture. Keep going until there are no lumps left.
Making this Hot Cocoa Dip Recipe is a breeze with a mixer. It incorporates air into the dip, which is something you just can’t achieve as well by hand. The creamy consistency is what we are aiming for here.
Step 3: Garnish And Chill
Once your dip is perfectly smooth, gently transfer it to your serving bowl. Use a spatula to get every last bit out of the mixing bowl. You do not want to waste any of this goodness.
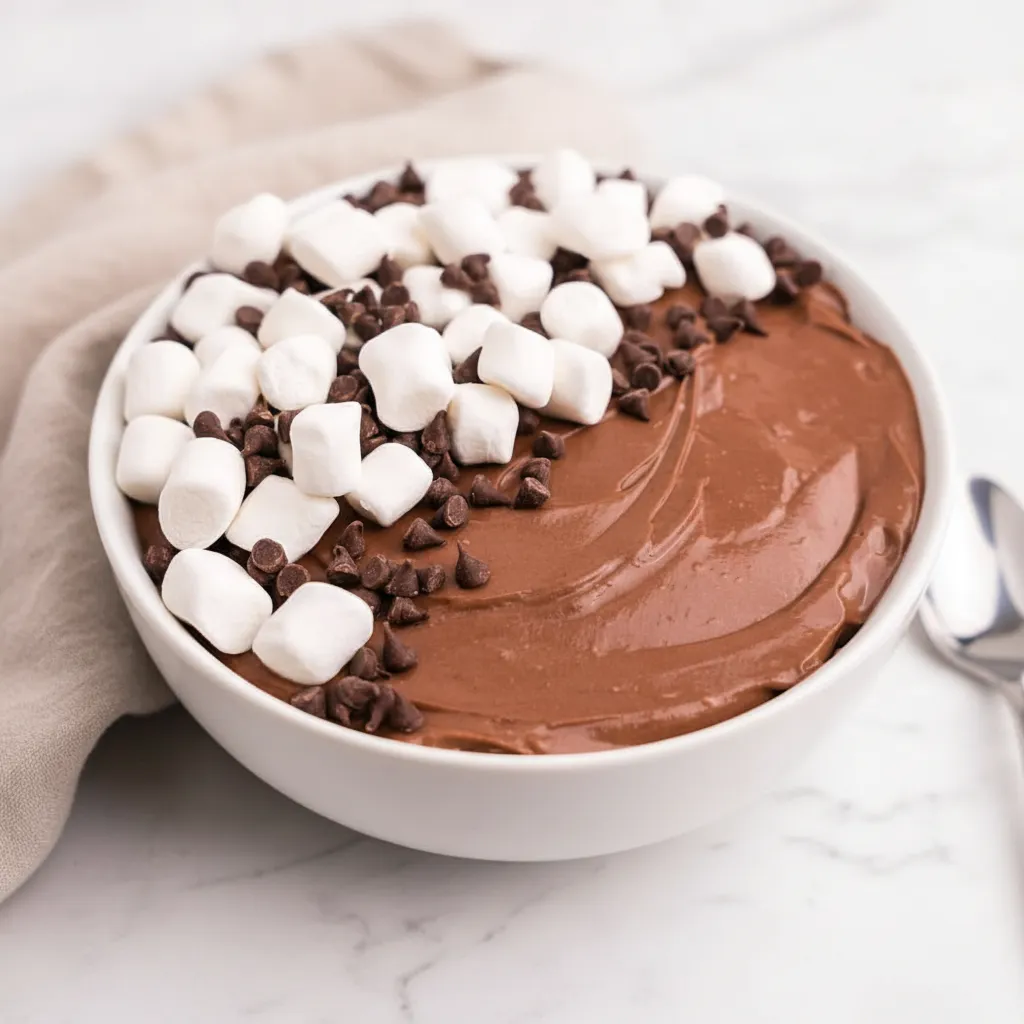
Now for the fun part! Sprinkle the mini marshmallows and mini chocolate chips all over the top. You can be as generous as you like. This is what makes the Hot Cocoa Dip Recipe look so inviting.
Finally, cover the bowl and place it in the refrigerator to chill until you are ready to serve. Chilling helps the dip set up a little more and allows the flavors to meld together beautifully.


How To Store Leftovers
If you happen to have any of this delicious Hot Cocoa Dip Recipe left over, storing it is simple. You will want to keep it fresh so you can enjoy it again later.
For the fridge, place the dip in an airtight container. It will stay good for up to four days. It is best to store the garnishes like marshmallows separately to keep them from getting soft.
As for the freezer, I do not recommend it for this dip. Freezing can change the texture of the cream cheese and marshmallow fluff. When it thaws, the dip might become a bit watery and grainy. It is best enjoyed fresh.
Tips
Want to make your Hot Cocoa Dip Recipe even better? Here are a few simple tips and tricks to help you get the most out of this fantastic treat.
First, let’s talk dippers. The possibilities are endless! Pretzels provide a great salty contrast. Graham crackers and shortbread cookies are classic choices. For a fresher option, try apple slices or strawberries.
You can also get creative with the flavor. Add a drop of peppermint extract for a festive mint chocolate vibe. A pinch of cinnamon or a dash of cayenne can add a lovely warmth to the dip.
This is a great recipe to make ahead of time. You can prepare the dip a day in advance and keep it in the fridge. Just wait to add the toppings until right before you serve to keep them looking their best.
Don’t be afraid to experiment with your hot cocoa mix. Using a dark chocolate mix will give the dip a richer flavor, while a milk chocolate one will be a bit sweeter. Feel free to use your favorite brand for this Hot Cocoa Dip Recipe.
For an extra bit of fun, you could even set up a toppings bar next to the dip. Think crushed candy canes, toffee bits, or colorful sprinkles. This is especially fun if you are serving this Hot Cocoa Dip Recipe at a party.
Conclusion
And there you have it! A super simple, wonderfully delicious Hot Cocoa Dip Recipe that is sure to be a new favorite. It is the perfect blend of creamy, chocolatey, and sweet.
This recipe is all about bringing people together with good food that is easy to make. It does not require any fancy skills or equipment, just a love for all things chocolate. It is a simple joy in a bowl.
I hope you have as much fun making and sharing this Hot Cocoa Dip Recipe as I do. It is a go to for me whenever I need something quick and impressive. Enjoy every single scoop!
FAQ
Can I Use A Different Type Of Cocoa Mix?
Yes, absolutely! You can use any kind of hot cocoa mix you like. Dark chocolate, milk chocolate, or even a salted caramel flavored mix would be delicious in this Hot Cocoa Dip Recipe. Use your favorite!
What If I Don’t Have An Electric Mixer?
You can definitely make this dip by hand. It will take more effort, but it is possible. Use a whisk and be prepared for a good arm workout. The key is to whip it until it is completely smooth and airy.
What Can I Dip In This Hot Chocolate Dip Recipe?
So many things are great with this Hot Chocolate Dip Recipe! Some favorites include graham crackers, pretzels, vanilla wafers, shortbread cookies, apple slices, strawberries, and even large marshmallows.
Is This Recipe Kid Friendly?
This Hot Cocoa Dip Recipe is extremely kid friendly. Children love the sweet flavor and the fun of dipping. It is a fantastic treat for birthday parties or family movie nights. They can even help add the toppings.
High-Protein Chocolate Creami
Enjoy the rich, comforting flavor of hot cocoa in a cool, creamy treat! This simple High-Protein Chocolate Creami recipe is a delightful dessert that comes together easily with your Ninja Creami machine, perfect for a sweet craving or a healthier indulgence.
Requirements


Ingredients
Instructions
- In a Ninja Creami pint container, combine the chocolate protein shake, chocolate protein powder, cocoa powder, sweetener, and a pinch of salt. For an even creamier texture, add the optional guar gum or pudding mix.
- Using a small milk frother or whisk, mix all ingredients thoroughly until no clumps remain and the base is smooth.
- Secure the lid on the pint and place it on a level surface in the freezer. Freeze for at least 24 hours until frozen solid.
- Once fully frozen, place the pint into the outer bowl, secure the processing lid, and lock it into the Ninja Creami machine.
- Select the ‘Lite Ice Cream’ function and let it run a full cycle. If the texture is powdery or crumbly, add 1 tablespoon of milk or protein shake and process again using the ‘Re-Spin’ function.
- If using mix-ins, create a small well in the center of the ice cream, add your desired items, and process using the ‘Mix-In’ function.
- Serve immediately and enjoy your homemade protein ice cream straight from the pint.
Notes
Taste the base before freezing and adjust sweetener if needed. Frozen desserts tastes less sweet, so aim for slightly sweeter than you prefer.
Do not fill the pint past the max fill line, as the mixture will expand during freezing and processing.
A full 24-hour freeze is essential for the best, creamiest texture. Rushing this step can result in an icy or soupy consistency.
Feel free to experiment with other flavors like vanilla protein with frozen berries or adding mint extract for a mint-chip version.
Nutrition
Calories
Sugar
Fat
Carbs