Is there any aroma more comforting than freshly baked bread? I don’t think so. It’s a scent that instantly makes a house feel like a home. For years, I thought making bread from scratch was some complicated art form reserved for seasoned bakers. But let me tell you, these Easy Fluffy Dinner Rolls from Scratch will change your mind completely. They are so simple and the result is absolutely heavenly.
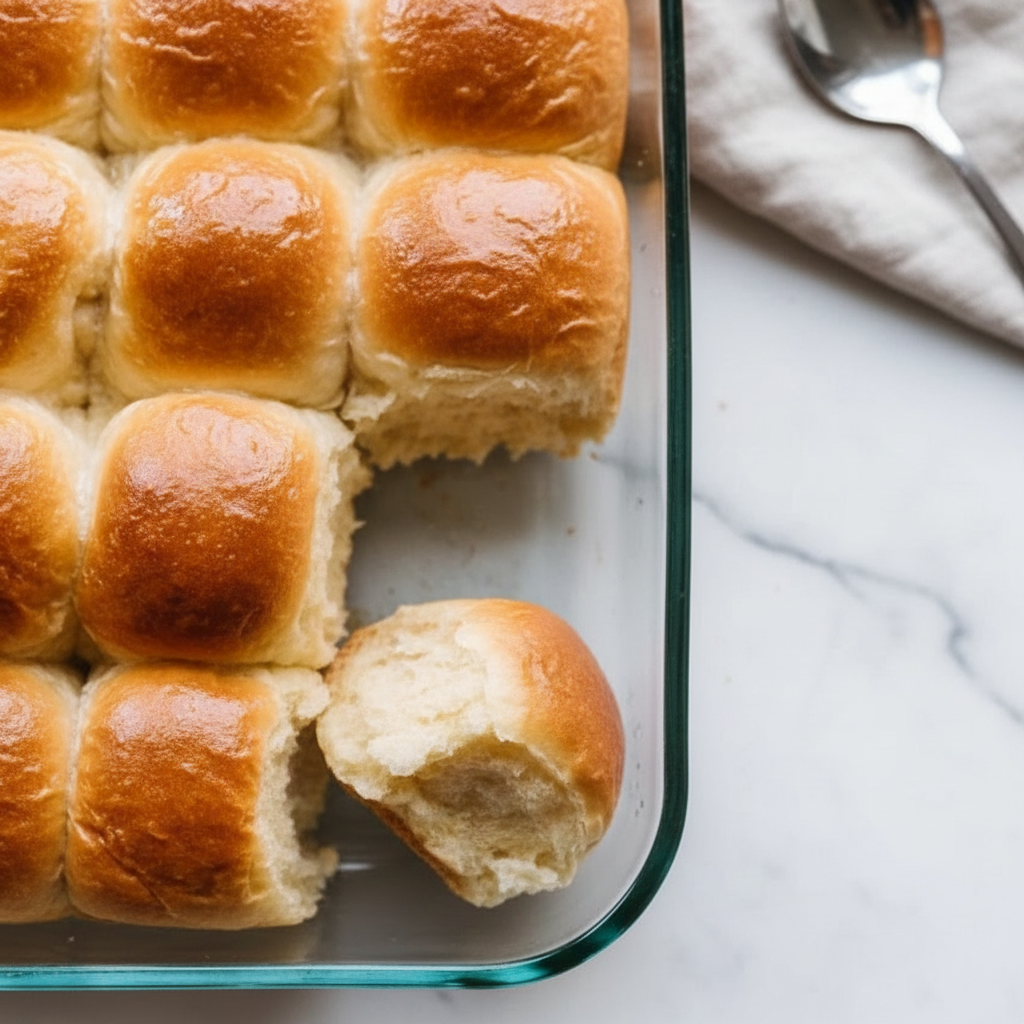
This is the Easy Dinner Rolls Recipe Quick enough for a weeknight but special enough for a holiday. Imagine pulling apart one of these warm, golden brown, Soft Dinner Rolls, slathering it with butter, and watching it melt. It’s pure bliss. Get ready to impress your family and yourself. You’ve got this!
Jump To:
Why You’ll Love This Recipe
First off, the texture is just incredible. These aren’t just rolls; they are pillowy clouds of deliciousness. They have a beautifully light and airy crumb that makes them the perfect Fluffy Dinner Rolls. They are soft, they are tender, and they practically melt in your mouth. Seriously, store bought rolls just can’t compare.
Another reason to love this recipe is its simplicity. You don’t need to be an expert baker to achieve fantastic results. The steps are straightforward and I’ve broken them down to be super easy to follow. Plus, you don’t need any fancy or professional equipment to make wonderful Soft Dinner Rolls at home.
The ingredients are also incredibly basic. You probably have most, if not all, of them in your pantry and refrigerator right now. It’s a budget friendly recipe that delivers a rich, buttery flavor that tastes like a million bucks. No complex shopping trips required for these beauties.
And let’s talk versatility. These rolls are the perfect companion to almost any meal. Serve them alongside a hearty soup, a big family pasta dinner, a roast chicken, or your holiday feast. They are also amazing on their own, or for making little leftover sliders the next day. The possibilities are endless.
Finally, the pure satisfaction you get from baking them is unmatched. The process of watching the dough rise, shaping the rolls, and pulling them golden and hot from the oven is so rewarding. And the look on everyone’s faces when they take their first bite? Absolutely priceless. It’s a simple joy that makes any day better.
Ingredients
Here’s what you’ll need to gather. These are simple, everyday ingredients that come together to create something truly special. No fuss, just pure goodness.
- 1 cup (240ml) whole milk, warmed to about 110 degrees F (43 C)
- 2 and 1/4 teaspoons instant yeast (1 standard packet)
- 2 Tablespoons granulated sugar, divided
- 1 large egg
- 1/4 cup (4 Tablespoons; 56g) pure butter or plant based butter, softened to room temperature and cut into 4 pieces
- 1 teaspoon salt
- 3 cups (390g) all purpose flour or bread flour (spooned & leveled)
- Optional topping: 2 Tablespoons (28g) melted pure butter or plant based butter mixed with 1 Tablespoon honey
Step By Step Instructions
Ready to bake? Let’s walk through this process together. It’s easier than you think to get perfect Fluffy Dinner Rolls every single time.
Step 1: Prepare The Dough
First, we need to wake up our yeast. In the bowl of your stand mixer, whisk together the warm milk, yeast, and just one tablespoon of the sugar. The milk should feel like warm bathwater, not hot. If it’s too hot, it can harm the yeast. Cover the bowl and let it sit for about five minutes. You should see it get a little foamy, which means the yeast is active and ready to work.
If you don’t have a stand mixer, no worries at all. You can do this in a large mixing bowl. The process is exactly the same, you’ll just be using a bit of arm power later on.
Step 2: Mix The Ingredients
Now it’s time to build our dough. Add the remaining tablespoon of sugar, the egg, the softened butter, salt, and just one cup of the flour to the yeast mixture. Using a dough hook or paddle attachment, mix on low speed for about 30 seconds to get things combined. Scrape down the sides of the bowl to make sure everything is incorporated.
Next, add the rest of the flour. Beat on medium speed for about two minutes. The dough will start to come together and pull away from the sides of the bowl. If it seems way too wet and sticky, you can add a little more flour, just one tablespoon at a time. The goal is a soft, slightly sticky dough that’s still manageable.
Step 3: Knead The Dough
Kneading is what develops the gluten and gives our rolls that classic chewy, soft structure. If using a mixer, just let it continue kneading the dough for about five minutes. If you’re doing it by hand, turn the dough out onto a lightly floured surface. Knead for about five to seven minutes. It should become smooth, elastic, and spring back when you poke it. Don’t be afraid to get your hands in there!
Step 4: The First Rise
This part is all about patience. Lightly grease a large bowl with oil or a bit of nonstick spray. Place your beautiful ball of dough inside, and turn it over once to coat it lightly with the oil. This prevents a dry skin from forming on top. Cover the bowl with plastic wrap or a clean kitchen towel.
Find a warm, draft free spot in your kitchen and let the dough rise for about one to two hours. You’re looking for it to double in size. A little patience here pays off big time in the final texture of your rolls.
Step 5: Shape The Rolls
Once the dough has doubled, it’s time for the fun part. Gently punch down the dough to release the air. Transfer it to a lightly floured surface and divide it into 14 to 16 equal pieces. I like to use a kitchen scale for this to make sure they’re all uniform, but you can definitely just eyeball it.
Roll each piece into a smooth little ball. A great trick is to cup your hand over the dough and roll it on the counter. Arrange the dough balls in a greased nine by thirteen inch baking pan or a large cast iron skillet. Placing them close together helps them rise up instead of out, creating those classic pull apart sides.
Step 6: The Second Rise
We’re almost there! Cover the pan of rolls again and let them rise for another hour or so. They should get nice and puffy and be touching each other. This second rise ensures a super light and airy final product. Don’t skip it!
Step 7: Bake The Rolls
Preheat your oven to 350 degrees F (177 C). Bake the rolls for 20 to 25 minutes. They should be a beautiful golden brown on top. It’s a good idea to rotate the pan about halfway through baking to ensure they cook evenly. If you notice the tops are browning a little too quickly, you can loosely tent a piece of foil over them.
Step 8: The Finishing Touch
As soon as you pull the pan from the oven, it’s time for the grand finale. Brush the tops of the hot rolls with that glorious melted butter and honey mixture. This gives them a lovely shine and an extra touch of sweetness. The smell at this point is simply divine. Let them cool for a few minutes in the pan before serving them warm. Enjoy your amazing Easy Fluffy Dinner Rolls from Scratch!


How To Store Leftovers
If you happen to have any leftovers, which is a big if, storing them is simple. Make sure the rolls have cooled completely to room temperature first. This prevents them from getting soggy from condensation.
You can store them in an airtight container or a zip top bag at room temperature for up to three days. They will stay surprisingly soft and fresh. For longer storage, you can refrigerate them for up to a week.
These Fluffy Dinner Rolls also freeze beautifully. Wrap them tightly in plastic wrap and then place them in a freezer safe bag. They can be frozen for up to three months. To reheat, you can let them thaw at room temperature or warm them gently in the oven or microwave.
Tips
Want to make your rolls even better? Here are a few little tricks I’ve learned. First, for an even richer flavor, you can use bread flour instead of all purpose flour. Bread flour has a higher protein content, which gives the rolls a slightly chewier texture. Both work great, so use what you have!
Don’t rush the rising process. Finding a warm place is key. I sometimes turn my oven on to the lowest setting for just a minute, then turn it off and place my dough bowl inside with the door cracked. It creates a nice cozy environment for the yeast to do its thing.
Feel free to get creative with the toppings. The honey butter glaze is classic, but you could also brush them with plain melted butter and a sprinkle of flaky sea salt. For savory rolls, add some garlic powder or dried herbs like rosemary to the butter topping.
If you want to make these ahead, you can prepare the dough through the first rise and shaping step. Arrange the rolls in the pan, cover them tightly, and refrigerate for up to 24 hours. When you’re ready to bake, let them sit at room temperature for about an hour to finish their second rise before baking as directed. It’s a great way to prep for a big dinner.
Conclusion
Making bread at home doesn’t have to be intimidating. This recipe for Easy Fluffy Dinner Rolls from Scratch is proof of that. With just a few simple ingredients and a little bit of time, you can create the most wonderfully Soft Dinner Rolls that will disappear from the dinner table in minutes.
There is so much joy to be found in the process of baking, and the reward is a batch of warm, buttery rolls that bring comfort and happiness to any meal. So go ahead, give this Easy Dinner Rolls Recipe Quick a try. I promise you’ll be so proud of the delicious results. Happy baking!
FAQ
Can I Use Active Dry Yeast Instead Of Instant?
Yes, you absolutely can. The main difference is that active dry yeast needs to be proofed in the warm milk and sugar for a bit longer, usually about 10 minutes, until it’s very foamy. The rest of the recipe remains the same.
How Do I Know If My Yeast Is Active?
After you mix the yeast with the warm milk and sugar, let it sit for five to ten minutes. If the mixture becomes foamy or bubbly, your yeast is active and good to go. If nothing happens, the yeast is likely expired and your dough won’t rise properly.
Can I Make These Rolls Without A Stand Mixer?
Of course! A stand mixer makes it a bit easier, but it’s not necessary. You can mix the dough with a wooden spoon or a spatula in a large bowl, and then knead it by hand on a lightly floured surface. It’s a great little workout!
Why Didn’t My Dough Rise?
There are a few common reasons. Your yeast may have been old or inactive. The milk might have been too hot, which can kill the yeast. Or, the room where you let it rise might have been too cold. Yeast loves a warm, cozy environment to thrive.
Can I Make The Dough Ahead Of Time?
Yes, this is a great recipe to make ahead. After you’ve shaped the rolls and placed them in the pan, you can cover them tightly with plastic wrap and refrigerate them for up to 24 hours. When you’re ready, let them sit at room temperature for an hour to complete their second rise before baking.
Easy Fluffy Dinner Rolls from Scratch
A simple recipe for homemade dinner rolls that are wonderfully soft, light, and airy. These classic, fluffy rolls are easy to make from scratch and are the perfect companion for any meal.
Ingredients
Instructions
- Whisk together warm milk, yeast, and 1 tbsp of sugar. Let sit for 5 minutes until foamy.
- Add the remaining sugar, egg, softened butter, salt, and 1 cup of flour. Mix to combine, then add the remaining 2 cups of flour and beat for 2 minutes until a soft dough forms.
- Knead the dough on a floured surface for 5-7 minutes until smooth. Place in a greased bowl, cover, and let rise for 1-2 hours until doubled.
- Punch down the dough, divide into 15 pieces, and roll into balls. Arrange in a greased 9×13 inch baking pan.
- Cover and let rise for another hour until puffy.
- Preheat oven to 350°F (177°C). Bake for 20-25 minutes until golden brown.
- Brush the hot rolls with a mixture of melted butter and honey. Serve warm.
Notes
For a richer flavor and chewier texture, you can use bread flour instead of all-purpose flour.
Ensure your rising location is warm and draft-free to help the yeast work effectively.
This dough can be made ahead. After shaping, cover the pan tightly and refrigerate for up to 24 hours. Let sit at room temperature for 1 hour before baking.
Nutrition
Calories
Sugar
Fat
Carbs