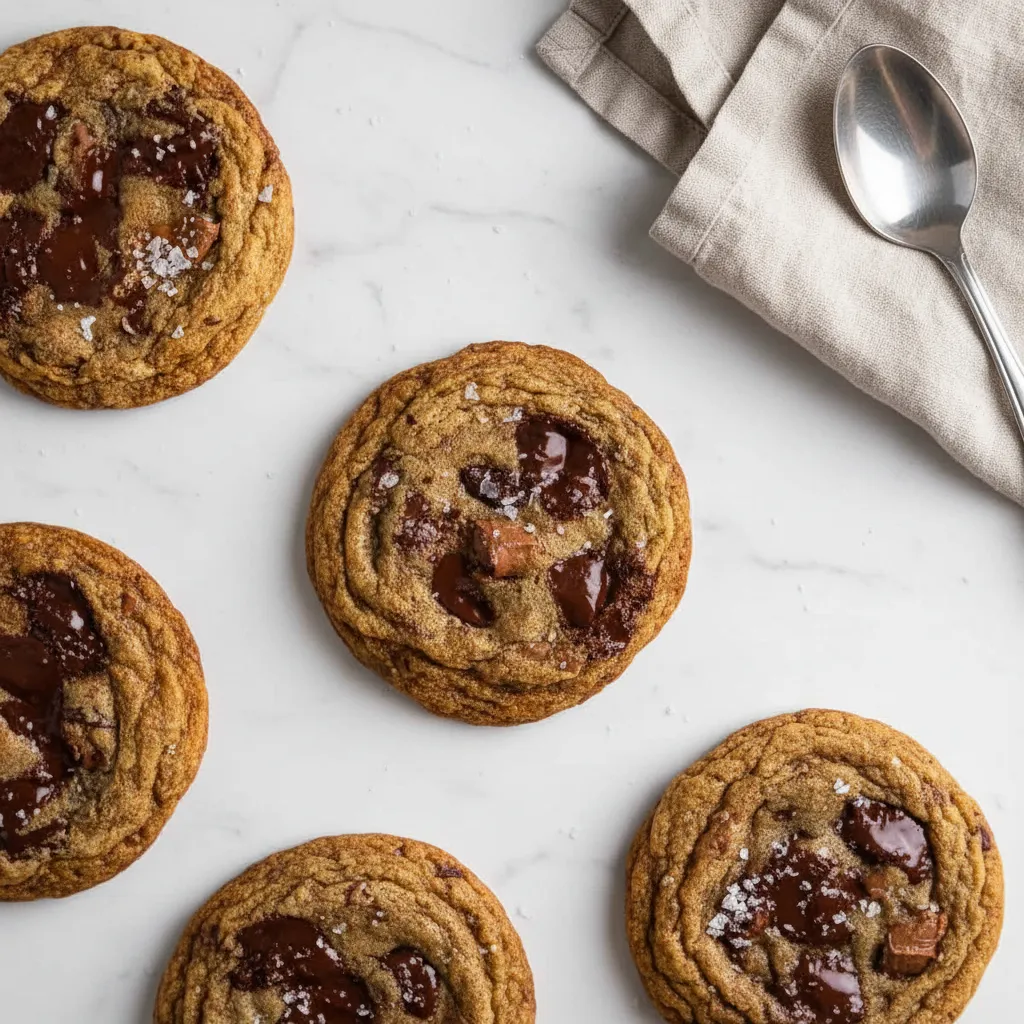
Graduation day is a massive achievement, a moment worth celebrating in style! You’ve cheered them on through late-night study sessions and countless exams. Now, it’s time to mark this incredible milestone with something sweet, personal, and totally memorable. Forget the usual store-bought stuff; let’s talk about making your own showstopping “graduation cookies”!
Whether you’re a seasoned baker or just starting out, these “graduation cookies” are surprisingly simple to make. We’re talking about delicious, customizable “diploma sugar cookies decorated” that will have everyone asking for the recipe. Get ready to impress your grad and their friends with some seriously fun “Diy Graduation Cookie Ideas”!
Why You’ll Love This Recipe
Honestly, who doesn’t love a cookie that looks as good as it tastes? These “graduation cookies” are perfect because they’re totally adaptable. You can play with colours to match school themes or just go wild with bright, celebratory hues. Plus, they’re a fantastic way to add a personal touch to any graduation party or gift basket. And the best part? They’re budget friendly too!
Think about it: a batch of these “grad cookies” is way more meaningful than a generic card. They’re a sweet gesture that shows you really put thought into celebrating your graduate’s success. They’re also super fun to make, especially if you get the whole family involved in the decorating process. It’s a great activity that creates lasting memories.
Ingredients
For the Diploma Cookies
- 225g unsalted butter, softened
- 150g caster sugar
- 1 large egg
- 1 tsp vanilla extract
- 375g plain flour
- 1/2 tsp salt
For the Royal Icing Decorations
- 500g icing sugar
- 3 tbsp meringue powder
- 6 tbsp warm water
- Food colouring (your choice of colours!)
Step-By-Step Instructions
Step 1: Cream the Butter and Sugar
Grab a big bowl. Add your softened butter and caster sugar. Cream them together until the mixture is light and fluffy. This is where the magic starts! A good creaming ensures a tender cookie base.
Step 2: Add Wet Ingredients
Next, beat in the large egg and vanilla extract. Mix until everything is nicely combined. Don’t overmix at this stage; just ensure it’s all incorporated smoothly.
Step 3: Combine Dry Ingredients
In a separate, smaller bowl, sift together your plain flour and salt. This helps prevent lumps and distributes the salt evenly. Then, add these dry ingredients to the wet mixture.
Step 4: Form the Dough
Mix everything on a low speed. You want to reach a smooth dough. It shouldn’t be sticky, but it should hold together well. Once it’s formed, wrap the dough tightly in cling film.
Step 5: Chill the Dough
Pop the wrapped dough into the refrigerator. Let it chill for at least one hour. This step is crucial! Chilling makes the dough easier to handle and roll out, preventing it from spreading too much while baking.
Step 6: Prepare for Baking
Preheat your oven to 180°C (that’s 160°C fan or gas mark 4). Grab two baking sheets and line them with parchment paper. This makes cleanup a breeze and stops the cookies from sticking.
Step 7: Roll and Cut the Dough
Lightly flour your work surface. Roll out the chilled dough to about 5mm thickness. Now, get creative with your cutters! For that diploma look, cut the dough into rectangular shapes. Aim for a size that’s easy to handle and decorate.
Step 8: Bake the Cookies
Carefully place the cut cookies onto your prepared baking sheets. Bake them for 10 to 12 minutes. You’re looking for the edges to just start turning a light golden colour. Don’t overbake them; we want them tender!
Step 9: Cool Completely
Once baked, let the cookies cool on the baking sheets for a couple of minutes before transferring them to a wire rack. They need to cool completely before you even think about decorating. Patience is key here!
Step 10: Make the Royal Icing
While the cookies cool, let’s whip up the icing. In a clean bowl, whisk together the icing sugar, meringue powder, and warm water. Keep whisking until you achieve stiff peaks. This means the icing will hold its shape when you lift the whisk.
Step 11: Colour the Icing
Divide the royal icing into smaller bowls. Now for the fun part! Add your chosen food colouring to each bowl to create vibrant ribbon and tassel colours. Think school colours, or just bright, celebratory shades!
Step 12: Decorate Your Diplomas
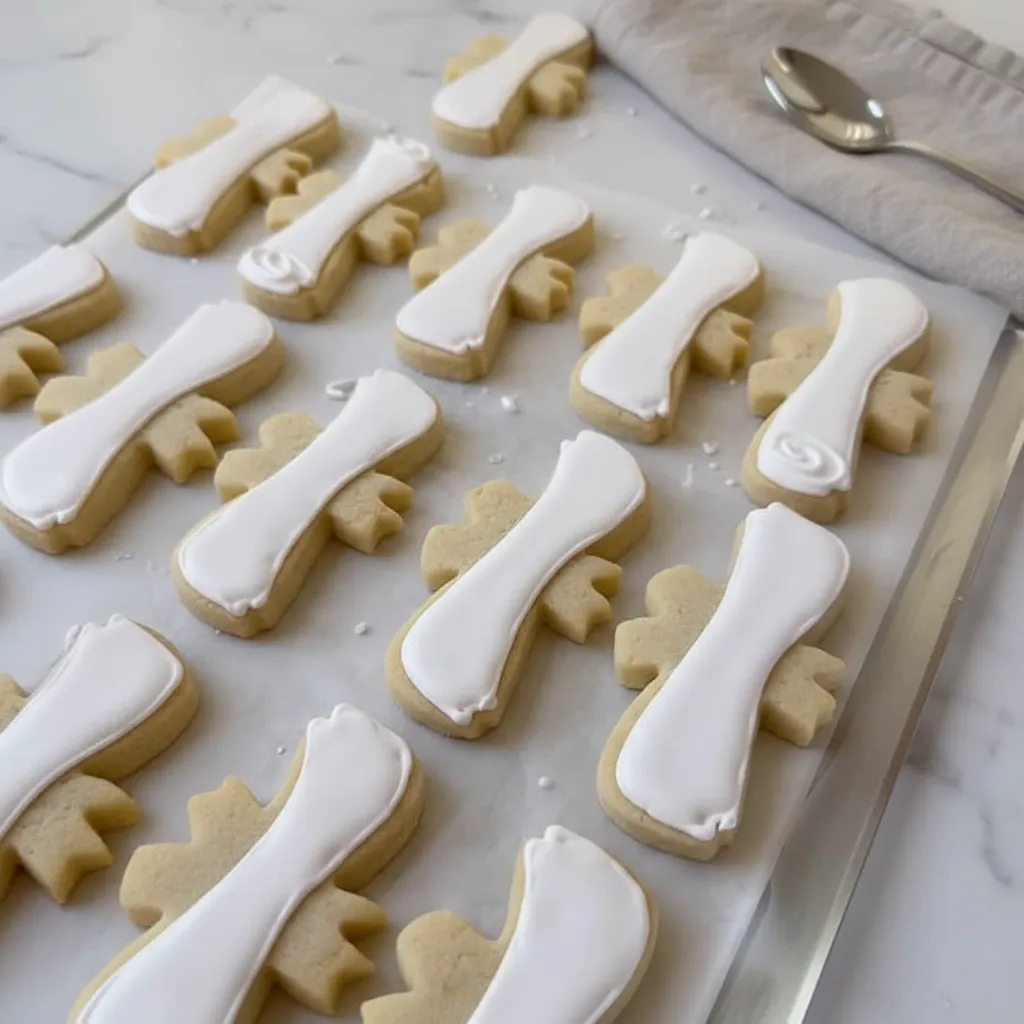
Spoon some white icing into a piping bag fitted with a small round tip. Pipe a base layer of white icing onto your rectangular cookies, making them look like rolled paper scrolls. Let this layer set slightly.
Step 13: Add the Finishing Touches
Now, use your coloured icings in separate piping bags. Pipe a contrasting coloured ribbon across the centre of the white icing. Finish it off with a little piped tassel at one end to really nail that diploma look. These “graduation biscuits” are going to be a hit!
How To Store Leftovers
Got any leftover “graduation cookies”? Lucky you! Store them in an airtight container at room temperature. They should stay fresh and delicious for up to a week. Make sure they are completely dry and cool before sealing the container to prevent any sogginess.
If you need to store them for longer, you can freeze them. Wrap them well in plastic wrap and then place them in a freezer-safe bag or container. They’ll keep for about 2-3 months. Thaw them at room temperature before serving.
Tips
For the best “Diy Graduation Cookie Decorations”, make sure your butter is truly softened, not melted. This is key for the right dough consistency. Also, don’t skip the chilling step; it really does make a difference.
When rolling the dough, use a light hand with the flour. Too much flour can make the cookies dry. If you don’t have rectangle cutters, you can simply cut them into squares or circles and decorate them with school logos or graduation caps instead. Get creative with your “Diy Graduation Cookie Ideas”!
For super smooth icing, sift your icing sugar twice. When piping, a steady hand goes a long way. If you mess up, don’t sweat it! You can often gently scrape off the icing and try again. Remember, these are “graduation cookies”, meant to be fun!
Conclusion
There you have it! Your very own batch of custom “graduation cookies” ready to celebrate your grad. These “diploma sugar cookies decorated” are more than just a treat; they’re a symbol of accomplishment and a sweet way to say ‘congratulations’. They’re a perfect example of how “Diy Graduation Cookie Ideas” can bring so much joy and personality to any celebration.
So go ahead, bake with love, decorate with pride, and make this graduation even more special. These “Grad Cookies” are sure to be a cherished part of the celebration. Happy baking!
FAQ
Can I make these “graduation cookies” ahead of time?
Absolutely! You can bake the cookies a few days in advance and store them in an airtight container. Decorate them a day or two before the event for the freshest look.
What if I don’t have meringue powder for the icing?
You can try using pasteurized egg whites instead, but meringue powder is generally more stable and easier to work with for royal icing. If using raw egg whites, be sure they are pasteurized for safety.
How do I get my icing to be the right consistency for piping?
The key is the ratio of liquid to powder. Start with the recommended amount of water and add more a tiny bit at a time if needed. You want it thick enough to hold its shape but fluid enough to pipe smoothly.
Are there other “Graduation Cookie Ideas” besides diplomas?
Definitely! You could make graduation cap cookies, number cookies for the graduation year, or even cookies shaped like the school mascot. “Diy Graduation Cookie Decorations” are all about personalization!
Graduation Diploma Sugar Cookies
Celebrate the big day with these tasty, no-fuss diploma sugar cookies. They are easy to bake, customizable with school colors, and perfect for graduation parties!
Requirements


Ingredients
Instructions
- Grab a big bowl. Cream the softened butter and caster sugar together until the mixture is light and fluffy. A good creaming ensures a tender cookie base.
- Beat in the large egg and vanilla extract. Mix until everything is nicely combined, but be careful not to overmix.
- In a separate bowl, whisk together the plain flour and salt. Add these dry ingredients to the wet mixture and mix on low speed until a smooth dough forms.
- Wrap the dough tightly in plastic wrap and chill in the refrigerator for at least one hour. This prevents spreading while baking.
- Preheat your oven to 180°C (350°F). Line two baking sheets with parchment paper for easy cleanup.
- Lightly flour your work surface. Roll out the chilled dough to about 5mm thickness. Cut the dough into rectangular shapes to resemble diplomas.
- Place cookies onto the prepared baking sheets. Bake for 10 to 12 minutes until the edges just start turning a light golden color. Cool completely on a wire rack.
- While cookies cool, whisk the icing sugar, meringue powder, and warm water until stiff peaks form.
- Divide the icing into bowls and tint with food coloring to match your school colors.
- Pipe a white base layer on the rectangle cookies to look like a rolled scroll. Once set, pipe a colored ribbon and tassel.
Notes
Ensure your butter is softened, not melted, to get the right dough consistency.
Chilling the dough is a crucial step; do not skip it or the cookies may spread too much.
Sift your icing sugar twice to ensure the royal icing is super smooth for piping.
Store leftovers in an airtight container at room temperature for up to a week, or freeze for 2-3 months.
Nutrition
Calories
Sugar
Fat
Carbs