Birthdays are a big deal, right? It’s your special day, or maybe you’re planning one for a loved one. You want it to be memorable, delicious, and maybe a little bit fancy. But let’s be real, sometimes the thought of baking from scratch can feel a bit daunting, especially when you’re aiming for that perfect birthday cake.
Well, get ready to ditch the stress and embrace the fun! Today, we’re diving into a recipe that’s designed to give you that showstopper birthday cake you’ve been dreaming of, without needing a professional bakery setup. It’s all about making it achievable and incredibly rewarding. Let’s get baking!
Why You’ll Love This Recipe
This isn’t just any birthday cake recipe. It’s a blueprint for a delicious, moist chocolate cake with a dreamy frosting and a touch of decadent ganache. It’s perfect for those celebrating their Golden Era Birthday or anyone wanting a truly special treat.
You’ll love it because it feels indulgent but is surprisingly straightforward. Plus, it’s totally customizable. Think of it as your canvas for a Dream Birthday Cake. It’s a fantastic way to make your Happy Birthday To Me Gold moment extra special.
Ingredients
For the Cake
- 2 cups Whole Wheat Flour
- 1/3 cup Cocoa Powder
- 2 cups Unrefined Cane Sugar
- 1 teaspoon Himalayan Pink Salt
- 1 teaspoon Baking Powder
- 2 teaspoons Baking Soda
- 2 extra-large Eggs, room temperature
- 1 1/3 cups Buttermilk, room temperature
- 2/3 cup Coconut Oil, melted
- 3/4 cup Hot Water
For the Frosting
- 2 cups Fine Raw Cane Sugar
- 6 Egg Whites, room temperature
- 3 cups (6 sticks) Salted Butter, room temperature
- 1 teaspoon alcohol-free vanilla extract
- 1/3 cup Cocoa Powder
For the Chocolate Ganache
- 3/4 cup Dark Chocolate Chips
- 2 tablespoons Butter
For Assembly & Garnish
- Chocolate Hazelnut Spread (store-bought or homemade)
- 8-10 Chocolate Hazelnut Truffles (e.g., Ferrero Rocher)
Step-By-Step Instructions
For the Cake
Step 1: Prepare Your Pans and Oven
First things first, let’s get the oven preheated to 325°F. Grab three six-inch round cake pans. Brush them with some melted coconut oil, then line the bottoms with parchment paper rounds. Give the parchment a little oil brush too. Set these aside.
Step 2: Mix the Dry Ingredients
In a big mixing bowl, combine your flour, sugar, cocoa powder, baking soda, baking powder, and salt. Give them a good whisk to make sure everything’s nicely mixed.
Step 3: Combine Wet Ingredients
In a separate bowl, whisk together the eggs, melted coconut oil, and buttermilk. Pour this liquid mixture into the bowl with your dry ingredients. Stir until it’s just combined. Don’t overmix!
Step 4: Add Hot Water
Now, pour in the hot water. Whisk everything until the batter is smooth and looks lovely. This step really helps create a wonderfully moist cake.
Step 5: Fill the Pans
Divide your cake batter evenly among the three prepared pans. Make sure each pan has about the same amount of batter for even baking.
Step 6: Bake to Perfection
Bake for about 25 to 30 minutes. You’ll know they’re ready when the tops feel firm. A toothpick inserted into the center should come out with a few moist crumbs attached – that’s perfect!
Step 7: Cool and Level
Let the cakes cool in their pans for about 10 minutes. Then, carefully run a knife around the edges and remove them from the pans. Use a serrated knife to gently level the tops of each cake layer. Wrap them in plastic wrap and pop them in the freezer on a level surface.
For the Frosting
Step 1: Prepare the Double Boiler
Get a saucepan with about an inch of water and bring it to a simmer over medium-high heat. Find a metal or glass bowl that fits snugly on top of the pan without touching the water.
Step 2: Dissolve the Sugar
Put the egg whites and sugar into the bowl over the simmering water. Whisk constantly for several minutes. You want the mixture to be hot to the touch and the sugar completely dissolved. Test it by rubbing a little between your fingers; it should feel smooth, not gritty.
Step 3: Whip to Stiff Peaks
Transfer this warm mixture to your electric stand mixer bowl. Whisk on medium speed until the mixture has cooled down completely. Then, crank it up to high speed until stiff peaks form. This creates a lovely, stable meringue base.
Step 4: Add the Butter
With the mixer still running on medium speed, gradually add the softened butter, one tablespoon at a time. Keep going until all the butter is incorporated and the frosting is thick and creamy. This is your Swiss meringue buttercream!
Step 5: Add Flavor
Now, add the cocoa powder and the alcohol-free vanilla extract. Mix on low speed until everything is evenly distributed and you have a gorgeous chocolate frosting.
For the Chocolate Ganache
Step 1: Melt Ingredients
In a small saucepan, combine the dark chocolate chips and butter. Heat gently over medium heat. Stir constantly as the chips begin to melt. Keep stirring until you have a smooth, pourable mixture. Remove from heat and let it cool just a bit.
To Assemble the Cake
Step 1: Prepare Cake Layers
Take your cake layers out of the freezer. Gently peel off the parchment paper rounds from the bottoms.
Step 2: First Layer and Spread
Place one cake layer onto your cake stand or serving plate. Spread an even layer of chocolate hazelnut spread over the top. This adds a wonderful hidden flavor!
Step 3: Add More Layers
Carefully place the second cake layer on top of the first. Spread another even layer of chocolate hazelnut spread. Then, add the final cake layer, making sure the bottom side is facing up for a nice, flat top surface.
Step 4: The Crumb Coat
Apply a very thin layer of your chocolate frosting all over the cake. This is called a crumb coat, and it helps trap any loose crumbs, giving you a smoother finish later. Don’t worry if it looks messy.
Step 5: Main Frosting Application
Now, frost the entire cake with the remaining frosting. Reserve about 1 cup for later. Use a bench scraper or offset spatula to smooth the top and sides. Because the cake layers are frozen, the frosting should set up pretty quickly.
Step 6: Watercolor Effect
Once the main frosting layer is cold and firm, add a few random swipes of chocolate hazelnut spread around the cake. Gently smooth these out with your spatula to create a beautiful, subtle watercolor effect.
Step 7: Drizzle the Ganache
Drizzle the slightly cooled chocolate ganache over the top of the cake, letting it cascade down the sides. This adds a lovely glossy finish. Pop the cake in the fridge to let the ganache set.
Step 8: Piping the Borders
When the ganache is set, take the cake out of the fridge. Put the reserved frosting into a piping bag fitted with a large French star tip. Pipe decorative rounds of frosting around the top edge of the cake.
Step 9: Add the Truffles
Place one chocolate hazelnut truffle on top of each piped frosting mound. They add a lovely texture and look!
Step 10: Chill and Serve
Refrigerate the finished birthday cake until you’re ready to serve. This helps everything meld together beautifully.
How To Store Leftovers
If, by some chance, you have leftover birthday cake, keep it stored in an airtight container in the refrigerator. It should stay wonderfully moist and delicious for about 3 to 4 days. Just let it sit at room temperature for about 15-20 minutes before serving for the best texture.
Tips
For a truly impressive Grown Up Birthday Idea, consider adding a touch of liqueur to your chocolate hazelnut spread or ganache. A splash of coffee liqueur or even a good bourbon can elevate the flavors.
If you’re not a fan of hazelnut, feel free to use a good quality chocolate fudge frosting or even a raspberry jam between the layers. This cake is all about making it your own, a true Dream Birthday Cake.
Remember those room temperature ingredients for the cake? They are key for a smooth batter and a perfectly baked cake. Don’t skip that step!
For those celebrating their 25th Birthday Golden Year or a Forever Golden Birthday, this chocolate creation is perfect. You can even add edible gold dust or flakes for an extra touch of glam, leaning into those Bday Aesthetics.
Conclusion
There you have it – a stunning, delicious homemade birthday cake that’s perfect for any celebration. It’s a recipe that proves you don’t need to be a pastry chef to create something truly special. So go ahead, bake this beauty, and make that birthday extra golden!
FAQ
Can I make this cake ahead of time?
Yes, you absolutely can! The cake layers can be baked a day or two in advance, wrapped well, and stored at room temperature or in the fridge. The frosting can also be made a day ahead and stored in the fridge, then brought back to room temperature and re-whipped.
Can I use a different type of flour?
While whole wheat flour adds a nice depth, you can try using all-purpose flour if preferred. You might need to adjust the liquid slightly. For gluten-free needs, a good gluten-free all-purpose blend should work, but baking times might vary.
My frosting looks curdled, what happened?
This can happen if the butter is too cold or too warm, or if it’s added too quickly. If it looks curdled, try gently warming the bowl over a double boiler for a minute or two, or chilling the bowl for a few minutes, then re-whipping. Patience is key with buttercream!
Can I make this dairy-free?
The cake itself can be made dairy-free by using a dairy-free buttermilk substitute (like almond milk with a splash of vinegar) and ensuring your chocolate hazelnut spread is dairy-free. The frosting is butter-based, so a dairy-free version would require a different frosting recipe, perhaps using vegan butter or a different style of frosting.
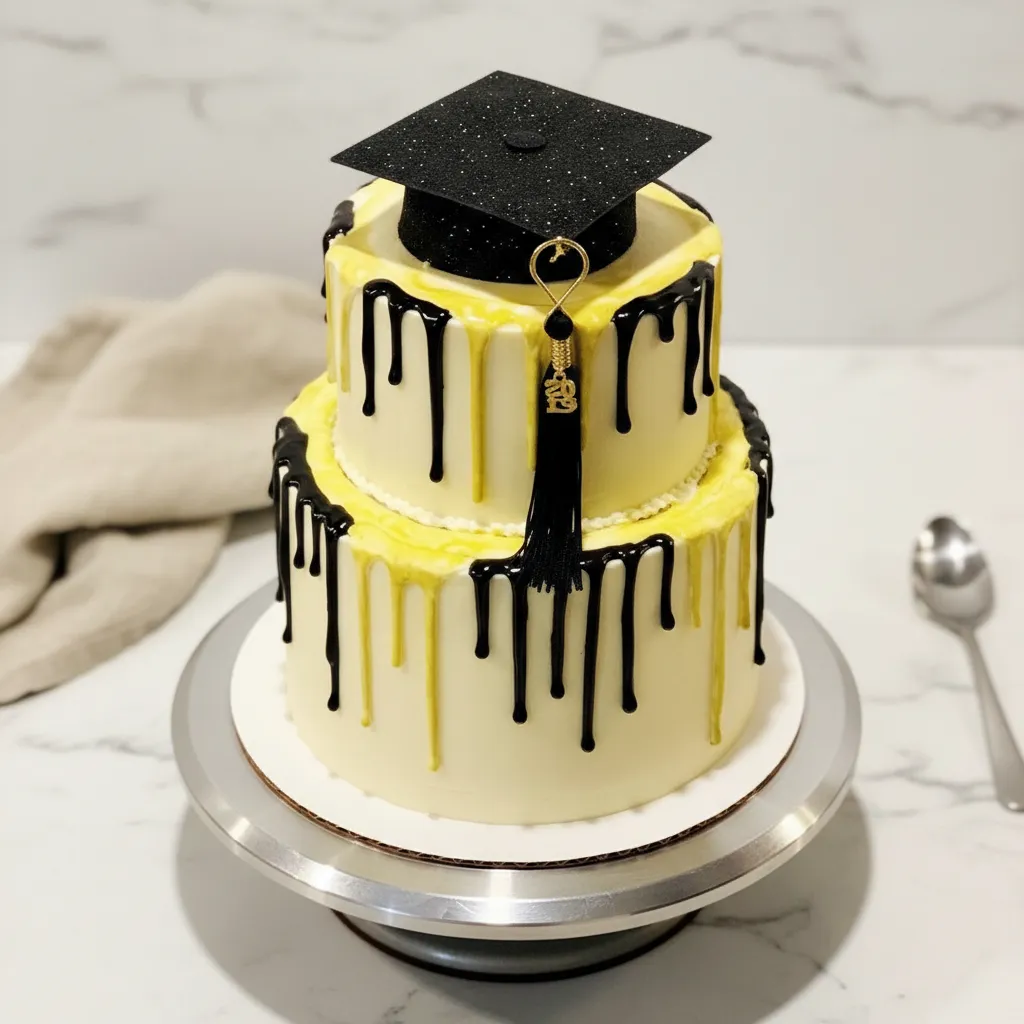
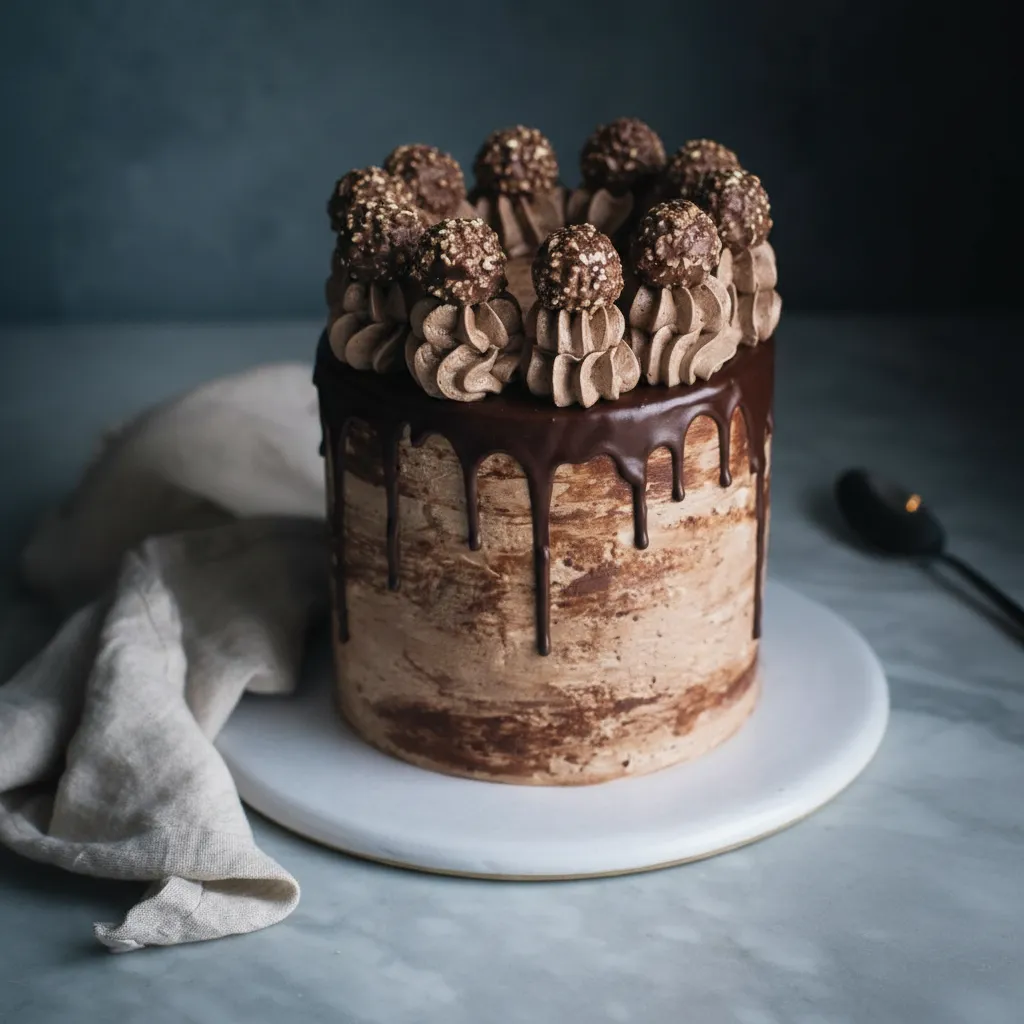
Golden Birthday Chocolate Cake
Ditch the bakery stress! This easy, one-bowl style chocolate cake is perfect for busy parents or anyone wanting a homemade “Golden Birthday” treat. It’s moist, rich, and surprisingly fast to pull together, giving you a stunning centerpiece without the fuss.
Requirements


Ingredients
Instructions
- Preheat your oven to 325°F. Brush three 6-inch round cake pans with coconut oil and line the bottoms with parchment paper rounds.
- In a large 5-Quart Mixing Bowl, combine the flour, sugar, cocoa powder, baking soda, baking powder, and salt. Use a Stainless Steel Whisk to ensure everything is nicely mixed.
- In a separate bowl, whisk together the eggs, melted coconut oil, and buttermilk. Pour this into the dry ingredients and stir until just combined.
- Pour in the hot water and whisk until smooth. Divide the batter evenly among the three pans and bake for 25-30 minutes, or until the tops are firm. Cool in pans for 10 minutes, then remove, level the tops, and freeze the layers.
- For the frosting: Whisk egg whites and sugar in a bowl over simmering water until hot and dissolved. Transfer to a Small Stand Mixer and whip on high speed until stiff peaks form.
- Slowly add the softened butter one tablespoon at a time while mixing. Once thick and creamy, mix in the cocoa powder and Pure Vanilla Extract on low speed.
- For the ganache: Melt the dark chocolate chips and butter in a small saucepan over medium heat, stirring constantly until smooth. Let it cool slightly.
- To assemble: Spread hazelnut spread between the frozen cake layers. Apply a crumb coat of frosting, then frost the entire cake using an Offset Spatula.
- Create a watercolor effect with swipes of hazelnut spread, drizzle the ganache over the top, pipe decorative borders, and top with truffles. Refrigerate until ready to serve.
Notes
Using room temperature ingredients (eggs, buttermilk, butter) is crucial for a smooth batter and perfectly emulsified frosting.
If you want to elevate the flavor for adults, add a splash of coffee liqueur or bourbon to the chocolate hazelnut spread or ganache.
The cake layers can be baked a day in advance and frozen. The frosting can also be made ahead and re-whipped before use.
If the frosting looks curdled while adding butter, don’t panic. Gently warm the bowl or keep whipping; it will come together!
Nutrition
Calories
Sugar
Fat
Carbs