I still remember the first time I tried making homemade dairy-free ice cream. Let’s just say it was a frosty, icy disaster. For years, I thought rich, creamy, scoop-shop-worthy ice cream was just something I had to give up. Then, the Ninja Creami entered my kitchen, and honestly, it changed everything. If you’re tired of disappointing store-bought options and want to create amazing frozen desserts at home, you’ve come to the right place. These dairy free Ninja Creami recipes are your ticket to sweet, creamy freedom.
After countless pints of trial and error, some great, some… well, let’s not talk about those, I’ve figured out the secrets to making unbelievably good dairy-free treats. It’s not just about swapping cow’s milk for almond milk; there’s a little bit of science and a whole lot of fun involved. This guide will walk you through everything, from picking the right ingredients to troubleshooting those pesky issues that pop up. Get ready to make the best homemade ice cream of your life.
Jump To:
Why You’ll Love This Dairy Free Ninja Creami Recipes
 18")
Seriously, what’s not to love? Once you get the hang of this basic formula, a whole world of flavor opens up.
- It’s unbelievably simple. We’re talking about a handful of ingredients and a few button presses. The hardest part is just waiting for the base to freeze!
- You control everything. Want it sweeter? Less sweet? Packed with protein? You get to be the boss of your own dessert. No more reading labels to hunt for hidden dairy or weird additives.
- It’s allergy-friendly. This recipe is naturally dairy-free and can easily be made vegan, gluten-free, and nut-free depending on the milk and
protein powderyou choose. - The texture is incredible. Forget icy, hard-as-a-rock vegan ice cream. The Ninja Creami works its magic to create a smooth, rich, and creamy texture that’s almost too good to be true.
 19")
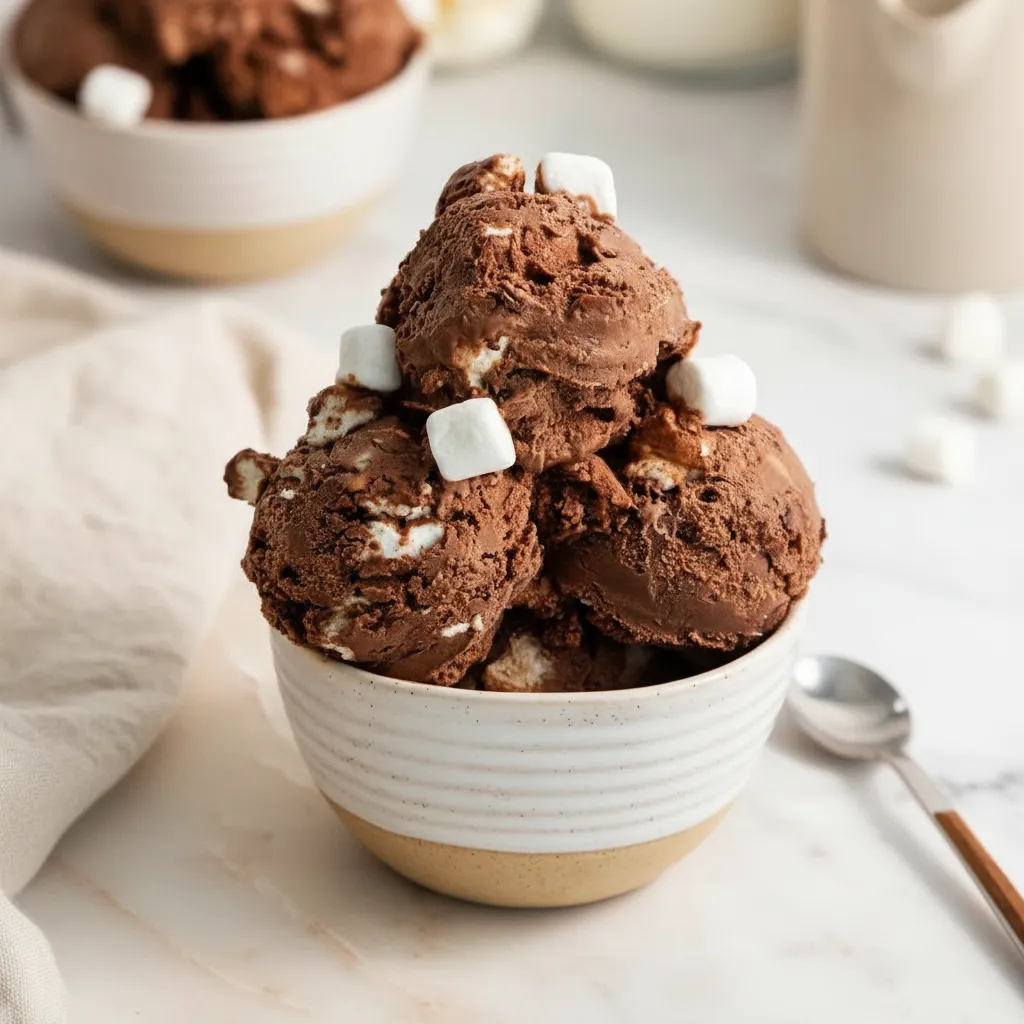
Dairy Free Ninja Creami Chocolate Recipe
A dairy-free spin on the Ninja Creami trend! Rich vegan chocolate ice cream sweetened with dates, healthy and high-protein, ready in minutes!
- Total Time: 8 hours 10 minutes
- Yield: 1 serving 1x
Ingredients
1 cup (240g) cashew milk (or almond milk)
1/2 cup (120g) full-fat coconut milk
2 scoops (40g) chocolate protein powder
2–3 (65g) pitted medjool dates
2 tbsp (12g) cocoa powder
1/8 tsp salt
1/2 tsp vanilla extract
Optional: 1 tbsp (16g) Chocolate SunButter, peanut butter, or tahini
Instructions
1. Blend all the ingredients until smooth.
2. Pour into a Ninja Creami container and freeze overnight.
3. Process on the “light ice cream” setting, it will be powdery at this point.
4. Add a splash of milk (preferably coconut) and “re-spin” once or twice as needed.
5. Add mix-ins of choice, and process on the “mix-in” setting. Enjoy!
Notes
For the best texture, use the RE-SPIN function after the initial blend.
Ensure you use enough fat, like full-fat coconut milk or a tablespoon of nut butter, to prevent an icy texture.
Blending in dates instead of syrup adds extra thickness and natural sweetness.
- Prep Time: 10 minutes
- Freeze Time: 8 hours
- Category: Ninja Creami Recipes
- Method: frozen
- Cuisine: american
Nutrition
- Serving Size: 1 serving
- Calories: 679
- Sugar: 35.5 g
- Sodium: 515.1 mg
- Fat: 35.9 g
- Saturated Fat: 21.7 g
- Trans Fat: 0 g
- Carbohydrates: 142.6 g
- Fiber: 69.8 g
- Protein: 38.2 g
- Cholesterol: 0 mg
 20")
 22")
 23")
 24")
Ninja Swirl by CREAMi Ice Cream and Soft Serve Maker, Sorbet, Milkshake, Frozen Yogurt, Low Calories Program & More, 13-in-1, Soft Serve Handle, (2) CREAMi Swirl 16oz Pints, For Kids & ALL ages, NC701
Deal price: $299.95
You save 14%
As an Amazon Associate, I earn from qualifying purchases. Pricing and availability may change.
Ingredients You’ll Need
 25")
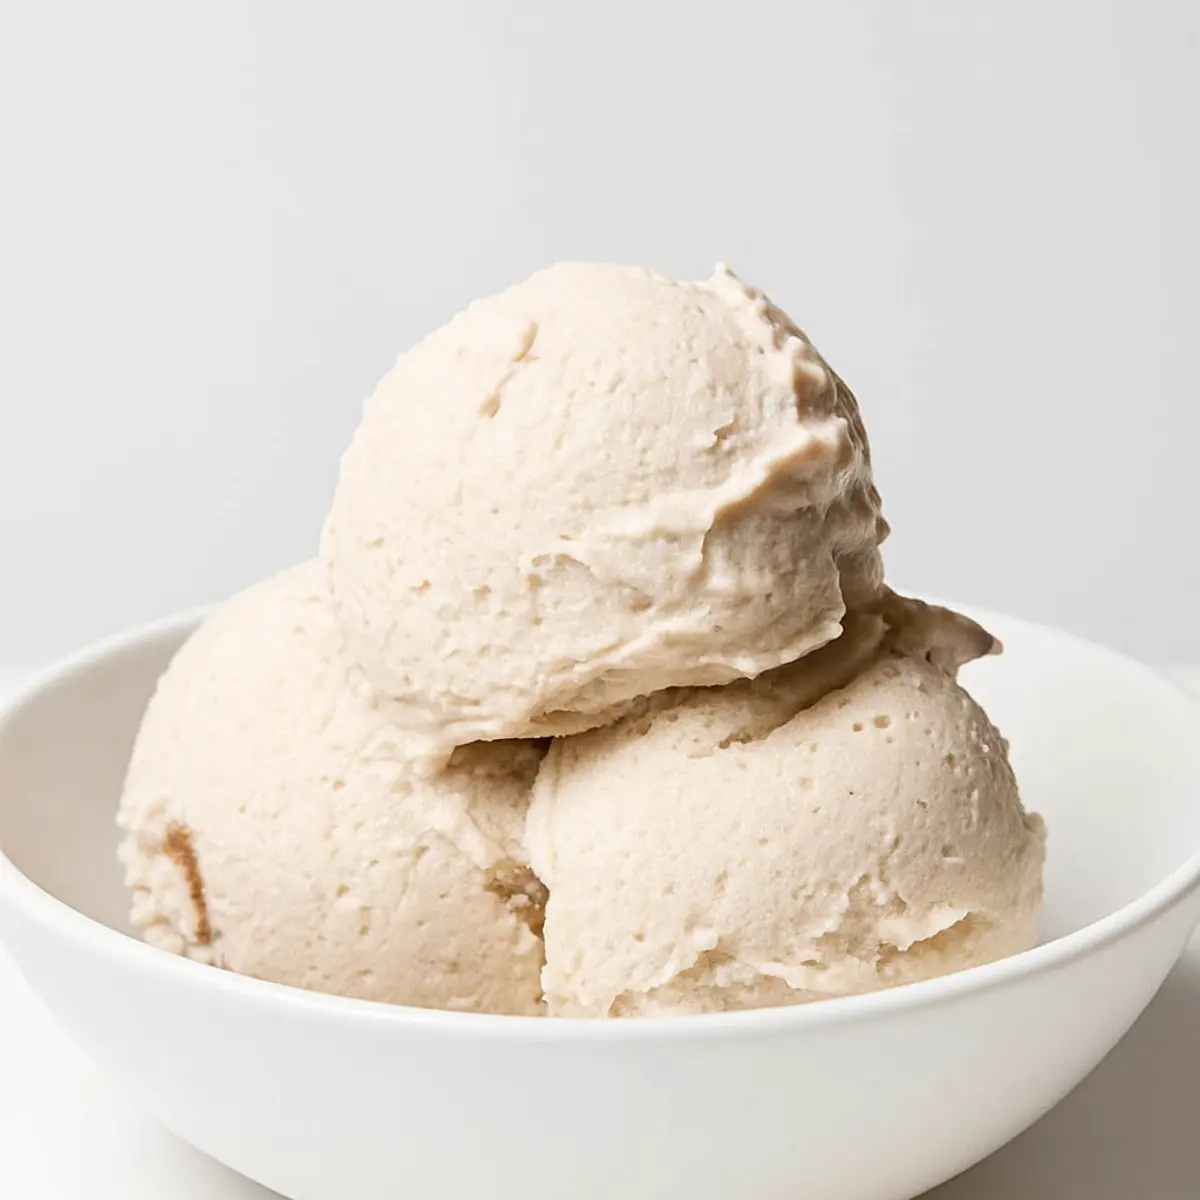
Let’s start with the basics. This is my go-to base recipe that you can customize in a million different ways.
- Non-Dairy Milk: 1 ¾ cups. This is the star of the show! (We’ll talk more about which one to pick in a second).
- Sweetener: 3-4 tablespoons of maple syrup, agave, or your favorite liquid sweetener. You can also use granulated sugar like coconut sugar, but make sure it dissolves completely.
- Protein Powder: 1 scoop (about 30g) of a plant-based protein powder
NIH(vanilla or unflavored works best). This is my secret weapon for creaminess! It acts as a binder and improves the texture dramatically. - Vanilla Extract: 1 teaspoon. Because everything is better with vanilla.
- A Pinch of Salt: Just a tiny bit to balance the sweetness.
- Optional Stabilizer: ¼ teaspoon of guar gum or xanthan gum
FDA. This is totally optional, but it helps prevent ice crystals and makes for an even smoother final product.
Choosing the Best Dairy-Free Milk (Almond, Oat, Cashew, Coconut)
 26")
Okay, here’s the thing: not all non-dairy milks are created equal when it comes to making ice cream. The key to a creamy texture is fat and protein content. The higher the fat, the richer and less icy your dairy free ice cream will be.
Here’s a quick rundown of the most popular options:
| Milk Type | Flavor Profile | Texture & Creaminess | Best For… |
| Coconut Milk (Canned) | Distinctly coconutty | Excellent. The high fat content makes for an incredibly rich and creamy base. Use the full-fat kind for the best results. | Rich, decadent flavors like chocolate, coffee, or tropical fruits. It’s the king of creaminess. |
| Cashew Milk | Neutral and creamy | Very Good. It has a decent amount of natural fat, leading to a smooth texture without a strong flavor. | Vanilla, caramel, or any flavor where you don’t want the milk to interfere. A fantastic all-rounder. |
| Oat Milk | Mildly sweet, oaty | Good. Look for “full-fat” or “barista blend” versions. These have added fats that help create a creamy consistency. | Cereal milk flavors, cinnamon, or anything warm and comforting. Avoid watery, low-fat versions. |
| Almond Milk | Slightly nutty, thin | Fair. It has the lowest fat and protein content, which can lead to an icier result. It works, but you’ll likely need a stabilizer or extra protein powder. | Lite ice cream or sorbet-style treats where a super-rich texture isn’t the main goal. |
My personal favorite for a truly decadent creami recipe? A blend! Try using one can of full-fat coconut milk and then topping it off with cashew or oat milk to reach your total liquid amount. It gives you the best of both worlds.
 27")
 28")
 29")
Step-by-Step Instructions
 30")
Ready to make some magic? It’s super easy.
Freezing Your Base
- Blend Your Ingredients: In a blender, combine your non-dairy milk, sweetener, protein powder, vanilla extract, salt, and guar gum (if using). Blend on high for about 30-60 seconds, or until everything is completely smooth. You don’t want any gritty bits from the protein powder.
- Fill the Pint: Pour the mixture into your Ninja Creami pint container. Be careful not to fill past the “Max Fill” line. If you do, the machine can get damaged.
- Freeze Solid: Secure the lid on the pint and place it in the freezer. Make sure it’s on a flat, level surface. Now for the hard part: let it freeze for a full 24 hours. I know, it’s tough to wait, but this step is non-negotiable for the machine to work properly.
Processing in the Ninja Creami
- Prep the Machine: Once your base is frozen solid, take it out of the freezer. Remove the lid from the pint and place the pint into the outer bowl of the Ninja Creami. Snap the outer bowl lid on (you’ll hear a click) and lock it into the machine base.
- First Spin: Turn the machine on and select the “Lite Ice Cream” function. Let it run through the full cycle.
- Check the Texture: When it’s done, take it out and look at the texture. More often than not, a dairy-free base will look a bit dry and powdery after the first spin. Don’t panic! This is totally normal.
- Re-Spin for Creaminess: If it’s crumbly, add a tablespoon of your non-dairy milk right on top. Place it back in the machine and hit the “Re-Spin” button. You might even need a second re-spin. This is where the magic happens! The mixture will transform from a powdery mess into a perfectly smooth and creamy ninja creami ice cream.
Adding Your Favorite Mix-ins
You can’t have ice cream without a good mix-in!
- Create a Well: After you’ve achieved a creamy texture, use a spoon to dig a small hole, about an inch wide, down the center of your ice cream.
- Add Your Goodies: Drop in your favorite mix-ins. Think dairy-free chocolate chips, crushed cookies, brownie bits, or frozen berries.
- Process Again: Put the pint back into the machine and select the “Mix-in” function. This cycle is much shorter and is designed to gently fold your additions into the ice cream without pulverizing them.
And that’s it! You can enjoy it straight away for a soft-serve consistency or pop it back in the freezer for an hour to firm up into a more scoopable ice cream.
Tips for the Creamiest Texture
Over my many, many pints of experimentation, I’ve learned a few tricks that make a huge difference.
- Don’t Skip the Protein Powder: I know some people want to avoid it, but the protein and emulsifiers in most powders really help bind the ice cream and prevent that dreaded icy texture. It’s a game-changer for dairy-free versions.
- A Little Fat Goes a Long Way: If your base seems a bit thin, adding a tablespoon of refined coconut oil or cashew butter before blending can add the richness needed for a creamier result.
- Make Sure Your Freezer is Cold Enough: A base that isn’t frozen completely solid won’t process correctly. Your freezer should be set to at least 0°F (-18°C)
USDA. - Patience with Re-Spins: Seriously, don’t give up after the first spin. That powdery texture is a normal part of the process for dairy free bases. The re-spin is what brings it all together.
Flavor Variations & Ideas
The base recipe is just a canvas. Here are a few ideas to get you started:
- Chocolate Decadence: Add 3 tablespoons of high-quality unsweetened cocoa powder to the base before blending. For mix-ins, try dairy-free chocolate chunks or brownie pieces.
- Mint Chip: Add ½ teaspoon of peppermint extract to the vanilla base. Use dairy-free chocolate chips or chopped dark chocolate as your mix-in. A drop of green food coloring is optional but fun!
- Strawberry Swirl: Blend ¼ cup of fresh or frozen strawberries into your base. For a swirl effect, add some chopped strawberries during the mix-in cycle.
- Coffee Kick: Dissolve 2 teaspoons of instant espresso powder in a tiny bit of hot water and add it to your base before blending. This makes for a fantastic protein ice cream pick-me-up.
Troubleshooting Common Issues (Icy, Powdery, Too Hard)
Let’s face it, sometimes things go wrong. Here’s how to fix the most common problems with dairy free Ninja Creami recipes.
- Problem: My ice cream is icy.
- Why it happens: This is usually due to a low fat or protein content. The water in the base freezes into larger ice crystals instead of tiny ones. Using a lower-fat milk like almond milk without any help is often the culprit.
- How to fix it: Next time, try using a creamier milk like canned coconut or cashew milk. Adding protein powder or a small amount of a healthy fat (like cashew butter) can also make a huge difference. A stabilizer like guar gum is fantastic for preventing ice crystals.
- Problem: My ice cream is dry and powdery.
- Why it happens: This is almost always the state of a dairy-free pint after the first spin. The machine’s blade shaves the frozen block into a fine powder.
- How to fix it: This is an easy one! Just add a tablespoon of extra dairy-free milk and hit the “Re-Spin” button. The extra liquid helps the powdery particles blend into a creamy emulsion. It might take two re-spins, but it will get there.
- Problem: My base is frozen too hard and the machine is loud.
- Why it happens: Sometimes the center of the pint freezes into a solid, slightly raised peak. This can make it difficult for the blade to process smoothly.
- How to fix it: Before putting it in the machine, let the pint sit out on the counter for 5-10 minutes to temper slightly. You can also run the outside of the pint under warm water for 30 seconds. This softens the edges just enough for the machine to do its job without struggling.
Storing Instructions
So, you’ve made a delicious pint of dairy-free ice cream, but maybe you couldn’t finish it all in one go. (Honestly, I admire your self-control!) The good news is that storing your creation is super simple, but there are a few key things to know to ensure it’s just as good the second time around.
First things first, always store your leftovers right in the Ninja Creami pint it was made in. Don’t bother transferring it to another container. The pint is specifically designed to be re-processed, which is the secret to enjoying your leftovers.
Before you pop the lid back on, take a moment to smooth the top of the ice cream with a spoon. Creating a flat, level surface is more important than you might think! An even surface helps the machine process the frozen block safely and effectively on the next spin, preventing unnecessary strain on the motor and blade.
Here’s the catch you need to expect: your beautiful, creamy dessert will freeze back into a rock-solid block. Don’t be alarmed—this is completely normal! Store-bought ice creams are packed with high amounts of sugar, fat, and stabilizers that act like antifreeze to keep them scoopable. Since our homemade version is healthier and contains less of those things, the water content freezes completely.
When you’re ready for round two, you’ll have to bring your ice cream back to life. This is where the magic of the Ninja Creami shines once again.
- Take the pint out of the freezer. If it’s exceptionally hard, you can let it sit on the counter for 5-10 minutes to temper slightly.
- Place it back in the machine and run it on the “Lite Ice Cream” or “Re-Spin” cycle.
- Just like when you first made it, it will likely look a little powdery or crumbly. Simply add a splash (about a tablespoon) of non-dairy milk and hit “Re-Spin” again.
- Trust the process! After a re-spin or two, it will return to that perfectly smooth and creamy texture you loved the first time.
While it can technically last for a week or two in the freezer, your dairy-free ice cream is always at its best within the first few days. The longer it sits, the more prone it is to developing ice crystals or absorbing other freezer odors.