There is something so special about the smell of cookies baking during the holidays. It just fills the whole house with warmth and happiness, doesn’t it? It gets everyone excited for the festive season ahead.
If you are looking to start a new tradition or just want to make some amazing treats, you have come to the right place. This recipe for Christmas Royal Icing Cookies is all about fun, flavor, and creating sweet memories right in your own kitchen.
Jump To:
Why You’ll Love This Recipe
First off, these cookies are incredibly delicious. They have a soft, buttery texture that practically melts in your mouth. The hint of vanilla and optional almond extract gives them a classic flavor that is simply wonderful.
The icing is also a star. It is a simple royal icing that is easy to work with, even if you are new to cookie decorating. It dries with a lovely sheen and a firm finish, making your cookies look like they came from a fancy bakery.
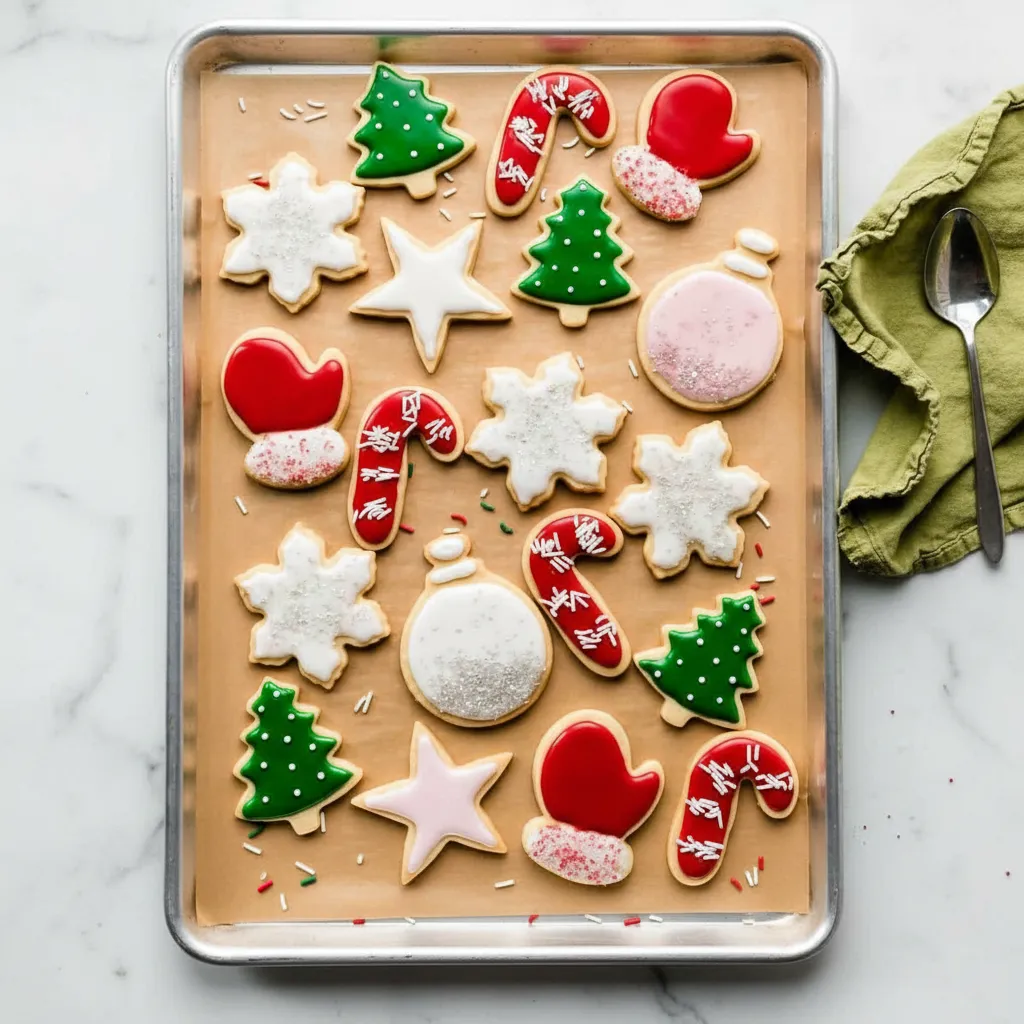
What is really great is how creative you can be. This recipe is your canvas for all sorts of Christmas Cookie Decorating Ideas. Think bright reds, greens, and snowy whites. You can make snowflakes, trees, stars, or anything you can imagine.
It is a fantastic activity to do with family or friends. Everyone can get involved in cutting out shapes and decorating. It is all about having a good time and making something tasty together. No professional skills are needed, I promise.
Ingredients
For the Cookies
- 2 and 1/4 cups all purpose flour
- 1/2 teaspoon baking powder
- 1/4 teaspoon salt
- 3/4 cup unsalted butter, softened to room temperature
- 3/4 cup granulated sugar
- 1 large egg, at room temperature
- 2 teaspoons pure vanilla extract
- 1/4 or 1/2 teaspoon almond extract (optional)
For the Easy Icing
- 3 cups confectioners’ sugar
- 1/2 teaspoon pure vanilla extract
- 2 teaspoons light corn syrup
- 4.5 to 5 Tablespoons room temperature water
- pinch salt
- optional: gel food coloring and sprinkles
Step By Step Instructions
Making these cookies is a process, but a very rewarding one. Just make sure you set aside enough time. The dough needs to chill and the icing needs time to set, so planning ahead is a good idea.
Step 1: Mix the Dry Ingredients
In a medium bowl, grab a whisk and combine the flour, baking powder, and salt. Just give them a quick mix to make sure everything is evenly distributed. Then, set this bowl aside for a little bit.
Step 2: Cream Butter and Sugar
In a large bowl, using a handheld or stand mixer, beat the softened butter and granulated sugar together. You will want to do this on high speed for about three minutes until it is super smooth and creamy. This step is important for the cookie texture.
Next, add the egg, vanilla extract, and the almond extract if you are using it. Beat everything together on high for another minute. Scrape down the sides of the bowl to make sure it is all mixed in.
Step 3: Mix the Dough
Now it is time to combine the wet and dry ingredients. Add the flour mixture to the butter mixture and mix on low speed. Just mix until it is combined. The dough will be a little soft, and that is totally okay.
If the dough feels way too sticky to handle, you can add one more tablespoon of flour. But try not to add too much more than that.
Step 4: Roll and Chill the Dough
Divide your cookie dough into two equal halves. Place each half on a piece of lightly floured parchment paper. Using a lightly floured rolling pin, roll each piece of dough out to about a one fourth inch thickness. Try to keep it even.
Stack the two rolled out dough sheets with a piece of parchment in between to prevent sticking. Cover them with plastic wrap and pop them in the refrigerator. Let them chill for at least one to two hours. This chilling step is key for cookies that hold their shape.
Step 5: Cut and Bake Your Cookies
When you are ready to bake, preheat your oven to 350 degrees F. Line a couple of large baking sheets with parchment paper. Take one piece of chilled dough out of the fridge.
Using your favorite Christmas cookie cutters, cut out your shapes. Place them on the prepared baking sheets, leaving some space between them. You can re roll the scraps to get more cookies.
Bake for about 11 to 12 minutes. You are looking for lightly browned edges. Let the cookies cool on the baking sheet for a few minutes before moving them to a wire rack to cool completely.
Step 6: Prepare the Royal Icing
While your cookies are cooling, you can make the icing. In a medium bowl, stir the confectioners’ sugar, vanilla, corn syrup, salt, and 4.5 tablespoons of water together with a fork. It will be very thick at first.
Switch to a whisk and add another half tablespoon of water. Whisk it well. The right consistency is when you lift the whisk and the icing drizzle holds its shape for a few seconds before melting back in. If it is too thick, add a tiny bit more water.
This is also when you would add gel food coloring. Divide the icing into separate bowls for different colors. A little goes a long way, so start with just a drop.
Step 7: Decorate Your Cookies
Here comes the fun part, exploring Christmas Sugar Cookie Designs! You can use squeeze bottles or piping bags to decorate. A good technique is to outline the cookie first, then fill in the center. This gives you clean, sharp edges for your Christmas Cookies Decorated Icing.
If you are adding sprinkles or other decorations, be sure to put them on right after you apply the icing so they stick. Let your creativity run wild with all your fun Christmas Cookie Decorating Ideas.
Step 8: Let the Icing Set
Your beautiful Christmas Royal Icing Cookies need time for the icing to set. It takes about 24 hours for it to dry completely. Leave them uncovered on a baking sheet. Once set, they are sturdy enough for gifting and stacking.


How To Store Leftovers
Once the icing on your Christmas Cookies Decorated Icing is completely dry, you can store them in an airtight container at room temperature. They will stay fresh for up to five days.
If you want to keep them a little longer, you can store them in the refrigerator for up to 10 days. They will still taste great.
These cookies also freeze really well. Place them in a freezer safe container with parchment paper between the layers. They can be frozen for up to three months. Just let them thaw in the fridge or at room temperature when you are ready to enjoy them.
Tips
Room temperature butter is really important. It should be soft but still cool to the touch. If your butter is too soft, the dough might become sticky and hard to work with. The same goes for the egg. Room temperature ingredients mix together more smoothly.
Do not skip the corn syrup in the icing if you can help it. It gives the icing a beautiful shine and helps it set nicely. It makes a big difference in the final look of your Christmas Royal Icing Cookies.
A tiny pinch of salt in the icing might seem odd, but it helps to balance the sweetness. You will not taste the salt, but it cuts through some of the sugariness, making the icing taste better.
Feel free to play with flavors. Instead of almond extract, you could try peppermint extract for a classic holiday taste, or even a little lemon zest for a bright, fresh flavor. It is fun to experiment.
Conclusion
Baking these Christmas Royal Icing Cookies is more than just making a dessert. It is about creating something special to share with the people you care about. Each cookie is a little piece of holiday cheer.
I hope you have so much fun with this recipe. Whether you are a seasoned baker or just starting out, you can make beautiful and delicious cookies. Happy baking, and happy holidays to you and yours.
FAQ
How Long Does The Icing Take To Set Completely?
The royal icing needs about 24 hours to dry and set completely. This ensures it is hard enough for stacking and packaging without smudging. You can speed this up slightly by placing the cookies in the refrigerator.
Can I Make The Cookie Dough Ahead Of Time?
Yes, absolutely. You can prepare the cookie dough and keep it in the refrigerator for up to two days before rolling and baking. You can also freeze the dough for up to three months for even more convenience.
What If My Dough Feels Too Sticky?
If the dough seems too soft and sticky even after mixing, your butter might have been too soft. You can mix in one additional tablespoon of flour. Chilling the dough thoroughly is also very important to make it easier to handle.
Do I Really Need Corn Syrup In The Icing?
While you can leave it out if necessary, the corn syrup is recommended. It gives the icing a beautiful, professional looking sheen and helps it set with a smoother finish. It also adds a bit of stability to the icing.
Christmas Royal Icing Cookies
A classic, comforting recipe for Christmas Royal Icing Cookies with a soft, buttery texture and a beautiful royal icing finish. Perfect for festive fun and creating sweet holiday memories.
Requirements


Ingredients
Instructions
- In a medium bowl, grab a whisk and combine the flour, baking powder, and salt. Just give them a quick mix to make sure everything is evenly distributed. Then, set this bowl aside for a little bit.
- In a large bowl, using a handheld or stand mixer, beat the softened butter and granulated sugar together. You will want to do this on high speed for about three minutes until it is super smooth and creamy. This step is important for the cookie texture.
- Next, add the egg, vanilla extract, and the almond extract if you are using it. Beat everything together on high for another minute. Scrape down the sides of the bowl to make sure it is all mixed in.
- Now it is time to combine the wet and dry ingredients. Add the flour mixture to the butter mixture and mix on low speed. Just mix until it is combined. The dough will be a little soft, and that is totally okay.
- If the dough feels way too sticky to handle, you can add one more tablespoon of flour. But try not to add too much more than that.
- Divide your cookie dough into two equal halves. Place each half on a piece of lightly floured parchment paper. Using a lightly floured rolling pin, roll each piece of dough out to about a one fourth inch thickness. Try to keep it even.
- Stack the two rolled out dough sheets with a piece of parchment in between to prevent sticking. Cover them with plastic wrap and pop them in the refrigerator. Let them chill for at least one to two hours. This chilling step is key for cookies that hold their shape.
- When you are ready to bake, preheat your oven to 350 degrees F. Line a couple of large baking sheets with parchment paper. Take one piece of chilled dough out of the fridge.
- Using your favorite Christmas cookie cutters, cut out your shapes. Place them on the prepared baking sheets, leaving some space between them. You can re roll the scraps to get more cookies.
- Bake for about 11 to 12 minutes. You are looking for lightly browned edges. Let the cookies cool on the baking sheet for a few minutes before moving them to a wire rack to cool completely.
- While your cookies are cooling, you can make the icing. In a medium bowl, stir the confectioners’ sugar, vanilla, corn syrup, salt, and 4.5 tablespoons of water together with a fork. It will be very thick at first.
- Switch to a whisk and add another half tablespoon of water. Whisk it well. The right consistency is when you lift the whisk and the icing drizzle holds its shape for a few seconds before melting back in. If it is too thick, add a tiny bit more water.
- This is also when you would add gel food coloring. Divide the icing into separate bowls for different colors. A little goes a long way, so start with just a drop.
- Here comes the fun part, exploring Christmas Sugar Cookie Designs! You can use squeeze bottles or piping bags to decorate. A good technique is to outline the cookie first, then fill in the center. This gives you clean, sharp edges for your Christmas Cookies Decorated Icing.
- If you are adding sprinkles or other decorations, be sure to put them on right after you apply the icing so they stick. Let your creativity run wild with all your fun Christmas Cookie Decorating Ideas.
- Your beautiful Christmas Royal Icing Cookies need time for the icing to set. It takes about 24 hours for it to dry completely. Leave them uncovered on a baking sheet. Once set, they are sturdy enough for gifting and stacking.
Notes
Room temperature butter is really important. It should be soft but still cool to the touch. If your butter is too soft, the dough might become sticky and hard to work with. The same goes for the egg. Room temperature ingredients mix together more smoothly.
Do not skip the corn syrup in the icing if you can help it. It gives the icing a beautiful shine and helps it set nicely. It makes a big difference in the final look of your Christmas Royal Icing Cookies.
A tiny pinch of salt in the icing might seem odd, but it helps to balance the sweetness. You will not taste the salt, but it cuts through some of the sugariness, making the icing taste better.
Feel free to play with flavors. Instead of almond extract, you could try peppermint extract for a classic holiday taste, or even a little lemon zest for a bright, fresh flavor. It is fun to experiment.
Nutrition
Calories
Sugar
Fat
Carbs