Have you ever wanted to enjoy rich, creamy ice cream every single day without feeling guilty? It sounds like a dream, right? Well, with a little kitchen magic and the right tool, it is totally possible. The Ninja Creami machine has changed the game for homemade frozen desserts.
This guide is all about sharing some amazing Ninja Creami Healthy Recipes that are both simple and delicious. We are going to walk through a basic recipe that you can customize in endless ways. Get ready to scoop up some joy with treats that fit your lifestyle.
Jump To:
Why You’ll Love This Recipe
Honestly, there is so much to love about making ice cream this way. First off, it is incredibly easy. You do not need to be a professional chef to create something wonderful. If you can mix a few things together, you are already halfway there. It is a fantastic starting point for anyone new to making frozen treats at home.
Another huge win is the texture. Often, healthy or protein ice cream Ninja Creami recipes can be icy or lack that satisfying creaminess. Not this one. The Ninja Creami technology works wonders, turning a simple frozen base into a smooth, scoopable dessert that feels just like the real deal. It really delivers on that luxurious mouthfeel we all crave in ice cream.
You also have complete control over the ingredients. This is a big deal if you are tracking macros or avoiding certain things like excess sugar. You can create Ninja Creami ice cream recipes high protein low cal without any weird additives or preservatives. You know exactly what is going into your body, which is always a good feeling.
Customization is where the real fun begins. This basic recipe is your canvas. You can add anything from chocolate chips to fruit swirls to cookie pieces. It is a fantastic way to use up ingredients you have on hand and get creative in the kitchen. The possibilities are truly endless with these Ninja Creami Healthy Recipes.
Finally, it is just so satisfying. There is a special kind of pride that comes from making your own dessert from scratch. Sharing a bowl of your homemade creation with family or friends is a simple joy. These Ninja Creami Healthy Recipes make that experience accessible to everyone.
Ingredients
For our base recipe, a Creamy Vanilla Protein Ice Cream, you only need a handful of simple ingredients. This forms the foundation for many Ninja Creami Healthy Recipes.
- 1 cup unsweetened almond milk (or milk of your choice)
- 1/4 cup heavy cream (or full fat coconut cream for dairy free)
- 1 scoop vanilla protein powder (about 30g)
- 2 tablespoons Besti Monk Fruit Erythritol Blend (or your favorite sweetener)
- 1 teaspoon vanilla extract
- Pinch of salt
- Optional: Sugar free chocolate chips for a mix in
Step-By-Step Instructions
Following these steps will give you a delicious pint of protein ice cream every time. Let’s get started on one of the easiest Ninja Creami Healthy Recipes you will ever make.
Step 1: Combine Your Ingredients
First things first, grab your ingredients. You can add everything into a blender or a simple mason jar with a secure lid. The goal is to get everything well combined and smooth. A blender is great for making sure the protein powder dissolves completely, which helps with the final texture.
If you are using a mason jar, just make sure to shake it really well. You want to see a consistent, smooth liquid with no clumps. This initial step is key for creamy results later on. It is a simple but important part of great protein ice cream Ninja Creami recipes.
Step 2: Freeze The Base
Once your mixture is smooth, pour it into the Ninja Creami pint container. Be careful not to fill it past the max fill line. Secure the lid tightly and place the pint on a level surface in your freezer. Let it freeze for at least 18 hours, though 24 hours is even better. This deep freeze is absolutely necessary for the machine to work its magic.
Patience is key here. A partially frozen base will not churn correctly and will result in a soupy mess. So let it get rock solid. This is a crucial step for all Ninja Creami Healthy Recipes.
Step 3: Prepare The Creami
When your base is completely frozen, take it out of the freezer. Remove the storage lid from the pint. Now, place the pint into the outer bowl, which is the part that holds it in the machine. Place the Creamerizer paddle into the processing lid and lock the lid into place on top of the outer bowl.
Step 4: First Spin
Lock the entire assembly into the Ninja Creami machine. You will hear it click into place. For this recipe, you can select either the ICE CREAM or SOFT SERVE setting. Let the machine run through its cycle. It might be a bit loud, but that is just the sound of deliciousness being made.
Step 5: Check And Respin (If Needed)
After the first spin, unlock the machine and take a look. Sometimes, especially with low fat or high protein bases, the texture might look a bit powdery or crumbly. This is totally normal. Do not worry. All you need to do is put it back in the machine and press the RE SPIN button. This second spin usually smooths everything out perfectly.
If it is still a little crumbly after the respin, add a tablespoon of your milk of choice and spin it one more time. This almost always results in a perfectly creamy texture for your Ninja Creami ice cream recipes high protein low cal.
Step 6: Add Mix Ins (Optional)
If you want to add mix ins like chocolate chips, nuts, or cookie pieces, now is the time. After you have achieved a creamy texture, use a spoon to create a small well in the center of the ice cream, about an inch wide. Drop your mix ins into the hole.
Place the pint back into the machine and select the MIX IN function. This will gently fold your additions throughout the pint without completely pulverizing them. It is a fantastic feature for creating fun flavor combinations in your Ninja Creami Healthy Recipes.
Step 7: Serve And Enjoy
And that is it. Your homemade protein ice cream is ready to eat. You can enjoy it straight from the pint or scoop it into a bowl. The texture will be amazing right after spinning. This simple process makes enjoying Ninja Creami Healthy Recipes a regular treat.


How To Store Leftovers
If you somehow have leftovers, storing them is easy. Use a spoon to smooth and level the top surface of the ice cream in the pint. This helps it freeze evenly and makes it easier to process again later.
Place the storage lid back on and return the pint to the freezer. When you are ready for another scoop, you will likely need to process it again. Just pop it back into the machine and run it on the ICE CREAM cycle. It should return to its creamy state. This is a normal part of storing homemade Ninja Creami Healthy Recipes.
Tips
Here are a few extra tips to make your experience with Ninja Creami Healthy Recipes even better. Little adjustments can make a big difference in the final product.
First, make sure your base is very cold and fully frozen. A 24 hour freeze time is ideal. A base that is not frozen solid will not churn correctly. A level surface in the freezer helps prevent any issues with the blade during processing.
Do not be afraid to experiment with different liquids. While almond milk is great for a low calorie option, using whole milk or light cream can add extra richness. The fat content plays a big role in the creaminess of the final product.
Adding a small amount of a binder can also improve texture. A teaspoon of sugar free pudding mix or a tiny pinch of xanthan gum can help make your ice cream incredibly smooth and prevent iciness. This is a great trick for many protein ice cream Ninja Creami recipes.
Feel free to play with flavors. Add a tablespoon of cocoa powder for a chocolate version, or blend in some strawberries for a fruity twist. The base recipe is a blank slate for your creativity. Creating new Ninja Creami Healthy Recipes is part of the fun.
Pre chilling your mix ins is a good idea. If you add room temperature chocolate chips or candy, they can sometimes freeze into hard little rocks. Chilling them in the freezer for a bit before mixing them in helps a lot. It keeps everything at a consistent temperature.
Conclusion
Making delicious, healthy ice cream at home is no longer a complicated process. With the Ninja Creami, you can whip up amazing frozen treats that fit your dietary needs and taste preferences. It opens up a whole world of possibilities right in your own kitchen.
These Ninja Creami Healthy Recipes are designed to be simple, satisfying, and completely customizable. You get to enjoy the rich, creamy texture of traditional ice cream without all the extra sugar and calories. It is a wonderful way to treat yourself any day of the week.
So go ahead and give it a try. Start with the basic vanilla recipe and see where your creativity takes you. Enjoy the process and, most importantly, enjoy every single scoop. We hope you love these Ninja Creami Healthy Recipes as much as we do.
FAQ
Can I Make This Dairy Free?
Yes, you absolutely can. To make this recipe dairy free, use a plant based milk like almond, oat, or soy milk. For the cream, substitute with full fat coconut cream from a can. This will provide the necessary fat content for a creamy texture. Also, be sure to use a plant based protein powder.
Why Is My Ice Cream Powdery?
A powdery or crumbly texture is very common, especially with low fat or high protein bases. It simply means the ice crystals are very fine and have not formed a creamy emulsion yet. The easiest fix is to use the RE SPIN button. If it is still powdery after that, add one tablespoon of liquid (like almond milk) and spin it again. This usually solves the problem and creates a smooth texture.
What If I Don’t Have That Specific Sweetener?
No problem. You can use other granulated sugar substitutes like classic erythritol or allulose. Keep in mind that different sweeteners have different levels of sweetness, so you may need to adjust the amount. It is best to check the conversion chart for your specific product. Liquid sweeteners can also work, but they may slightly alter the freezing process.
Can I Use Regular Sugar?
You can use regular sugar if you are not concerned about the recipe being low carb or sugar free. It will work just fine. However, it will change the nutritional information, adding more calories and carbs. Sugar also lowers the freezing point, which can sometimes result in a slightly softer base, but the Ninja Creami handles it well.
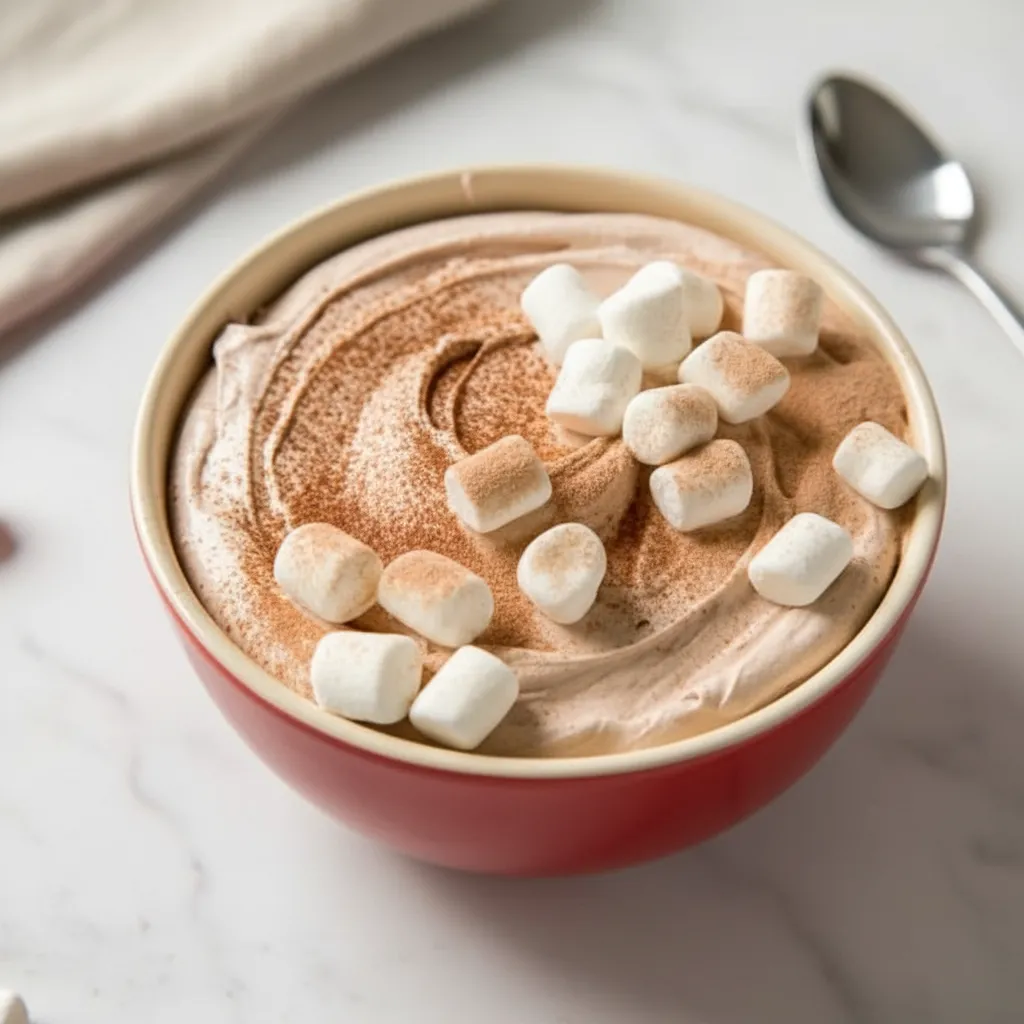
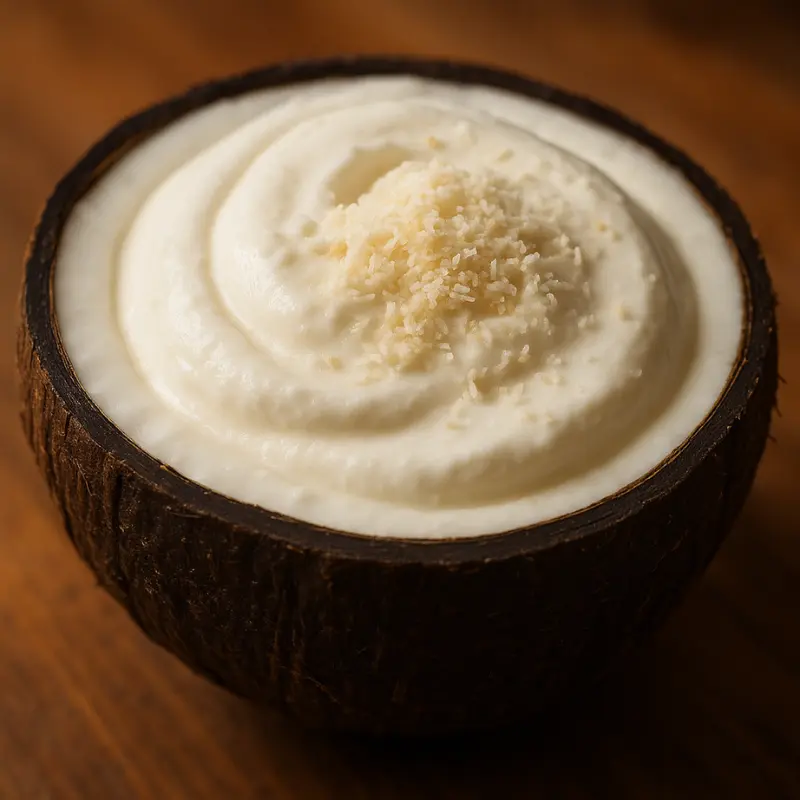
Creamy Vanilla Protein Ice Cream (Ninja Creami)
A simple and delicious recipe for creamy vanilla protein ice cream made in the Ninja Creami. This healthy, high-protein treat is easy to customize and delivers a smooth, scoopable texture.
Ingredients
Instructions
- Combine all ingredients (except mix-ins) in a blender or a mason jar. Blend or shake vigorously until completely smooth and the protein powder is dissolved.
- Pour the mixture into the Ninja Creami pint container, ensuring not to fill past the max fill line. Secure the lid.
- Place the pint on a level surface in the freezer and freeze for at least 18-24 hours, or until completely solid.
- Once frozen, remove the pint from the freezer, take off the storage lid, and place it into the outer processing bowl. Attach the Creamerizer paddle lid.
- Lock the assembly into the Ninja Creami machine and select the ‘ICE CREAM’ setting. Let it complete the cycle.
- After the first spin, check the texture. If it appears crumbly or powdery, re-install the pint and press the ‘RE-SPIN’ button. If still crumbly, add 1 tablespoon of milk and re-spin again.
- If using mix-ins, create a 1-inch wide hole in the center of the ice cream, add your mix-ins, and process using the ‘MIX-IN’ function.
- Serve immediately for a soft-serve consistency, or return to the freezer for 10-15 minutes to firm up.
Notes
For the creamiest texture, ensure the base is frozen completely solid for a full 24 hours.
For an even smoother result, add 1 teaspoon of sugar-free pudding mix or a tiny pinch of xanthan gum to the base before freezing.
Feel free to experiment with different milks; whole milk or light cream will result in a richer ice cream.
Nutrition
Calories
Sugar
Fat
Carbs