There is honestly nothing better than the smell of fresh baked goods filling your kitchen. It instantly makes a house feel like a home. We all have that one treat we crave after a long week.
For me, it is always classic Chocolate Chip Cookies. They are simple, comforting, and universally loved. You really cannot go wrong with them.
I have spent years hunting for Best Cookie Recipes. Some were too cakey. Others were too crispy. I wanted that perfect middle ground.
You know the kind I mean? They have golden edges that offer a slight crunch. But the center stays soft and chewy for days.
This recipe is the answer. It uses a specific method with melted butter that changes the game entirely. Plus, there is a secret ingredient involved.
If you are looking for easy Homemade Cookies that taste like they came from a bakery, you are in the right place. Let’s get baking.
Jump To:
Why You’ll Love This Recipe
You might be wondering what makes this specific recipe stand out among thousands of others. Here is the thing. It comes down to texture and ease.
First off, you do not need a stand mixer. Since we use melted butter, you can mix everything by hand with a whisk and a spatula. That means less cleanup for you.
The texture is incredible. Thanks to the addition of cornstarch, these Chocolate Chip Cookies stay soft in the middle. They do not turn into rocks the next day.
This recipe is also very forgiving. It is perfect for beginners who are just starting their baking journey. You get consistent results every single time.
It is also one of those Chocolate Chip Desserts that you can prep ahead of time. You can make the dough and keep it in the freezer for a rainy day.
Here are a few quick reasons why this will become your go to recipe:
- No Fancy Equipment: Just a bowl and a whisk will do the trick.
- Perfect Texture: Chewy edges meet soft, tender centers.
- Budget Friendly: It uses pantry staples you likely already have.
- Fast Prep: The active time is super short before the chilling step.
Ingredients
The magic of these Chocolate Chip Cookies lies in the ratio of ingredients. We stick to simple basics but use them in a smart way.
Here is everything you need to grab from your pantry:
- 2 ⅓ cups all purpose flour
- 1 teaspoon baking soda
- 1 tablespoon corn starch
- ½ teaspoon salt
- 1 tablespoon vanilla extract
- ¾ cup unsalted butter (melted and cooled just until opaque)
- 1 cup brown sugar
- ½ cup granulated sugar
- 1 egg (room temperature)
- 1 egg yolk (room temperature)
- 1 ½ cups semi sweet chocolate chips
Let’s talk about that cornstarch for a second. It might seem odd to add it to a cookie recipe. However, it works wonders.
Cornstarch softens the proteins in the flour. This ensures your cookies are tender rather than tough. It is the secret to that bakery style bite.
Also, make sure your butter is melted but not hot. If it is too hot, it will cook the eggs. Let it cool until it looks creamy and opaque again.
Step-By-Step Instructions
Making these Homemade Cookies is a breeze. We will break it down so you can follow along easily.
Step 1: Mix The Butter and Sugars
Grab a large mixing bowl. Pour in your melted butter, brown sugar, and granulated sugar.
Whisk these together vigorously for about two minutes. This step is important. You want the sugar to start dissolving into the butter.
The mixture should look glossy and smooth. This creates that shiny crackly top we all love on Chocolate Chip Cookies.
Step 2: Add Wet Ingredients
Next, add the vanilla extract, the whole egg, and the extra egg yolk. Make sure your eggs are at room temperature.
Whisk again until the mixture is light and creamy. It should look pale and slightly thickened.
The extra yolk adds richness and fat. This contributes to the chewiness of the final cookie.
Step 3: Combine Dry Ingredients
Now it is time for the dry stuff. Add the flour, baking soda, corn starch, and salt right into the bowl.
Switch from a whisk to a rubber spatula or wooden spoon for this part. You want to mix gently.
Stop mixing as soon as you see no more streaks of flour. Overmixing leads to tough cookies, which we definitely want to avoid.
Step 4: Fold in Chocolate
Pour in your semi sweet chocolate chips. Fold them into the dough until they are evenly distributed.
You can save a few chips to press onto the tops of the dough balls later if you want them to look extra pretty.
Step 5: Scoop and Chill
Scoop out the dough using a measuring cup or cookie scoop. You want about 1/4 cup of dough per cookie.
Roll the dough balls in your hands until they are smooth. Place them on a parchment lined baking sheet.
Now comes the hardest part. Waiting. Place the baking sheet in the freezer for 30 to 60 minutes.
Chilling is non negotiable here. Since we used melted butter, the dough is soft. Freezing ensures they do not spread into flat puddles in the oven.
Step 6: Bake to Perfection
While the dough chills, preheat your oven to 325°F. This lower temperature allows the cookies to bake evenly.
Arrange the chilled dough balls about 3 inches apart on a baking sheet lined with parchment paper or a silicone mat.
Bake for 12 to 15 minutes. Watch them closely near the end.
You want the edges to be golden brown. The centers should still look slightly under baked and soft.
Step 7: Cool and Serve
Remove the pan from the oven. Let the cookies sit on the hot baking sheet for at least 5 minutes.
They will continue to cook slightly and firm up during this time. This is crucial for setting the structure.
Transfer them to a wire rack to finish cooling. Now try not to eat them all at once!


How To Store Leftovers
If you somehow have leftovers, you are lucky. These Chocolate Chip Cookies keep very well.
Place completely cooled cookies in an airtight container. They will stay fresh at room temperature for up to 5 days.
To keep them extra soft, here is a pro tip. Put a slice of white bread in the container with the cookies.
The cookies will absorb moisture from the bread. It sounds strange, but it works like a charm.
You can also freeze the baked cookies. Place them in a freezer safe bag and freeze for up to 3 months.
Just let them thaw on the counter for an hour before eating. Or microwave them for 10 seconds for that fresh from the oven taste.
Tips
Want to ensure these are the Best Cookie Recipes you have ever made? Follow these simple tips for success.
Measure Flour Correctly: Do not scoop the flour directly with the measuring cup. This packs the flour down and leads to dry cookies.
Instead, fluff the flour with a spoon. Then, spoon it into the measuring cup and level it off with a knife. Or use a kitchen scale if you have one.
Room Temperature Eggs: Cold eggs can shock the melted butter. This might cause the butter to solidify again.
Place your eggs in a bowl of warm water for 5 minutes before using them. This brings them to room temp quickly.
Do Not Overbake: I cannot stress this enough. The cookies should look a little raw in the middle when you pull them out.
They firm up as they cool. If you bake them until the centers look dry, they will be hard once they cool down.
Use Quality Chocolate: Since chocolate is the main flavor, use a brand you like eating plain. Semi sweet gives the best balance.
Chill The Dough: Do not skip the freezer step. The flour needs time to hydrate. The fat needs to solidify.
Conclusion
Baking at home does not have to be complicated or stressful. With this recipe, you get amazing results with minimal effort.
These Chocolate Chip Cookies are perfect for bake sales, movie nights, or just a Tuesday afternoon treat. They are sure to become a family favorite.
I hope you give this recipe a try soon. There is something special about sharing a batch of warm cookies with people you love.
So grab your whisk and get started. Your kitchen is about to smell amazing. Happy baking!
FAQ
Can I Make This Gluten-Free?
Yes, you can. Simply swap the all purpose flour for a high quality 1:1 gluten free baking flour blend. Make sure the blend contains xanthan gum.
Why Did My Cookies Spread Too Much?
This usually happens if the dough was not chilled enough. Or perhaps the butter was too hot when you started mixing.
Ensure you freeze the dough balls for the full 30 to 60 minutes. Also, never place dough on a hot baking sheet.
Can I Use Milk Chocolate Chips?
Absolutely. You can use milk chocolate, dark chocolate, or even white chocolate chips. It is all about your personal preference.
Can I Freeze The Dough?
Yes! This is one of the best Chocolate Chip Desserts for meal prepping. Roll the dough into balls and freeze them on a sheet.
Once solid, move them to a bag. You can bake them straight from frozen, just add an extra minute or two to the bake time.
Why Are My Cookies Hard?
This is often due to overbaking or adding too much flour. Remember to spoon and level your flour.
Also, pull them from the oven while the centers are still soft. They will finish cooking on the hot pan.
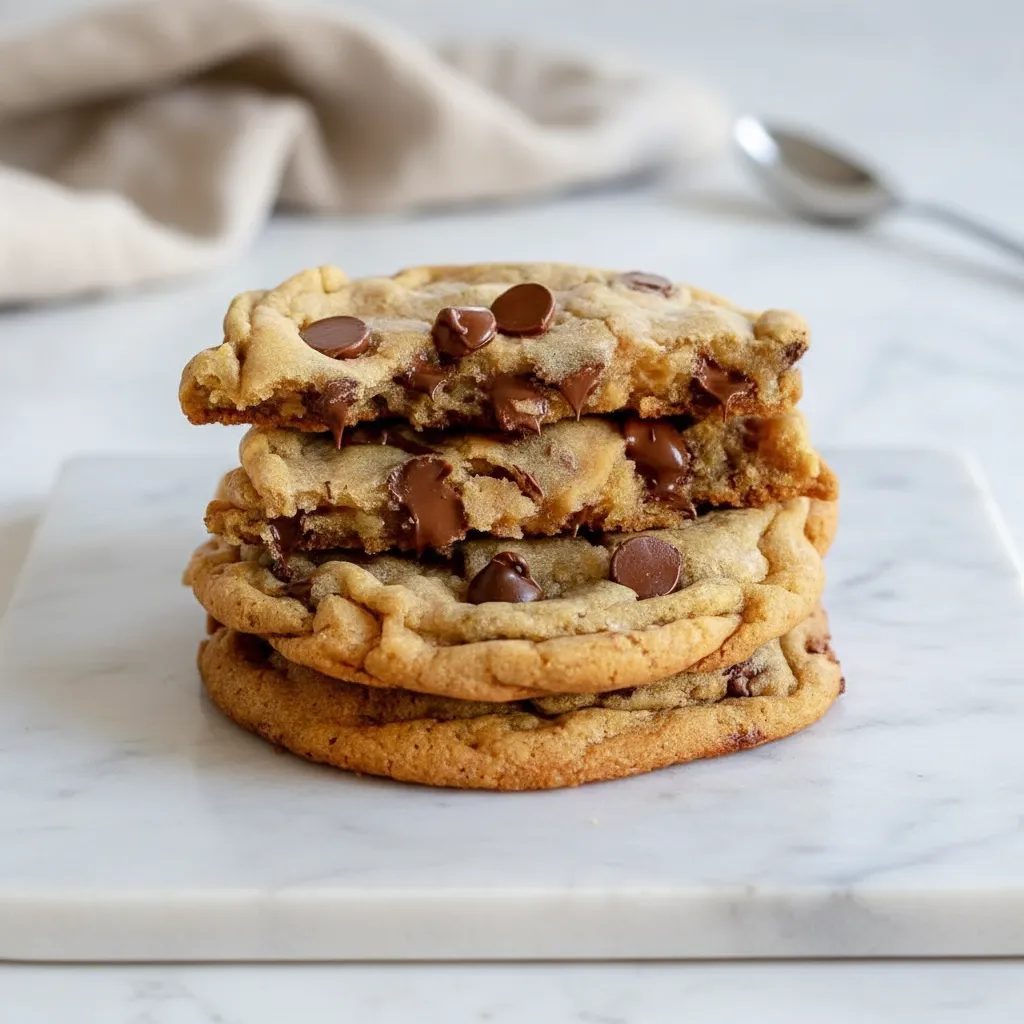
Classic Chocolate Chip Cookies
Get ready for the ultimate homemade treat! These classic chocolate chip cookies have perfectly golden, chewy edges and a soft, gooey center that stays tender for days. No mixer required!
Requirements


Ingredients
Instructions
- In a large mixing bowl, whisk the melted butter, brown sugar, and granulated sugar vigorously for two minutes until glossy and smooth.
- Add the vanilla extract, whole egg, and egg yolk. Whisk again until the mixture is light, creamy, and pale.
- Add the flour, baking soda, corn starch, and salt. Gently mix with a spatula until just combined, with no streaks of flour remaining.
- Fold in the semi sweet chocolate chips until evenly distributed.
- Scoop dough (about 1/4 cup each), roll into balls, and place on a baking sheet. Freeze for 30-60 minutes.
- Preheat oven to 325°F. Arrange chilled dough balls about 3 inches apart on a baking sheet lined with parchment paper.
- Bake for 12-15 minutes, until edges are golden brown but centers look slightly underbaked.
- Let cookies cool on the hot baking sheet for 5 minutes before transferring to a wire rack to cool completely.
Notes
Measure flour correctly by spooning it into the cup and leveling it, not scooping directly from the bag.
Do not overbake! The cookies will firm up as they cool. Pull them from the oven when the centers still look soft.
Chilling the dough is a mandatory step to prevent the cookies from spreading too much.
Nutrition
Calories
Sugar
Fat
Carbs