Have you ever craved a bowl of creamy, delicious ice cream but wanted something a bit healthier? I know I have. Sometimes you just want a sweet treat that does not come with a side of guilt. That is where the magic of the ninja creami comes in. This amazing machine has totally changed how I think about homemade desserts.
Today, I am so excited to share one of my favorite go to Ninja Creami Deluxe Recipes. It is a super simple Greek yogurt frozen dessert. It is creamy, packed with protein, and you can customize it in so many ways. Let’s get started!
Jump To:
Why You’ll Love This Recipe
Honestly, what is not to love? This is one of those Ninja Creami Deluxe Recipes that feels like a special treat but is actually good for you. It is the best of both worlds, right? You get that satisfying, smooth texture you crave from frozen yogurt without all the added sugars you often find in store bought versions.
First off, it is incredibly easy to make. We are talking two main ingredients. You do not need any complicated techniques or fancy kitchen skills. If you can stir something in a cup, you can absolutely make this. It is a great starting point if you are new to your machine.
It is also a fantastic healthy option. Using Greek yogurt as the base means this recipe is loaded with protein. This makes it a really satisfying snack that can keep you full longer. It is a wonderful choice for a post workout treat or a light dessert.
The custom options are nearly endless. The basic recipe is a blank canvas. You can add different flavorings, sweeteners, and mix ins to create your own unique combinations. This is where you can get really creative with your Ninja Creami Deluxe Recipes.
And let’s talk about texture. The ninja creami does an amazing job of creating a velvety smooth frozen yogurt. It breaks down the frozen base into tiny particles, resulting in a texture that is so much better than just freezing yogurt in a tub. This is a core reason why Ninja Creami Recipes With Greek Yogurt are so popular.
Ingredients
For this basic yet delicious recipe, you only need two simple things. It is one of the most straightforward Protein Ice Cream Ninja Creami Recipes you will find.
- 2 cups Greek yogurt (nonfat, zero sugar vanilla works great)
- 2 teaspoons vanilla bean paste (optional but recommended)
Let’s chat about these ingredients for a moment. The star of the show is the Greek yogurt. I suggest using a nonfat, zero sugar vanilla version to keep it light. However, you can use full fat or plain Greek yogurt too. A higher fat content will result in an even creamier final product.
The key is to use Greek yogurt specifically. Its thick consistency is what makes these Ninja Creami Recipes With Greek Yogurt work so well. Regular yogurt has too much water, which can make your frozen treat icy instead of creamy.
As for the vanilla bean paste, I think it adds a lovely, rich flavor and those beautiful little vanilla specks. If you do not have it, a teaspoon of good quality vanilla extract will also work just fine. This simple addition really enhances the flavor.
Step By Step Instructions
Making this is a breeze. Here is how you can create your own delicious frozen yogurt using one of the simplest Ninja Creami Deluxe Recipes available.
Step 1: Combine Your Ingredients
First, grab your Ninja Creami pint container. Add the two cups of Greek yogurt directly into it. Then, add your vanilla bean paste or any other flavorings you might want to use, like a sprinkle of cinnamon or a dash of almond extract.
Use a small spoon or spatula to stir everything together until it is well combined. You want the flavor to be evenly distributed throughout the yogurt. Once it is mixed, smooth out the top to create a flat, level surface. This helps it freeze evenly.
Step 2: Freeze For 24 Hours
Now for the most important part: patience! Put the lid on the pint and place it in your freezer. Make sure it is on a flat surface so it does not freeze at an angle. For the best results, you need to let it freeze for a full 24 hours.
I know, waiting is the hardest part. But this step is crucial. The base needs to be frozen solid all the way through for the ninja creami to work its magic. A partially frozen base will not give you that creamy texture we are aiming for.
Step 3: The First Spin
After 24 hours, it is time for the fun to begin. Take the pint out of the freezer. Place it into the outer bowl, snap on the lid, and lock it into your Ninja Creami machine. Select the “Lite Ice Cream” function. The machine will be loud, but that just means it is working hard!
This cycle is designed for lighter, lower fat bases, which is exactly what our Greek yogurt mixture is. This process is what makes Protein Ice Cream Ninja Creami Recipes so special.
Step 4: Handle The Powdery Stage
Once the cycle is done, take a look at your creation. It will likely look a bit dry and powdery. Do not worry! This is completely normal for low fat or low sugar Ninja Creami Deluxe Recipes. It just means you are one step away from perfection.
All you need to do is put the pint back into the machine and run the “Re Spin” cycle. This second spin will transform that powdery texture into a smooth, creamy, and scoopable frozen yogurt. Sometimes, I add a tablespoon of milk or almond milk before the re spin for extra creaminess.
Step 5: Add Mix Ins And Serve
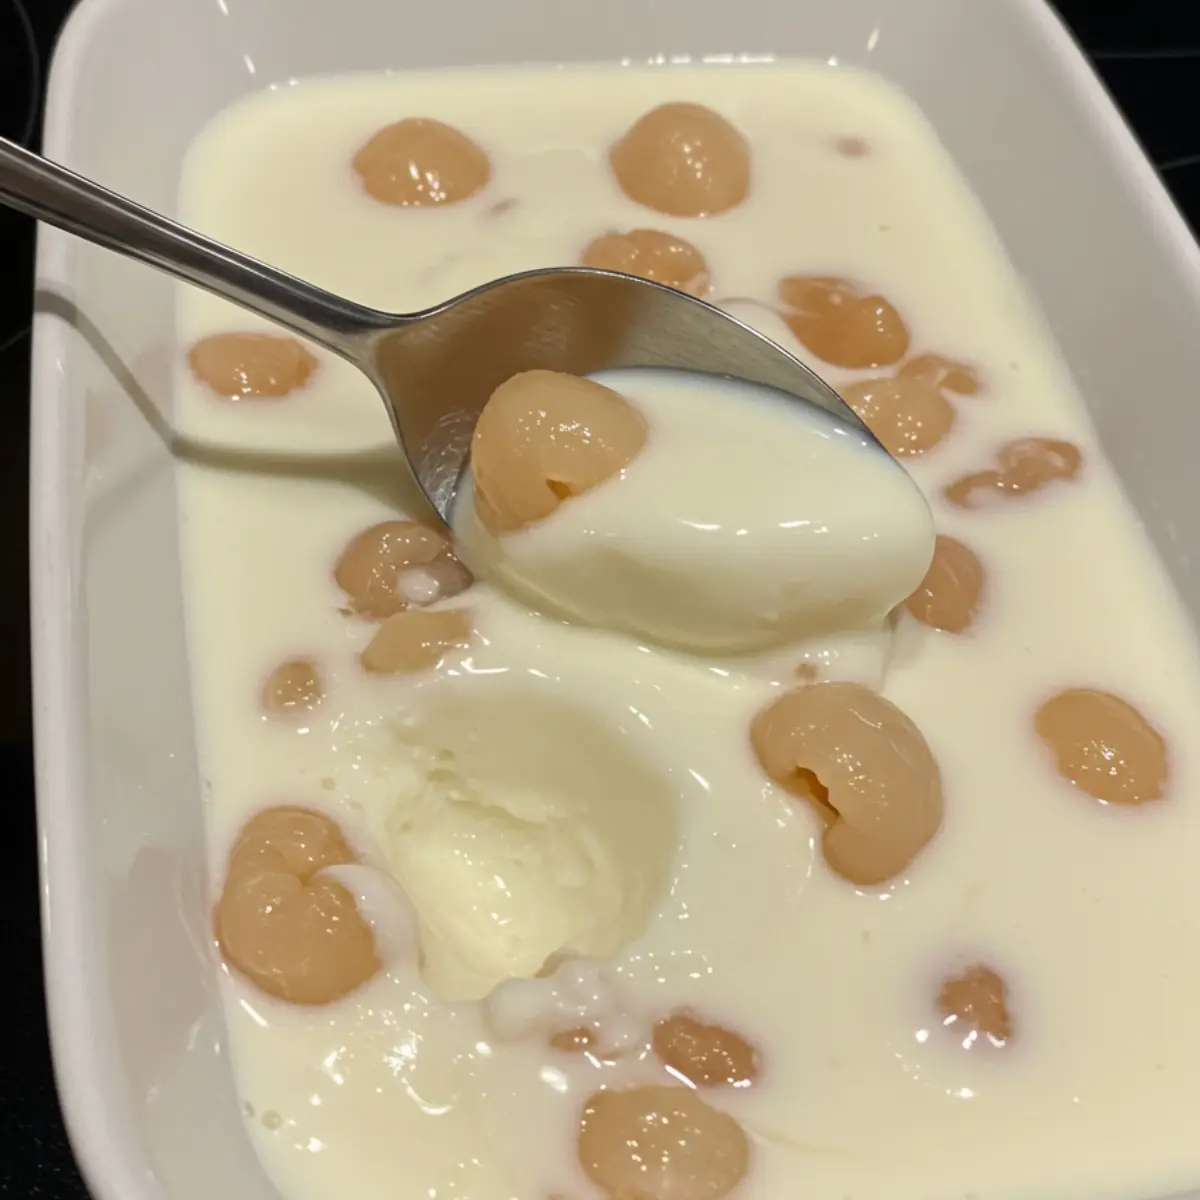
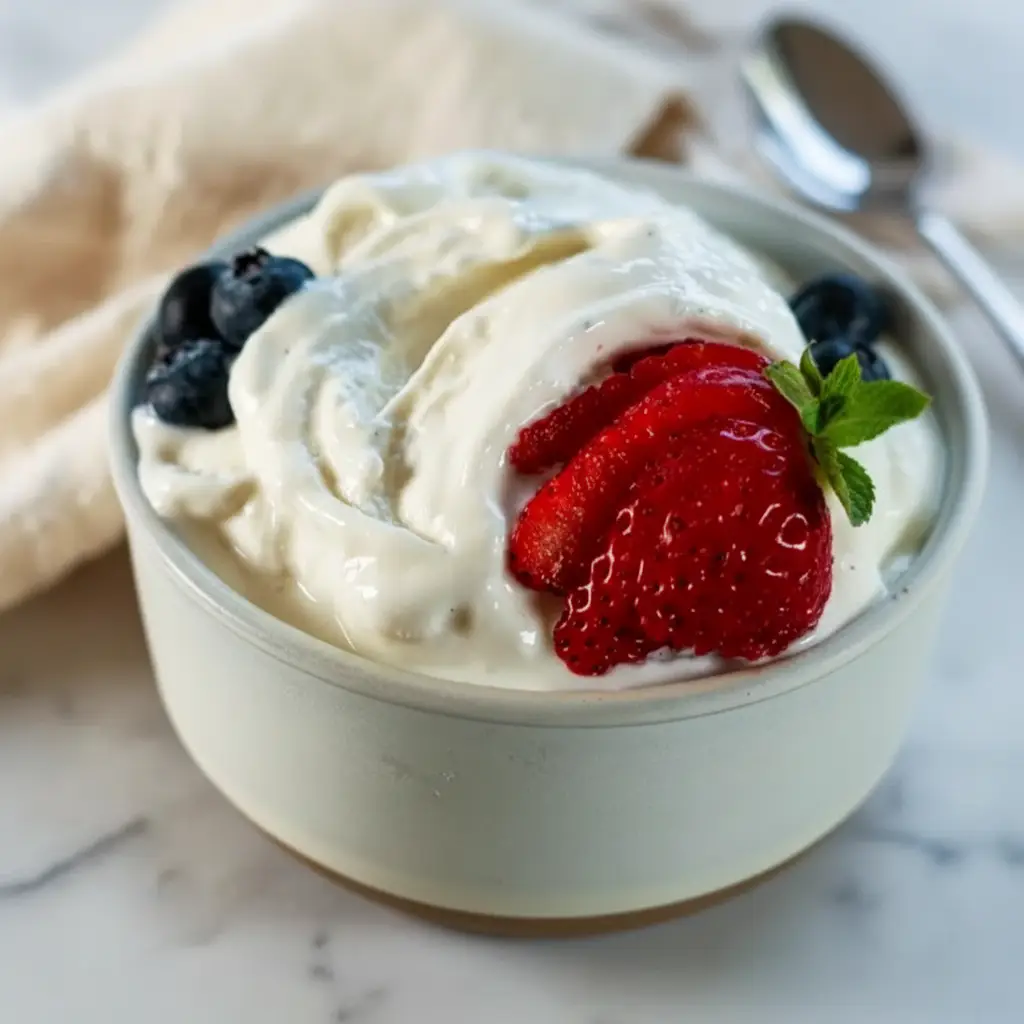
Now you have a delicious, creamy base. You can enjoy it as is, or you can add some fun mix ins. If you want to add something, make a small well in the center of your frozen yogurt. Add your favorite toppings, like chocolate chips, fresh berries, or crushed nuts.
Place it back in the machine and run the “Mix In” cycle. This will evenly distribute your additions throughout the pint. Serve it immediately and enjoy your homemade treat. The fresh texture is truly wonderful.


How To Store Leftovers
Ideally, you will enjoy your frozen yogurt right after making it. The texture is at its best when it is freshly spun. However, if you have leftovers, you can definitely store them. Simply smooth the top of the remaining frozen yogurt in the pint, put the lid on, and place it back in the freezer.
When you are ready to eat it again, it will be frozen solid. You cannot scoop it straight from the freezer. You will need to run it through the ninja creami again. Usually, one spin on the “Lite Ice Cream” or “Re Spin” setting will bring it back to that creamy, smooth texture. This is a common step for all Ninja Creami Deluxe Recipes.
Tips
Want to make your frozen yogurt even better? Here are a few tips I have learned along the way. First, always make sure your freezer is set to a very cold temperature. A solidly frozen base is the key to success.
Do not be afraid to experiment with flavors. A little bit of cocoa powder can turn this into a chocolatey treat. A spoonful of peanut butter powder can add great flavor and more protein. The possibilities for Protein Ice Cream Ninja Creami Recipes are huge.
If your yogurt is unsweetened, you might want to add a liquid sweetener like maple syrup or a sugar free alternative before freezing. This will help with both the flavor and the final texture, as sugar helps prevent large ice crystals from forming.
Another great tip is to make a few pints at once. Since they need to freeze for 24 hours, having a few different flavors ready to go in your freezer means you can have a delicious treat whenever you want. This makes enjoying your favorite Ninja Creami Deluxe Recipes much more convenient.
Conclusion
And there you have it! A simple, healthy, and incredibly delicious frozen yogurt made right in your kitchen. This is one of those foundational Ninja Creami Deluxe Recipes that you will come back to again and again. It is proof that you do not need a lot of ingredients or a lot of sugar to make a satisfying dessert.
I hope you love this recipe as much as I do. It is a fantastic way to explore what your ninja creami can do. Get creative with your flavors and mix ins, and have fun with it. Let me know in the comments what your favorite combinations are!
FAQ
Can I Use Regular Yogurt Instead Of Greek Yogurt?
I would not recommend it. Regular yogurt has a much higher water content than Greek yogurt. When you freeze it, that extra water turns into ice, which results in a very icy texture instead of a creamy one. The thickness of Greek yogurt is what makes these Ninja Creami Recipes With Greek Yogurt so successful.
Why Is My Frozen Yogurt Powdery?
A powdery or crumbly result after the first spin is completely normal, especially for recipes low in fat and sugar like this one. It simply means the base is frozen very well. Running the “Re Spin” cycle will fix this and create that smooth, creamy texture you are looking for in your Ninja Creami Deluxe Recipes.
Do I Have To Wait The Full 24 Hours?
Yes, for the best results, you really should. The base needs to be frozen solid all the way to the center. If it is not fully frozen, the machine cannot process it correctly, and you might end up with a soupy or icy result. Patience is a key ingredient in all great Ninja Creami Deluxe Recipes.
What Are Some Good Mix In Ideas?
The options are endless! Here are a few ideas to get you started:
- Mini chocolate chips or chopped chocolate bars
- Fresh berries like strawberries, blueberries, or raspberries
- Crushed cookies or graham crackers
- A swirl of caramel, chocolate sauce, or nut butter
- Chopped nuts or granola for some crunch
Ninja Creami Greek Yogurt Frozen Dessert
A simple and healthy frozen dessert made with Greek yogurt. This recipe is creamy, packed with protein, and easy to customize for a satisfying homemade treat.
Ingredients
Instructions
- In your Ninja Creami pint container, add the Greek yogurt and vanilla bean paste. Stir with a spoon until well combined and the flavor is evenly distributed.
- Smooth the top of the yogurt mixture to create a flat, level surface. Secure the lid on the pint.
- Place the pint on a flat surface in your freezer and freeze for a full 24 hours. The base must be frozen solid for the best results.
- After 24 hours, remove the pint from the freezer. Place it into the outer bowl, attach the lid, and lock it into your Ninja Creami machine. Select the ‘Lite Ice Cream’ function and let it run.
- After the first spin, the mixture may look dry or powdery. This is normal. Place the pint back into the machine and run the ‘Re-Spin’ cycle to make it creamy.
- If you wish to add mix-ins, create a small well in the center of the frozen yogurt. Add toppings like chocolate chips or berries, place it back in the machine, and run the ‘Mix-In’ cycle.
- Serve immediately and enjoy your fresh, homemade frozen yogurt.
Notes
Ensure your freezer is set to a very cold temperature. A solidly frozen base is the key to a creamy texture.
If using unsweetened yogurt, consider adding a liquid sweetener like maple syrup before freezing to improve flavor and texture.
Store leftovers in the pint with the lid on. To serve again, you will need to re-spin the frozen block in the machine to restore its creamy texture.
Nutrition
Calories
Sugar
Fat
Protein