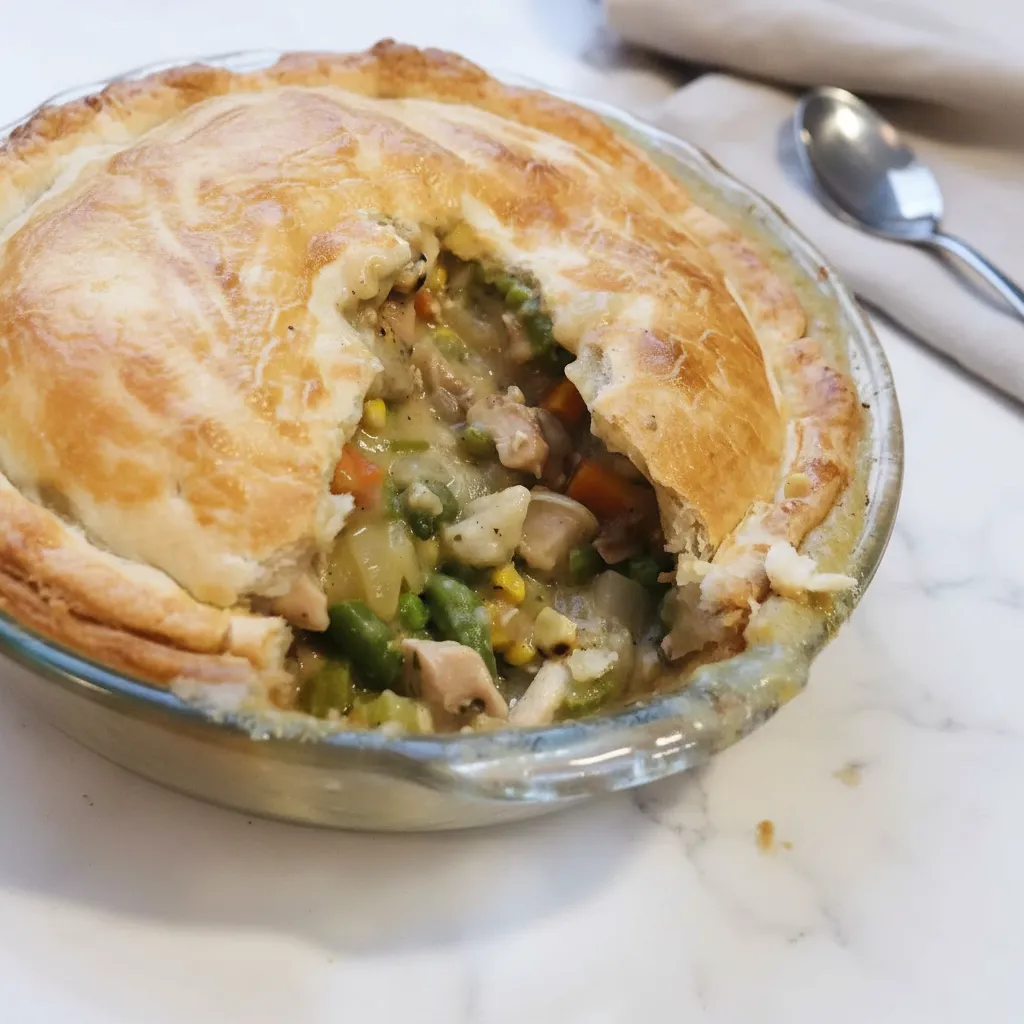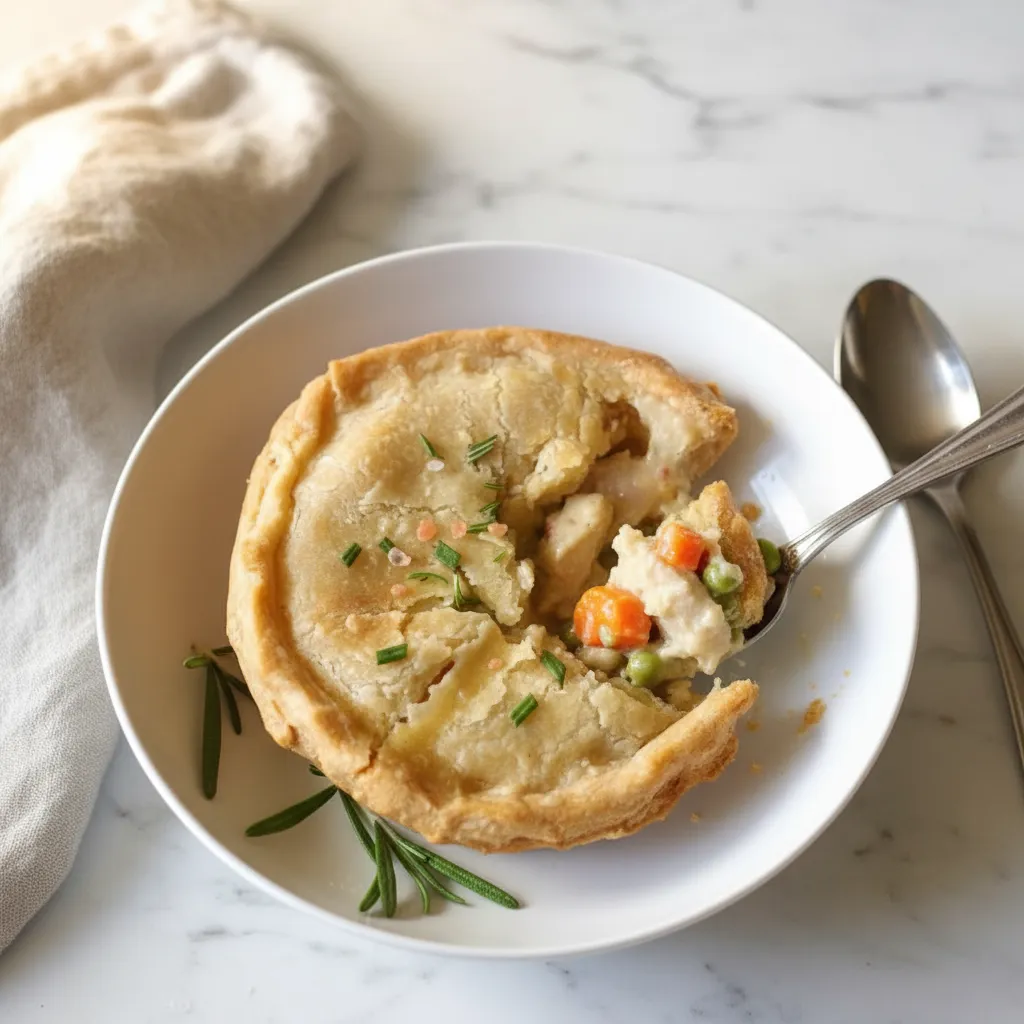
Is there any meal more comforting than a classic Chicken Pot Pie? Imagine a golden, flaky crust breaking open to reveal a rich, creamy sauce filled with tender chicken and colorful vegetables. It’s the kind of food that warms you up from the inside out, perfect for a chilly evening or a cozy family dinner. Many people think making one from scratch is complicated, especially a gluten free version. I’m here to show you just how simple it can be.
This Easy Pot Pie Recipe is designed for everyone, even if you’re new to baking. We’ll walk through each step together, from making a buttery gluten free crust to creating that savory, smooth filling. Get ready to fill your kitchen with the amazing aroma of a true Homemade Pot Pie. It’s one of those Chicken Pie Recipes you’ll come back to again and again.
Why You’ll Love This Recipe
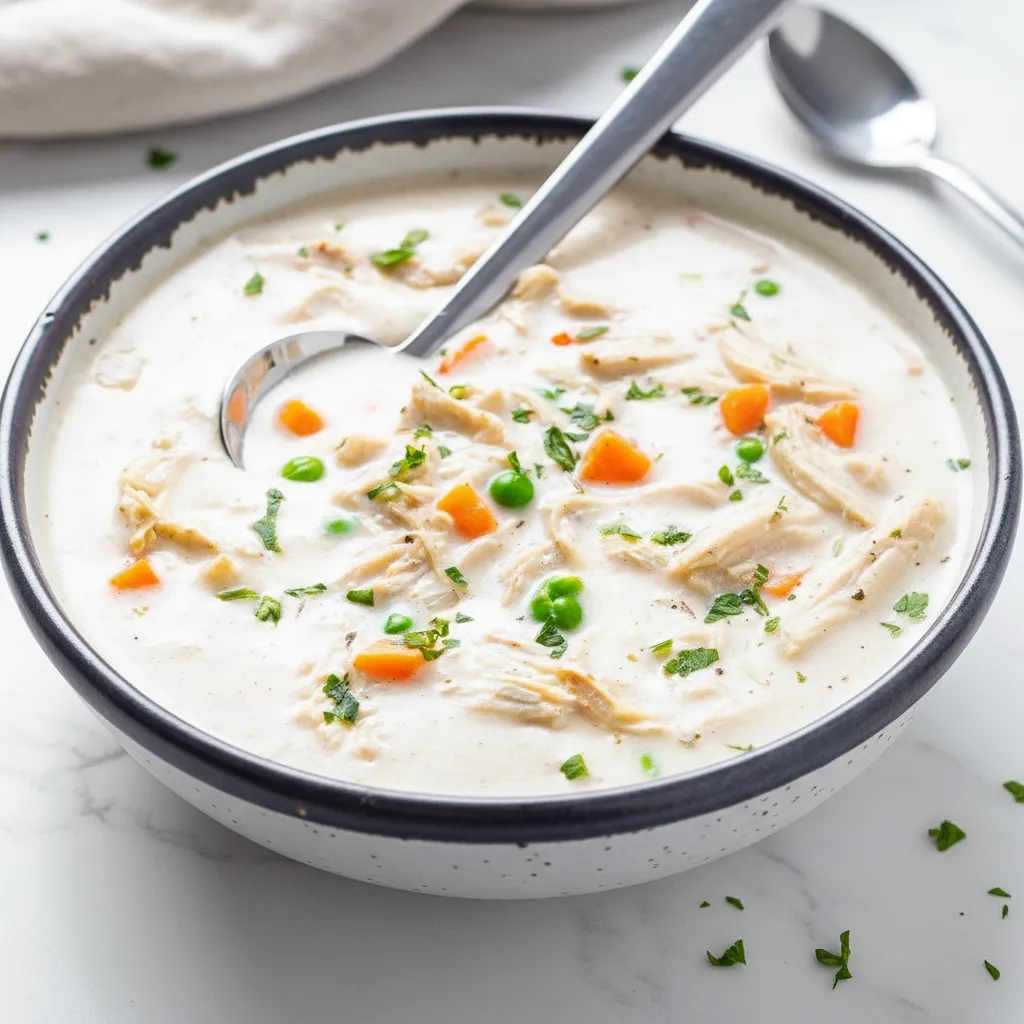
First off, the flavor is just fantastic. The combination of the rich gravy, tender chicken, and sweet vegetables like carrots and peas is a timeless classic for a reason. It is pure comfort in a dish. Every bite feels like a warm hug.
The crust is another star of the show. Making a good gluten free pastry can feel tricky, but this recipe creates a crust that is both flaky and sturdy. It holds up beautifully to the creamy filling without getting soggy. You will be so proud of the result.
It’s also a wonderfully flexible meal. You can stick to the recipe exactly or use it as a base to clean out your vegetable drawer. Have some potatoes or green beans? Feel free to add them in. It’s a great way to use up leftover cooked chicken too.
Finally, this Chicken Pot Pie is a meal that brings everyone to the table. It’s a complete dinner all in one dish, which makes serving a breeze. Whether for a weeknight meal or a special Sunday dinner, it always feels like a treat.
Ingredients
Here is what you will need to gather for this delicious Homemade Pot Pie. We’ve broken it down into two parts, the crust and the filling, to keep things organized.
For The Gluten Free Crust
- 3 cups all purpose gluten free flour blend
- ½ teaspoon salt (omit if using salted butter)
- 2 teaspoons xanthan gum (omit if your blend already has it)
- 1 cup cold butter (2 sticks), cut into small pieces
- 8 to 10 tablespoons cold milk
For The Creamy Filling
- 1 pound skinless, boneless chicken breast halves, cubed
- 1 cup sliced carrots
- 1 cup frozen green peas
- ⅓ cup butter
- ⅓ cup chopped fresh yellow or white onion
- ⅓ cup all purpose gluten free flour blend (or 3 tablespoons corn starch)
- ½ teaspoon salt
- ¼ teaspoon black pepper
- 1 ¾ cups chicken broth
- ⅔ cup milk
Step By Step Instructions
Let’s make this incredible Chicken Pot Pie together. Follow these simple steps for a meal your family will love. Take your time and enjoy the process!
Step 1: Prepare The Oven And Mix The Dry Ingredients
First things first, preheat your oven to 425°F (220°C). Getting it hot early is key. In a medium mixing bowl, combine the gluten free flour, salt, and xanthan gum. Give it a quick whisk to mix everything together evenly.
Step 2: Cut In The Butter
Now for the butter. Make sure it’s very cold. Using a pastry knife or just a regular knife and fork, cut the butter into the flour mixture. Keep going until the butter pieces are about the size of small peas. This creates the flaky layers in your crust.
Step 3: Form The Dough
Slowly add the cold milk, a few tablespoons at a time. Mix it gently until the dough starts to come together. You might need to use your hands to work the milk in and form a ball. The dough should be moist but not sticky.
Step 4: Roll Out The Crust
Divide your dough in half. On a surface lightly dusted with gluten free flour, roll out one half of the dough into a circle about 10 inches across. A helpful tip is to roll the dough between two sheets of wax paper. Carefully place this circle into your pie pan for the bottom crust.
Step 5: Cook The Chicken And Veggies
It’s time for the filling! In a medium saucepan, combine your cubed chicken, sliced carrots, and frozen peas. Add just enough water to cover them and bring it to a boil. Let it cook for about 15 minutes. Once done, drain the water and set the mixture aside.
Step 6: Make The Creamy Sauce
Using the same saucepan, melt the butter over medium heat. Add the chopped onion and cook until it’s soft. Stir in the gluten free flour, salt, and pepper to create a paste. Then, slowly pour in the chicken broth and milk, stirring constantly. This prevents lumps.
Step 7: Combine The Filling
Let the sauce simmer over medium low heat until it gets nice and thick. It should coat the back of a spoon. Once it has thickened, remove it from the heat. This is the heart of your Chicken Pot Pie filling.
Step 8: Assemble Your Pot Pie
Spoon the cooked chicken and vegetable mixture into the bottom pie crust. Pour that lovely, thick gravy mixture right over the top. Fill the pie pan about three quarters of the way full. You don’t want it to overflow while baking.
Now, roll out the second half of your dough for the top crust. Place it over the filling. Seal the edges by pinching them together, and trim any excess dough. Don’t forget to cut a few small slits in the top crust. This lets steam escape.
Step 9: Bake To Golden Perfection
Place your beautiful pie into the preheated oven. Bake for 30 to 35 minutes. You’re looking for a gorgeous golden brown crust and a bubbly filling. The smell alone will be incredible. Once it’s done, let it cool for about 15 minutes before serving. This helps the filling set.
How To Store Leftovers
If you happen to have any leftover Chicken Pot Pie, storing it is simple. First, let it cool down completely to room temperature. Cover the pie dish tightly with plastic wrap or aluminum foil. You can store it in the refrigerator for up to 3 or 4 days.
For reheating, the oven is your best friend. It helps keep the crust from getting soggy. Just heat it at 350°F (175°C) for about 15 to 20 minutes, or until the filling is hot and bubbly again. A microwave works in a pinch, but the crust will be softer.
You can also freeze it. For best results, you can freeze the entire pie before baking or after. If freezing after baking, wrap it well and it will last for up to 2 months. Thaw it in the fridge overnight before reheating in the oven.
Tips
Here are a few extra tips to make your Chicken Pot Pie experience even better. These little things can make a big difference in many Chicken Pie Recipes.
Always use cold ingredients for your crust. Cold butter and cold milk are essential for creating those flaky layers. The small pieces of butter melt during baking, creating pockets of steam that make the pastry light and airy.
Be careful when measuring your gluten free flour. Don’t scoop the flour directly with your measuring cup. Instead, spoon the flour into the cup and then level it off with a knife. This prevents the flour from becoming too compacted, ensuring your measurements are accurate.
Try not to overwork the pie dough. Mix it just enough until it comes together. Overworking can make the crust tough instead of tender and flaky. Handle it gently and you’ll be rewarded with a much better texture.
Feel free to customize the filling. This is a great Easy Pot Pie Recipe to adapt. You could add diced potatoes, corn, or mushrooms. If you have leftover turkey from a holiday meal, it works wonderfully in place of chicken.
Conclusion
There you have it, a wonderful recipe for a gluten free Chicken Pot Pie that’s full of flavor and comfort. It’s a satisfying meal that proves homemade is truly special. Taking the time to make this dish from scratch is so rewarding, and the results are absolutely delicious.
I hope you and your loved ones enjoy every last bite of this Homemade Pot Pie. It’s more than just a meal; it’s an experience that brings warmth and happiness to your table. Happy cooking!
FAQ
Can I Use A Different Type Of Flour?
For the best results with this gluten free recipe, I recommend using an all purpose gluten free flour blend that contains xanthan gum. Different flours can have very different properties, and this recipe was developed specifically with that type of blend in mind.
Can I Make This Dairy Free?
Yes, you can adapt this recipe to be dairy free. Simply use a dairy free butter substitute in both the crust and the filling. For the milk, you can use an unsweetened dairy free alternative like almond milk or soy milk. The results will be just as creamy and delicious.
Can I Use Leftover Chicken?
Absolutely! Using leftover cooked chicken or a store bought rotisserie chicken is a great way to save time. Simply shred or cube the cooked chicken and add it to the vegetable mixture after you have drained the water. This makes it an even quicker Easy Pot Pie Recipe.
Can I Prepare This Pot Pie Ahead Of Time?
Yes, this is a great meal to prepare ahead. You can assemble the entire Chicken Pot Pie, cover it, and store it in the refrigerator for up to 24 hours before baking. You may need to add a few extra minutes to the baking time since it will be starting from cold.
Gluten Free Chicken Pot Pie
This easy pot pie recipe delivers a rich, savory filling with tender chicken and veggies, all tucked under a golden, flaky gluten-free crust. It’s comfort food at its best, perfect for any family meal.
Requirements


Ingredients
Instructions
- First, let’s get that oven preheating to 425 degrees Fahrenheit. In a medium mixing bowl, whisk together your gluten free flour, salt, and xanthan gum. You want those dry ingredients nicely combined.
- Next, add your cold, cubed butter. Using a pastry knife or even just a fork, cut the butter into the flour. Keep going until the butter pieces are about the size of small peas. This little step is what creates those lovely flaky layers.
- Now, pour in the cold milk. Start with about 8 tablespoons and mix it in. You might need to use your hands to gently bring the dough together. If it feels too dry, add a little more milk, one tablespoon at a time. The final dough should be moist but not sticky.
- Divide the dough in half. On a surface lightly dusted with gluten free flour, roll each half into a circle about 10 inches wide. A neat trick is to roll the dough between two pieces of wax paper to prevent sticking. Carefully place one circle of dough into your pie pan and gently press it in. Set the other circle aside for the top.
- In a medium saucepan, combine your cubed chicken, sliced carrots, and frozen peas. Add just enough water to cover everything and bring it to a boil. Let it cook for about 15 minutes, or until the chicken is cooked through. Drain the water and set this mixture aside.
- If you’re using leftover cooked chicken, you can just boil the carrots and peas for a few minutes until tender, then stir in the chicken after you drain them. This makes it an even quicker easy pot pie recipe!
- Using the same saucepan, melt the ⅓ cup of butter over medium heat. Add the chopped onion and cook until it’s soft and translucent. Your kitchen should be smelling pretty amazing right about now.
- Stir in the gluten free flour, salt, and pepper to create a paste. This is your roux, and it’s going to thicken our sauce beautifully. Cook for about a minute, stirring constantly.
- Now, slowly pour in the chicken broth and milk while stirring. It’s important to add the liquid slowly to avoid lumps. Continue cooking and stirring over medium low heat until the sauce simmers and thickens up. Once it’s nice and creamy, remove it from the heat.
- It’s time to put it all together! Spoon the chicken and vegetable mixture into the bottom pie crust. Pour that lovely creamy sauce over the top, filling the pie pan about three quarters full.
- Carefully place the second circle of dough over the filling. Trim any excess dough from the edges and press the top and bottom crusts together to seal them. You can use a fork to create a decorative edge if you like!
- Don’t forget the final touch! Cut a few small slits in the top crust. This allows steam to escape while the Chicken Pot Pie bakes, preventing a soggy top. Now, pop it into your preheated oven.
- Bake for 30 to 35 minutes. You’re looking for a beautiful golden brown crust and a filling that is hot and bubbly. When it’s done, let the Chicken Pot Pie cool on a wire rack for at least 15 minutes before serving. This helps the filling set so it doesn’t all run out when you cut into it.
Notes
Feel free to get creative with the vegetables. Diced potatoes, celery, corn, or even mushrooms would be delicious additions. It’s a great way to use up whatever you have in the fridge.
To save time, use a store bought rotisserie chicken. Just shred the meat and you’re ready to go. This turns it into one of the quickest chicken pie recipes.
When making the crust, handle the dough as little as possible. Overworking it can develop the gluten and make the crust tough instead of tender and flaky.
When measuring gluten free flour, spoon it into your measuring cup and then level it off. Don’t scoop directly from the bag, as this can pack the flour and give you a dry crust.
Nutrition
Calories
Sugar
Fat
Carbs