Have you ever wanted a big bowl of ice cream after a long day? Me too. But sometimes you want something that tastes good and fits your health goals. It feels like a tough choice, right? Well, not anymore.
Let me introduce you to my favorite kitchen helper, the Ninja Creami. This machine makes creating frozen treats at home so much fun. Today, we are making a rich and creamy chocolate protein ice cream. It is one of my go to Protein Ice Cream Ninja Creami Recipes. You are going to love it.
Jump To:
Why You’ll Love This Recipe
So, what makes this Ninja Creami recipe so special? Honestly, it’s all about the texture and the taste. It is incredibly smooth. Not icy or chalky like some protein treats can be. You get that real ice cream feel in every single spoonful.
It is also packed with protein. This makes it a fantastic post workout snack or a smart dessert choice. You can satisfy your sweet tooth without any of the usual guilt. It keeps you full and happy.
The best part is how simple it is. You just mix a few things together, freeze it, and let the ninja creami do its work. It feels like you are a kitchen wizard. Plus, you can customize it with your favorite mix ins. What’s not to love?
Ingredients
Gathering your ingredients is the first step to deliciousness. You do not need anything too fancy for this recipe. Most of these items might already be in your pantry. It is one of the easiest Protein Ice Cream Ninja Creami Recipes you will find.
Protein Ice Cream Base
- 2 cups (16 oz) milk of choice. Whole, 2 percent, soy, oat, or almond milk all work well.
- 2 scoops (about 64 g) chocolate protein powder. A brownie or fudge flavor is amazing here.
- 1 scoop (about 10 g) unflavored or chocolate collagen. This is optional but adds extra smoothness.
- 2 to 3 tablespoons (about 40 g) natural chocolate sauce. A date sweetened or pure cocoa version is great.
Mix In Ideas
- Protein cookie dough or gluten free cookie dough
- Sliced banana or other fruit of your choice
- 2 to 3 tablespoons creamy peanut butter
- 2 tablespoons mini chocolate chips
Step By Step Instructions
Ready to make some magic with your Ninja Creami? Let’s walk through the process together. It is very straightforward, I promise.
Step 1: Mix The Base
First, grab your Ninja Creami pint. If you have the Deluxe Model NC501, you will use the 24 ounce pint. Take your milk, protein powder, collagen, and chocolate sauce.
Pour them all into the pint. Now, you need to mix everything together until it is completely smooth. You can use a whisk or a small immersion blender for this. Make sure there are no clumps left.
If you have the 7 in 1 NC301 model, you will need to halve this recipe to fit your smaller pint. The process is exactly the same, just with smaller amounts.
Step 2: Freeze
Once your base is smooth and chocolatey, it is time for the freezer. Place the pint in the freezer without the lid. It needs to freeze for at least 10 hours, but overnight is even better.
A little tip. Try to keep the surface of the liquid as flat as possible. This helps prevent a large bump from forming on top as it freezes. A level surface makes the spinning process much easier later.
Step 3: Prep Before Spinning
After its long nap in the freezer, take the pint out. Do not spin it right away. Let it sit on the counter for about 10 minutes to soften just a tiny bit.
If you see a little bump in the middle, gently scrape it off with a spoon to make the top flat. Then, run the outside of the pint under warm water for 30 to 60 seconds. Dry it completely before putting it in the machine.
Step 4: First Spin
Now for the exciting part. Place the pint into your Ninja Creami Deluxe. Select the Full button and then the Lite Ice Cream cycle. Let the machine work its magic.
After the first spin, check the texture. Sometimes it might look a little powdery or crumbly. Do not worry. This is totally normal. If it does, add about 2 tablespoons of milk and hit the Re Spin button. You might need to Re Spin once or twice to get it perfectly creamy.
Step 5: Add Mix Ins
Once your ice cream is smooth and creamy, it is time for mix ins. Use a spoon to make a small well in the center of the ice cream. This is where you will add your goodies.
Drop in your peanut butter, cookie dough, or chocolate chips. Place the pint back into the ninja creami and run the Mix In cycle. This will distribute your treats perfectly throughout the ice cream.
Step 6: Serve And Enjoy
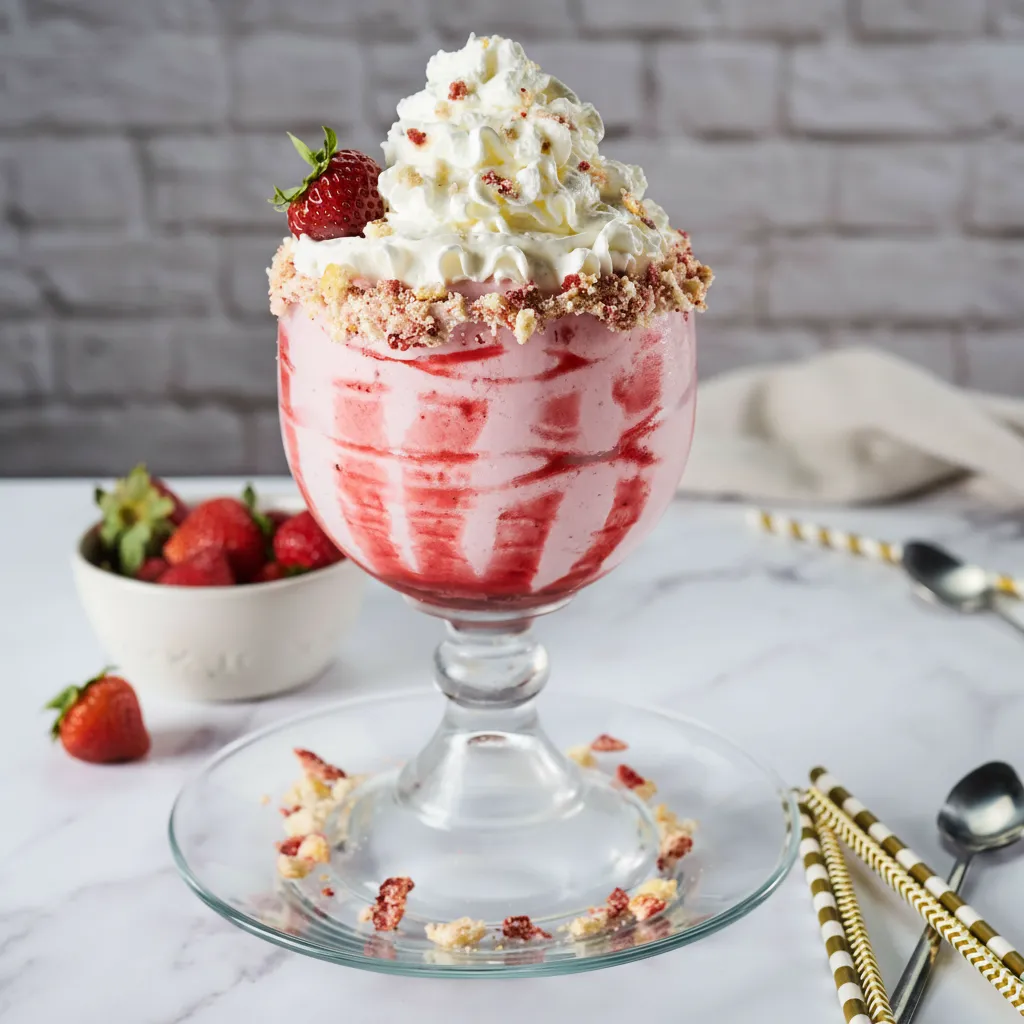
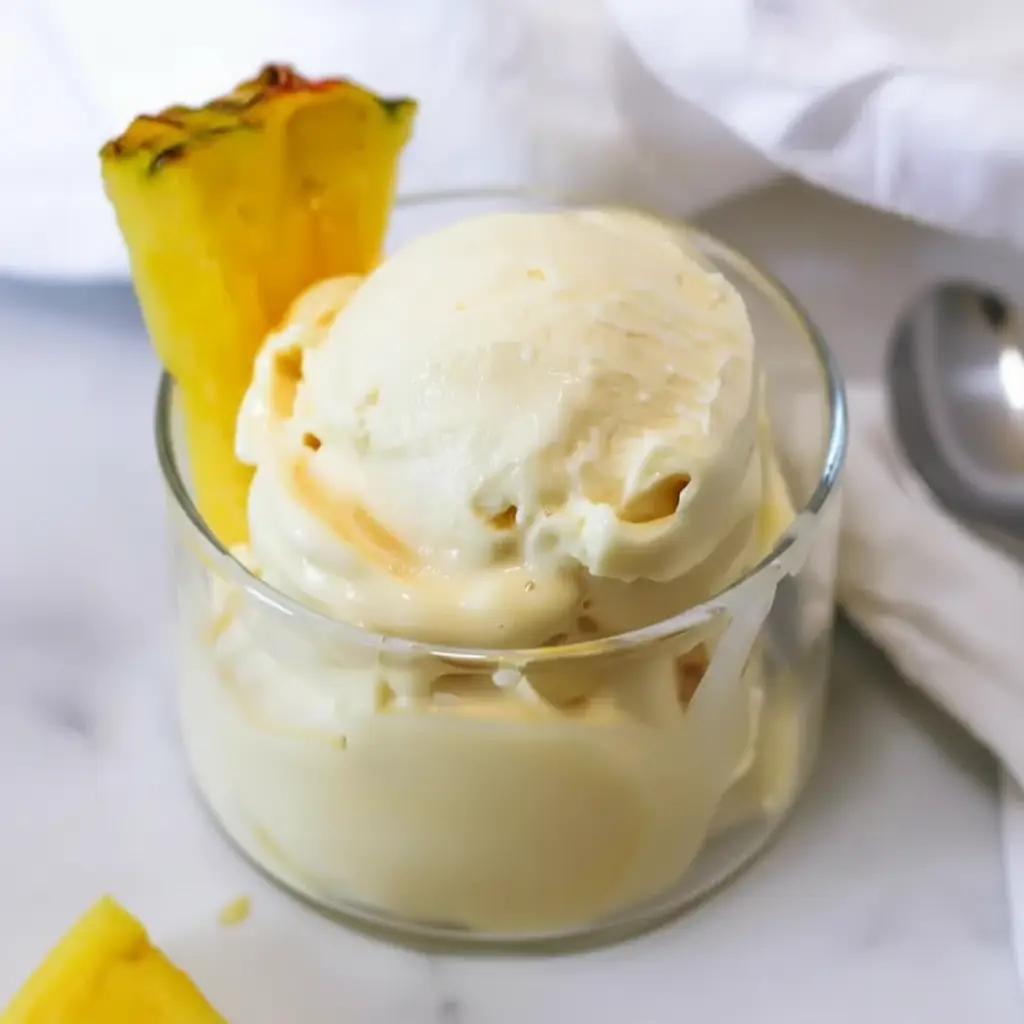
And that is it. Your homemade protein ice cream is ready. Scoop it into a bowl, maybe drizzle a little extra chocolate sauce on top, and enjoy. You just made an amazing treat. This is my absolute favorite Recette Glace Ninja Creami.


How To Store Leftovers
If you somehow have leftovers, storing them is easy. First, use a spoon to flatten the top surface of the ice cream in the pint. This is really important for getting a good texture next time.
Put the lid on and place it back in the freezer. When you are ready for another scoop, you will need to process it again in your Ninja Creami. For the Deluxe model, use the “bottom” Lite Ice Cream setting. This only processes the top half.
If you added mix ins, you will also want to use the “bottom” Mix In cycle. This ensures your ice cream is just as creamy as the first time you made it.
Tips
Want to make your protein ice cream even better? Here are a few tips I have learned along the way. Your choice of milk really matters. For the highest protein content, Fairlife 2 percent milk is a great option. It adds about 34 grams of protein per serving.
If you prefer a lighter ice cream, almond milk is a good choice. It is still creamy but you might need that extra 2 tablespoons of milk after the first spin to avoid a powdery texture. The Ninja Creami handles both wonderfully.
For a dairy free option, just use your favorite plant based milk. Soy, oat, and Ripple milk all work well. Pair it with a plant based protein powder. To make it fully vegan, you can replace the collagen. A small spoonful of nut butter or even avocado can add that same creaminess.
Remember, the Re Spin button is your best friend. If your ice cream base doesn’t look smooth and creamy after the first cycle, a little extra milk and a Re Spin will almost always fix it. Patience is key with the Ninja Creami.
Conclusion
Making delicious, high protein ice cream at home is totally possible. Thanks to the Ninja Creami, you can whip up a batch of this creamy chocolate treat anytime you want. It is a simple way to enjoy a classic dessert without compromising your goals.
I hope you love this recipe as much as I do. It is one of those Protein Ice Cream Ninja Creami Recipes that you will come back to again and again. Feel free to experiment with different flavors and mix ins. Have fun with it.
FAQ
Can I Use A Different Protein Powder Flavor?
Absolutely. Vanilla or peanut butter flavored protein powders would be delicious in this recipe. You could even try a salted caramel flavor for something different. The base is very versatile.
Why Is My Ice Cream Icy?
An icy texture usually means the base needs more fat or protein to create a smoother result. Using a creamier milk like whole milk or oat milk can help. Also, make sure to use the Re Spin function until it is smooth.
Do I Have To Use Collagen?
No, the collagen is optional. It is mainly there to help improve the texture and make the ice cream a bit smoother. If you do not have it, your ice cream will still be very tasty.
Can I Make This Recipe In The Smaller Ninja Creami?
Yes, you can. If you have the NC301 model or another with smaller pints, just cut all the ingredient amounts in half. The instructions and settings on the ninja creami remain the same.
What Is The Best Milk To Use?
The best milk depends on what you are looking for. Fairlife milk is great for extra protein. Oat milk is wonderful for creaminess in a dairy free version. Almond milk is a good lighter option. They all work, so feel free to choose your favorite.
Ninja Creami Chocolate Protein Ice Cream
This rich and creamy chocolate protein ice cream is incredibly easy to make in your Ninja Creami. A smooth, high-protein frozen dessert that’s a fantastic post-workout snack or healthy treat.
Ingredients
Instructions
- Mix Base: In a Ninja Creami pint, combine milk, protein powder, collagen, and chocolate sauce. Whisk or blend until smooth.
- Freeze: Place the pint on a level surface in the freezer for at least 10 hours, or overnight.
- Prep for Spinning: Let the frozen pint sit on the counter for 10 minutes to soften slightly.
- First Spin: Install the pint in your Ninja Creami and process using the ‘Lite Ice Cream’ setting.
- Re-spin: If the texture is powdery, add 1-2 tablespoons of milk and use the ‘Re-spin’ cycle until creamy.
- Add Mix-ins: Create a hole in the center, add your desired mix-ins, and run the ‘Mix-in’ cycle.
- Serve: Scoop and enjoy immediately.
Notes
For the creamiest texture, use higher-fat milk like whole milk or oat milk.
Fairlife milk is a great option to add even more protein to the base.
The ‘Re-spin’ function is key to fixing a crumbly or icy texture. Don’t be afraid to use it more than once!
Nutrition
Calories
Sugar
Fat
Carbs