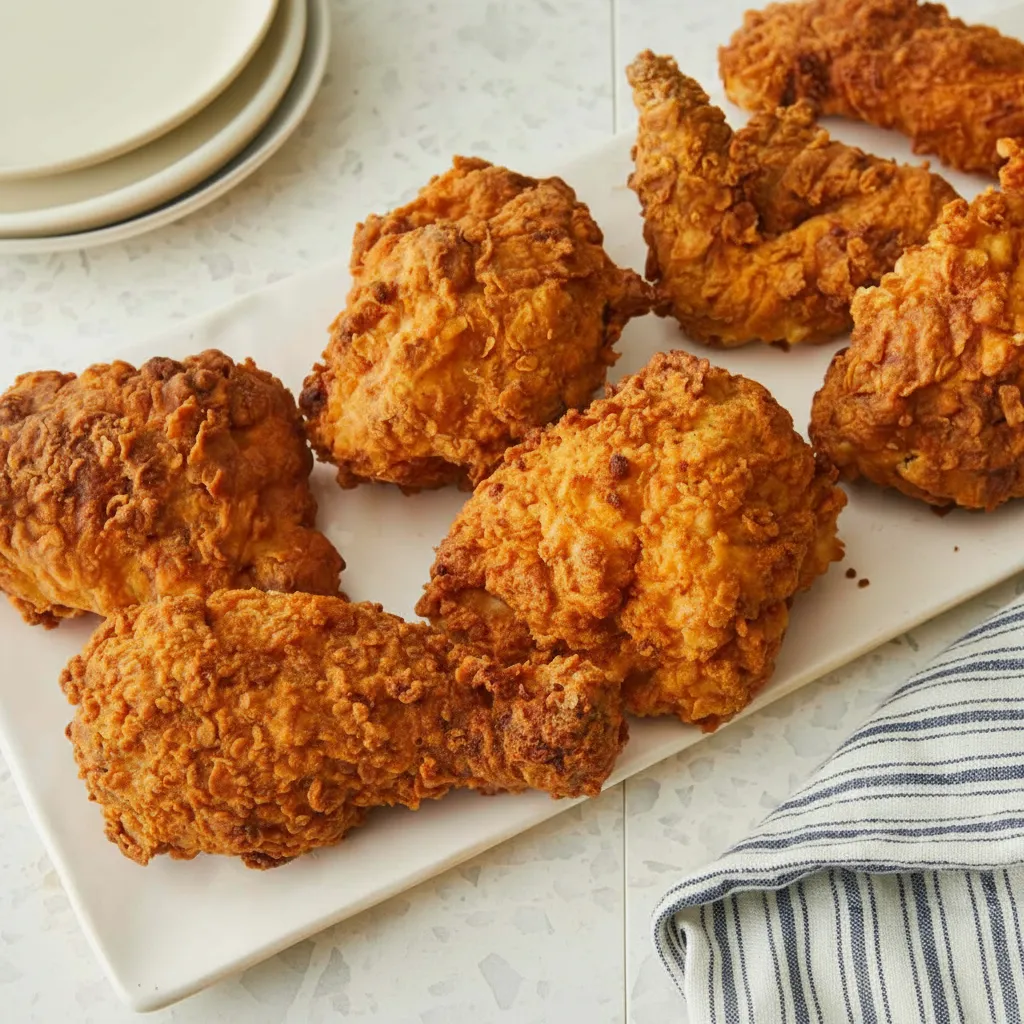
There is nothing quite like the sound of chicken hitting hot oil. It instantly signals that something delicious is coming. We all love that moment when you bite into a piece of perfectly cooked chicken. The crunch is loud, the meat is juicy, and the flavor is just right. It is the ultimate comfort food.
Many people feel intimidated by making Fried Chicken at home. It can seem messy or complicated. But honestly, it is much easier than you think. You do not need fancy equipment or professional skills. All you need is a little patience and the right technique.
Jump To:
Why You’ll Love This Recipe
This dish is a total crowd pleaser. Whether it is a Tuesday night dinner or a Sunday family gathering, this recipe always delivers. The secret lies in the double coating method. This ensures that every single bite has that irresistible crunch we all crave.
You will also love how budget friendly this is. Making Fried Chicken at home costs a fraction of what you would pay at a restaurant. Plus, you control the ingredients. You know exactly what is going into your food. There are no mystery additives here.
Another reason this is the Best Fried Chicken Recipe is the marinade. The buttermilk works magic on the meat. It breaks down proteins to keep the chicken tender. Even if you are a beginner, this recipe makes you look like a pro. Your kitchen will smell amazing, and your family will thank you.
Finally, this recipe is versatile. You can adjust the spice level to your liking. Add more cayenne if you like heat. Dial it back if you prefer it mild. It is your kitchen, so you make the rules.
Ingredients
You do not need a long list of hard to find items for this. Most of these ingredients are likely already in your pantry. Here is what you need to get started on your Chicken Cooking journey.
- 2 cups buttermilk
- 1 tablespoon Dijon mustard
- 1 teaspoon salt (divided use)
- 1 teaspoon ground black pepper (divided use)
- 1 teaspoon cayenne pepper (divided use)
- 1 whole chicken, cut into pieces
- 2 cups all purpose flour
- 1 tablespoon baking powder
- 1 tablespoon garlic powder
- 1 tablespoon onion powder
- 5 cups vegetable oil for frying
Step-By-Step Instructions
Ready to get cooking? Follow these simple steps to create the most delicious chicken you have ever tasted. We will guide you through the process so you feel confident.
Step 1: Prepare The Marinade
Grab a large bowl. Whisk together the buttermilk, Dijon mustard, 1 teaspoon of salt, 1 teaspoon of pepper, and 1 teaspoon of cayenne. Make sure everything is well combined. The mustard adds a nice tang that helps balance the richness.
Step 2: Marinate The Chicken
Pour your buttermilk mixture into a large resealable plastic bag. Add your chicken pieces to the bag. Seal it tight and squeeze out any excess air. squish the bag around to coat every piece. Place it in the refrigerator. Let it marinate for 2 to 8 hours. This time is crucial for tender meat.
Step 3: Mix Dry Ingredients
When you are ready to cook, grab another resealable plastic bag. Combine the flour, baking powder, garlic powder, onion powder, and the remaining salt, pepper, and cayenne. Seal the bag and shake it vigorously. This ensures the spices are distributed evenly throughout the flour.
Step 4: The Double Dredge
Now for the fun part. Work with one piece of chicken at a time. Remove a piece from the marinade and drop it into the flour bag. Seal and shake to coat. Then, dip it back into the buttermilk marinade. Finally, drop it back into the flour bag and shake again. This double coating creates that thick, crispy crust we all love.
Step 5: Let It Rest
Place the coated chicken pieces on a wire rack set over a baking sheet. Do not skip this step. Letting the chicken rest helps the coating adhere to the meat. If you fry it immediately, the breading might slide off in the oil. Give it about 10 minutes.
Step 6: Fry To Perfection
While the chicken rests, heat your vegetable oil in a large, heavy skillet or Dutch oven. You want medium high heat. Carefully add the chicken in batches. Do not overcrowd the pan. Fry the chicken, turning occasionally, until it is golden brown. This usually takes about 15 to 18 minutes per batch.
Step 7: Check Temperature
Safety first. Use an instant read thermometer to check the thickest part of the meat. It should read at least 165 degrees F (74 degrees C). Once cooked, transfer the chicken to a clean wire rack or paper towels to drain excess oil. Serve hot and enjoy your masterpiece!


How To Store Leftovers
If you manage to have leftovers, you are in luck. Cold Fried Chicken is a classic treat. However, if you want to reheat it, proper storage matters. Place the cooled chicken in an airtight container. It will stay good in the fridge for up to 3 days.
Avoid the microwave for reheating. The microwave will make the crust soggy and rubbery. Nobody wants that. Instead, use your oven or an air fryer. This brings the crunch back to life.
Preheat your oven to 350 degrees F. Place the chicken on a wire rack over a baking sheet. Bake for about 10 to 15 minutes until heated through. This method keeps the skin crispy while warming the meat.
You can also freeze the cooked chicken. Wrap each piece tightly in foil and place them in a freezer bag. They can last for up to 3 months. Thaw them in the fridge overnight before reheating.
Tips
Oil temperature is key. If the oil is too hot, the outside will burn before the inside cooks. If it is too cool, the chicken will absorb too much grease. Aim for a steady sizzle. A candy thermometer can be very helpful here.
Do not overcrowd the pan. We mentioned this before, but it is worth repeating. Adding too many pieces drops the oil temperature quickly. This leads to soggy chicken. Fry in small batches for the best results.
Use a wire rack for draining. Placing hot chicken directly on a plate can cause steam to build up underneath. This steam turns your crispy crust into mush. A wire rack allows air to circulate, keeping the bottom just as crunchy as the top.
Season your flour well. The recipe calls for spices, but feel free to taste a tiny pinch of the flour mixture. It should taste salty and flavorful. If the flour is bland, your crust will be bland. Don’t be shy with the seasoning.
Let the chicken come to room temperature slightly before frying. If you put ice cold chicken into hot oil, it drops the temp drastically. Let the marinated chicken sit on the counter for 15 minutes before dredging.
Keep the first batch warm. While you fry the second batch, place the cooked pieces in a warm oven. Set the oven to 200 degrees F. This keeps them hot and crispy without cooking them further.
Conclusion
Making Fried Chicken at home is a rewarding experience. It brings people together and creates wonderful memories. The smell of savory spices filling the kitchen is simply unbeatable. Plus, the taste of homemade beats fast food any day of the week.
We hope this guide on How To Make Fried Chicken helps you feel confident in the kitchen. Remember, practice makes perfect. The more you make it, the better you will get at judging the oil and the timing. It is a skill worth mastering.
Pair this dish with some coleslaw, mashed potatoes, or biscuits for a full meal. It is the perfect way to show your family some love through food. So grab your ingredients and get frying!
FAQ
Can I Make This Gluten Free?
Yes, you can. Simply swap the all purpose flour for a high quality gluten free flour blend. Make sure the blend contains xanthan gum for better binding. The texture might be slightly different, but it will still be delicious and crunchy.
What Is The Best Oil For Frying?
You need an oil with a high smoke point. Vegetable oil, canola oil, or peanut oil are excellent choices. They can handle the high heat without burning. Avoid olive oil or butter, as they will smoke and burn too quickly.
Why Is My Breading Falling Off?
This usually happens if the chicken was too wet or didn’t rest long enough. Patting the chicken dry before the marinade helps. Also, letting the dredged chicken rest on the wire rack for 10 minutes is vital. It acts like glue for the flour.
Can I Use Chicken Breast Instead?
Absolutely. You can use any part of the bird. However, breast meat cooks faster than dark meat like thighs or drumsticks. Keep an eye on the time so it does not dry out. Cutting breasts into smaller tenders works great too.
How Do I Know When The Oil Is Ready?
If you do not have a thermometer, you can use a wooden spoon. Dip the handle into the oil. If small bubbles form around the wood, the oil is ready. If it bubbles violently, it is too hot. If nothing happens, it is too cold.
Best Fried Chicken Recipe
Learn how to make the best fried chicken at home with this no-fuss recipe! The secret double-coating method guarantees an irresistibly crunchy crust and juicy, tender meat every time. A perfect, comforting meal for any weeknight.
Requirements


Ingredients
Instructions
- In a large bowl, whisk together the buttermilk, Dijon mustard, 1 teaspoon of salt, 1 teaspoon of pepper, and 1 teaspoon of cayenne.
- Pour the buttermilk mixture into a large resealable plastic bag. Add the chicken pieces, seal, and squish to coat. Refrigerate and let marinate for 2 to 8 hours.
- In another large resealable plastic bag, combine the flour, baking powder, garlic powder, onion powder, and the remaining salt, pepper, and cayenne. Seal and shake vigorously to mix.
- Working one piece at a time, remove a chicken piece from the marinade, drop it into the flour bag, and shake to coat. Dip it back into the buttermilk, then drop it into the flour bag again and shake for a final coating.
- Place the coated chicken pieces on a wire rack and let them rest for about 10 minutes. This helps the coating adhere.
- While the chicken rests, heat vegetable oil in a large, heavy skillet or Dutch oven over medium-high heat. Carefully add the chicken in batches, being careful not to overcrowd the pan.
- Fry the chicken, turning occasionally, for 15 to 18 minutes per batch, until golden brown and cooked through. Use an instant read thermometer to ensure the thickest part of the meat reaches at least 165°F (74°C).
- Transfer the cooked chicken to a clean wire rack to drain excess oil. Serve hot and enjoy.
Notes
Oil temperature is key. If it’s too hot, the outside will burn before the inside cooks. If it’s too cool, the chicken will be greasy. Aim for a steady sizzle.
Do not overcrowd the pan. Frying in small batches ensures the oil temperature stays high, resulting in crispy, not soggy, chicken.
Always drain fried chicken on a wire rack. Placing it on paper towels can trap steam and make the bottom of the crust soggy.
Don’t be shy with seasoning the flour. A well-seasoned flour mixture is crucial for a flavorful crust.
Nutrition
Calories
Sugar
Fat
Carbs