There is something so special about a homemade Strawberry Shortcake. It just tastes like sunshine and happy memories, doesn’t it? It reminds me of long summer days and family gatherings. You might even think of the sweet Strawberry Shortcake Characters from childhood cartoons. This recipe captures that same feeling of simple joy.
We are not using store bought cake here. Oh no. We are making tender, flaky, buttery biscuits from scratch. And it is so much easier than you think. Paired with a simple fresh strawberry sauce and fluffy whipped cream, this dessert is a real treat for everyone. Let’s get baking!
Jump To:
Why You’ll Love This Recipe
First off, the flavor is just incredible. The combination of sweet strawberries, rich cream, and savory biscuits is a classic for a reason. It is balanced, fresh, and completely satisfying. It is the kind of dessert that gets rave reviews every single time.
The texture is also a huge part of the appeal. You get the soft, crumbly biscuit soaking up the juicy berry syrup. Then you have the light, airy whipped cream melting into everything. Each spoonful is a wonderful mix of sensations. It is comforting and feels a little fancy at the same time.
This recipe is also very straightforward. There are no complicated steps or hard to find ingredients. It is a great starting point for new bakers. And for seasoned cooks, it is a reliable favorite you can whip up without much fuss. It is a simple pleasure that delivers big results.
Plus, it looks so beautiful. The bright red berries against the white cream and golden biscuits are stunning. It makes a great centerpiece for a summer party, a backyard barbecue, or just a special weeknight dinner. A true showstopper that tastes as good as it looks.
Ingredients
For this classic Strawberry Shortcake, we are using simple, wholesome ingredients. Nothing too complicated, just good quality basics that come together beautifully. Here is what you will need for each component.
Fresh Strawberry Sauce
- 2 pints strawberries, halved, then sliced
- ⅓ cup granulated sugar
Shortcakes
- 1 ¾ cups all purpose flour (White Lily Flour is great if you can find it)
- 1 ½ teaspoons baking powder
- ¼ teaspoon baking soda
- ½ teaspoon salt
- 3 tablespoons granulated sugar
- 10 tablespoons unsalted butter, chilled
- ½ cup heavy cream, chilled (or whole buttermilk)
- Extra cream for lightly brushing tops of biscuits
- Turbinado sugar for sprinkling
- Lemon zest
- Extra flour for dusting
Homemade Whipped Cream
- 1 ½ cups heavy whipping cream
- 3 tablespoons granulated sugar
- 1 teaspoon pure vanilla extract
- Pinch of salt
- Zest of ½ lemon
Step By Step Instructions
Making this dessert is a fun process. We will go through it one step at a time. Just follow along, and you will have a beautiful Strawberry Shortcake ready in no time.
Step 1: Make The Fresh Strawberry Sauce
Find a large bowl for your strawberries. Take about one third of the sliced berries and gently mash them with a potato masher. You want to release some of their juices. This helps create a lovely syrup naturally.
Now, add the rest of the sliced strawberries to the bowl. Sprinkle the sugar over everything. Give it a good stir to combine. Cover the bowl and just set it aside on the counter. The sugar will draw out more juice and create a delicious sauce while you work on the biscuits.
Step 2: Prepare The Shortcake Dough
First, preheat your oven to 425 degrees Fahrenheit. In another large bowl, preferably a glass one, whisk together the dry ingredients. That is the flour, baking powder, baking soda, salt, and sugar. A simple fork works just fine for this.
Next comes the butter. Make sure it is very cold. Grate the chilled butter directly into the flour mixture using a box grater. This is the trick for flaky layers. Use your fork to toss the butter shreds, coating them in flour. Gently mash them in a little bit.
Create a small well in the center of your flour and butter mixture. Pour the cold heavy cream into that well. Use the fork again to lightly mix everything together. You are aiming for a shaggy, loose dough. Do not overmix it. A few dry spots are totally okay.
Step 3: Cut And Chill The Biscuits
Turn the loose dough out onto a lightly floured surface. Gently gather the pieces and press them together. This next part is important for creating layers. Turn the dough over once or twice and pat it into a rectangle. Cut that rectangle into four equal pieces.
Now, stack those four pieces on top of each other. Gently pat the stack down into a rectangle again. Cut it into quarters one more time. Repeat this stacking and patting process one last time. Finish by patting the dough into a rectangle that is about one to one and a half inches thick.
Dip a two inch biscuit cutter in some flour. This prevents sticking. Press the cutter straight down into the dough. Do not twist it. Twisting seals the edges and stops the biscuits from rising tall. Place the cut biscuits on a baking sheet, about one to two inches apart. Re group the scraps, pat down, and cut more until the dough is all used.
Step 4: Bake The Shortcakes
Place the baking sheet with the biscuits into the freezer for 15 minutes. This chill time helps the butter stay solid, which creates steam in the oven and gives you those amazing flaky layers. Do not skip this step. It makes a huge difference.
After 15 minutes, remove them from the freezer. Lightly brush the tops with a little extra cream. Sprinkle them generously with turbinado sugar for a sweet, crunchy topping. Add a little fresh lemon zest too. Bake in your preheated oven for about 15 minutes, or until they are golden brown and beautiful.
Step 5: Whip The Cream
While the biscuits are baking is a great time to make the whipped cream. In a mixing bowl, whip the heavy cream with a mixer on high speed. Continue until soft peaks just begin to form. This means when you lift the beaters, a peak forms but then droops over.
Once you see soft peaks, add the sugar, vanilla extract, a tiny pinch of salt, and the lemon zest. Continue whipping on high speed. Stop when you have stiff peaks. This means the peaks will hold their shape. Be careful not to overwhip or you will start making butter. Set the finished cream aside.
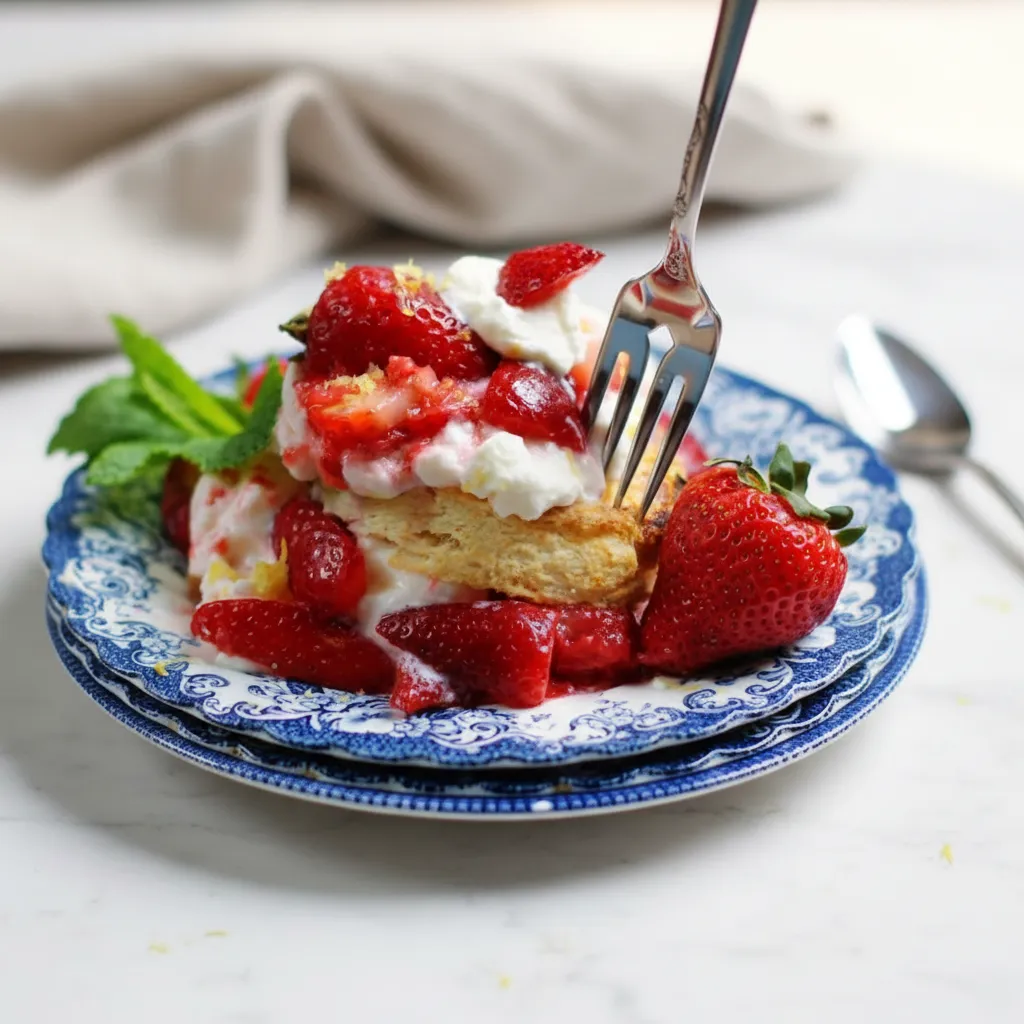
Step 6: Assemble Your Strawberry Shortcake
Once the shortcakes are baked and have cooled slightly, it is time to assemble your delicious dessert. Carefully cut a shortcake in half. Place both halves open faced on a serving plate. This makes a great presentation for your Strawberry Shortcake.
Add a generous spoonful of whipped cream onto the bottom half of the shortcake. Then, top that with a big spoonful of the strawberries and their lovely syrup. Let some of that syrup drizzle down the sides. It looks so good.
Gently place the top half of the shortcake over the berries. Do not press down hard. You want to keep everything light and airy. Add another dollop of whipped cream on top and finish with a few more strawberries. A sprig of fresh mint and a little extra lemon zest are a nice touch. Your homemade Strawberry Shortcake is ready!


How To Store Leftovers
If you happen to have any leftovers, it is best to store the components separately. This keeps everything fresh. Assembled shortcakes can become soggy if they sit for too long. Proper storage is key.
Keep the baked shortcakes in an airtight container at room temperature for up to two days. Store the strawberry sauce in a covered container in the refrigerator for about three days. The whipped cream should also be kept in an airtight container in the fridge and is best used within a day or two.
When you are ready for another serving, just assemble a fresh Strawberry Shortcake. It will taste just as good as the first time. It is a little extra step that is well worth the effort for a top quality dessert experience.
Tips
For the flakiest biscuits, your butter and cream must be very cold. Cold fat creates steam pockets as it bakes, which results in those lovely, airy layers we all love. Do not let your ingredients sit out at room temperature.
Be gentle with the dough. Overworking it develops the gluten in the flour, which can make your shortcakes tough instead of tender. Mix just until the ingredients come together, and handle the dough as little as possible.
Let your strawberries macerate. That is the process of them sitting in sugar and releasing their juices. Giving them at least 30 minutes to an hour makes a huge difference in the flavor and texture of your sauce.
Do not twist the biscuit cutter. As mentioned before, pressing straight down and lifting straight up allows the biscuits to rise to their full potential. A clean cut is a happy biscuit. It is a small detail that has a big impact.
Conclusion
And there you have it. A simple, beautiful recipe for a classic Strawberry Shortcake. It is a dessert that brings people together and celebrates the sweet flavors of the season. I hope you enjoy making it as much as you enjoy eating it.
Baking from scratch can be so rewarding, and this is one of those recipes that proves it. With its flaky biscuits, fresh berries, and creamy topping, it is a truly special treat. Happy baking!
FAQ
Can I Use A Different Fruit?
Absolutely. While strawberry is the classic choice, this recipe works wonderfully with other fruits. Peaches, blueberries, or a mix of berries would be delicious. Just adjust the sugar based on the sweetness of your fruit.
Can I Make This Ahead Of Time?
Yes, you can prepare the components in advance. The shortcakes can be baked a day ahead and stored in an airtight container. The strawberry sauce can be made and refrigerated for a couple of days. Just whip the cream right before serving for the best texture.
Why Are My Biscuits Not Flaky?
The most common reasons are using butter that was not cold enough or overworking the dough. The cold butter pieces are essential for creating steam and layers. Handling the dough too much makes it tough. Keep everything cold and be gentle with your mixing and shaping.
Is This A Vintage Strawberry Shortcake Recipe?
This recipe is very much in the style of a Vintage Strawberry Shortcake. It uses a traditional biscuit or shortcake base rather than sponge cake. This method is considered the classic, old fashioned way to make this beloved dessert, bringing a sense of timeless comfort.
Homemade Strawberry Shortcake
A simple, beautiful recipe for a classic Strawberry Shortcake. It uses tender, flaky, buttery biscuits from scratch, paired with a fresh strawberry sauce and fluffy whipped cream. This comforting dessert brings people together and celebrates the sweet flavors of the season, perfect for any gathering.
Requirements


Ingredients
Instructions
- Find a large bowl for your strawberries. Take about one third of the sliced berries and gently mash them with a potato masher. You want to release some of their juices. This helps create a lovely syrup naturally.
- Now, add the rest of the sliced strawberries to the bowl. Sprinkle the sugar over everything. Give it a good stir to combine. Cover the bowl and just set it aside on the counter. The sugar will draw out more juice and create a delicious sauce while you work on the biscuits.
- First, preheat your oven to 425 degrees Fahrenheit. In another large mixing bowl, preferably a glass one, whisk together the dry ingredients. That is the flour, baking powder, baking soda, salt, and sugar. A simple fork works just fine for this.
- Next comes the butter. Make sure it is very cold. Grate the chilled butter directly into the flour mixture using a box grater. This is the trick for flaky layers. Use your fork to toss the butter shreds, coating them in flour. Gently mash them in a little bit.
- Create a small well in the center of your flour and butter mixture. Pour the cold heavy cream into that well. Use the fork again to lightly mix everything together. You are aiming for a shaggy, loose dough. Do not overmix it. A few dry spots are totally okay.
- Turn the loose dough out onto a lightly floured surface. Gently gather the pieces and press them together. This next part is important for creating layers. Turn the dough over once or twice and pat it into a rectangle. Cut that rectangle into four equal pieces.
- Now, stack those four pieces on top of each other. Gently pat the stack down into a rectangle again. Cut it into quarters one more time. Repeat this stacking and patting process one last time. Finish by patting the dough into a rectangle that is about one to one and a half inches thick.
- Dip a two inch biscuit cutter in some flour. This prevents sticking. Press the cutter straight down into the dough. Do not twist it. Twisting seals the edges and stops the biscuits from rising tall. Place the cut biscuits on a baking sheet, about one to two inches apart. Re group the scraps, pat down, and cut more until the dough is all used.
- Place the baking sheet with the biscuits into the freezer for 15 minutes. This chill time helps the butter stay solid, which creates steam in the oven and gives you those amazing flaky layers. Do not skip this step. It makes a huge difference.
- After 15 minutes, remove them from the freezer. Lightly brush the tops with a little extra cream. Sprinkle them generously with turbinado sugar for a sweet, crunchy topping. Add a little fresh lemon zest too. Bake in your preheated oven for about 15 minutes, or until they are golden brown and beautiful.
- While the biscuits are baking is a great time to make the whipped cream. In a mixing bowl, whip the heavy cream with a mixer on high speed. Continue until soft peaks just begin to form. This means when you lift the beaters, a peak forms but then droops over.
- Once you see soft peaks, add the sugar, vanilla extract, a tiny pinch of salt, and the lemon zest. Continue whipping on high speed. Stop when you have stiff peaks. This means the peaks will hold their shape. Be careful not to overwhip or you will start making butter. Set the finished cream aside.
- Once the shortcakes are baked and have cooled slightly, it is time to assemble your delicious dessert. Carefully cut a shortcake in half. Place both halves open faced on a serving plate. This makes a great presentation for your Strawberry Shortcake.
- Add a generous spoonful of whipped cream onto the bottom half of the shortcake. Then, top that with a big spoonful of the strawberries and their lovely syrup. Let some of that syrup drizzle down the sides. It looks so good.
- Gently place the top half of the shortcake over the berries. Do not press down hard. You want to keep everything light and airy. Add another dollop of whipped cream on top and finish with a few more strawberries. A sprig of fresh mint and a little extra lemon zest are a nice touch. Your homemade Strawberry Shortcake is ready!
Notes
Taste the base before freezing and adjust sweetener if needed. Frozen desserts tastes less sweet, so aim for slightly sweeter than you prefer.
Do not fill the pint past the max fill line, as the mixture will expand during freezing and processing.
A full 24-hour freeze is essential for the best, creamiest texture. Rushing this step can result in an icy or soupy consistency.
Feel free to experiment with other flavors like vanilla protein with frozen berries or adding mint extract for a mint-chip version.
Nutrition
Calories
Sugar
Fat
Carbs