Have you jumped on the Ninja Creami train yet? If so, you know the excitement of turning almost anything into a creamy frozen treat. It is a fantastic machine. But maybe you have found the tricky part is getting the base just right.
Some recipes are complicated. Others turn out icy. Well, I have some great news for you. The solution is simple and probably at your local grocery store. Today we are talking about the easiest of all Fairlife Ninja Creami Recipes. You are going to love this.
Jump To:
Why You’ll Love This Recipe
First off, this recipe is incredibly simple. We are talking about one single ingredient. Yes, you read that right. There is no long list of items to buy. No complicated prep work. It is simplicity at its finest.
Another great reason is the texture. Fairlife milk is ultra filtered. This process removes lactose and much of the sugar. It also concentrates the protein and calcium. What does this mean for your ice cream? It means a creamier result. The higher protein content helps prevent large ice crystals from forming. This gives you a smoother, richer texture that feels like traditional ice cream. It is a big deal for homemade treats.
This is one of those Protein Ice Cream Ninja Creami Recipes that does not taste like a compromise. The flavor is rich and satisfying. It is a fantastic way to satisfy a sweet tooth. Plus you get a nice dose of protein with it. That is a win in my book.
Finally, this recipe is a blank canvas. It is delicious on its own. But it is also the perfect starting point for your creativity. You can add mix ins. You can create swirls. You can use it as a base for all sorts of amazing desserts. The possibilities are truly endless with these Fairlife Ninja Creami Recipes.
Ingredients
Okay, prepare yourself for the shortest ingredient list ever. It is almost funny how simple this is. But trust me, the results are fantastic. Let’s get to it.
- 2 Cups chocolate 2% Fairlife milk
That is it. That is the whole list. You might be wondering why this specific milk works so well. As I mentioned, the ultra filtration process is key. Regular milk has more water content. This water can easily turn into ice crystals in the freezer. That is what gives some homemade ice cream a gritty or icy texture.
Fairlife has less water and more protein. The protein molecules get in the way of water molecules. This makes it harder for them to form big ice crystals. The result is a texture that is much closer to the store bought ice cream we all love. It is a little bit of food science magic happening in your freezer.
Step By Step Instructions
Following these steps is super important for getting that perfect creamy texture. The Ninja Creami is a powerful machine, but it needs the base to be frozen correctly. Here is how to do it.
Step 1: Prepare Your Pint
First, grab your clean Ninja Creami pint. Carefully pour the two cups of Fairlife chocolate milk Ninja Creami base into the pint. Do not fill it past the max fill line. This is very important. The machine needs space to work its magic and expand the mixture.
Once filled, place the storage lid on securely. Make sure it is snapped on tight. You do not want any spills in your freezer. That would be a sad start to our ice cream adventure.
Step 2: Freeze For 24 Hours
This step requires patience, but it is not optional. Place the pint on a flat, level surface in your freezer. A crooked pint will lead to problems when you spin it. Let it freeze for a full 24 hours.
I know, waiting is the hardest part. But the mixture needs to be frozen completely solid. If it is even a little bit liquid in the center, the blade could be damaged. A solid freeze ensures the machine can shave the block of frozen milk properly.
Step 3: Spin Your Ice Cream
After 24 long hours, it is time for the fun part. Take the pint out of the freezer. Remove the storage lid. Place the frozen pint into the outer bowl that came with your machine. Now, take the processing lid with the blade attached. Place it on top of the outer bowl and twist it until it locks into place.
Place the entire assembly into the Ninja Creami machine. Lock it into place by twisting the handle up. Turn the machine on. For this recipe, you will want to select the ‘Lite Ice Cream’ function. Press the button and let the machine do its thing. It will be loud, but that is the sound of deliciousness being made.
Step 4: The Magic Of The Re-Spin
When the first cycle is done, unlock the machine and remove the bowl. Take off the lid. Do not be alarmed if your mixture looks dry and powdery. This is completely normal for many Fairlife Ninja Creami Recipes, especially low fat ones.
This is where the magic happens. Put the lid back on, lock it into the machine, and press the ‘Re-Spin’ button. This second spin is what transforms that crumbly powder into a smooth, creamy, scoopable treat. It is an amazing transformation to watch.
Step 5: Serve And Enjoy
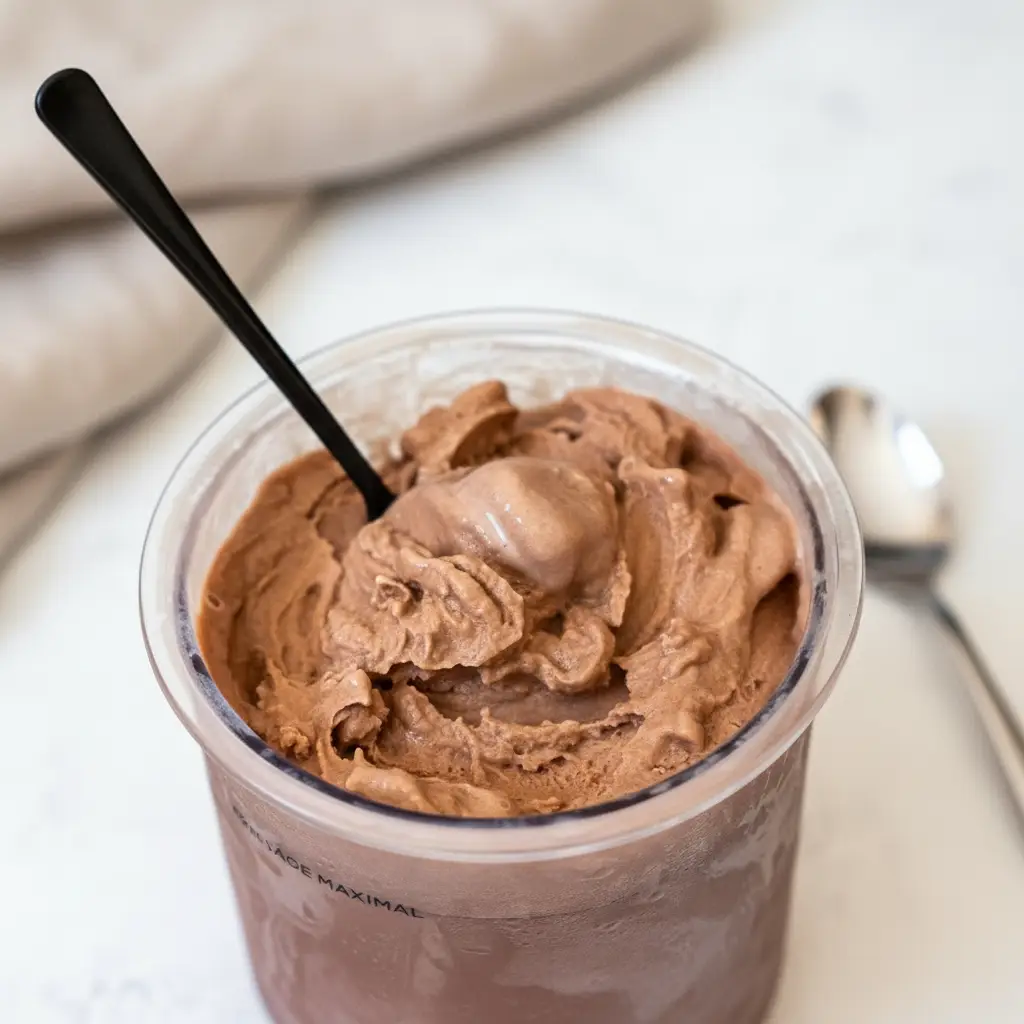
After the re spin cycle, your ice cream should be perfect. It will have a texture similar to soft serve. You can enjoy it right away. Scoop it into a bowl and marvel at your creation. You just made incredible chocolate ice cream from one ingredient.
For the whole pint, you are looking at around 280 calories and 26 grams of protein. What a fantastic and satisfying treat. A great example of what makes Ninja Creami ice cream recipes Fairlife chocolate milk so popular.


How To Store Leftovers
If you have leftovers, which is a big if, storing them is easy. Use a spoon to smooth and flatten the top of the remaining ice cream in the pint. This helps it freeze evenly later. Pop the storage lid back on and return it to the freezer.
When you are ready for another scoop, it will be frozen solid again. Do not try to scoop it right out of the freezer. Just place it back in the machine and run it on the ‘Lite Ice Cream’ or ‘Re-Spin’ function. It will return to its creamy state, ready to enjoy.
Tips
While this base recipe is great, there are many ways to customize your Fairlife Ninja Creami Recipes. Here are a few ideas to get you started on your creative journey.
Want to add some texture? Use the ‘Mix In’ function. After your re spin is complete, create a small well in the center of your ice cream. Add your favorite goodies like chocolate chips, chopped nuts, or cookie pieces. Place it back in the machine and press the ‘Mix In’ button. The machine will gently fold everything together.
You can also experiment with other flavors. Try using Fairlife’s regular 2% milk and adding a little vanilla extract and sweetener for a classic vanilla bean flavor. Or better yet, use a Fairlife protein shake. This is a simple way to make amazing Ninja Creami Fairlife protein ice cream. They come in many flavors like vanilla, chocolate, and strawberry.
If your ice cream is still a bit crumbly after the first re spin, add a tablespoon of milk before the next spin. This little bit of extra liquid can help everything come together into a perfectly smooth texture. It is a common trick that works wonders.
Always remember the max fill line. Overfilling can strain the motor and give you a less than ideal result. It is better to make two smaller batches than one overfilled one. Your machine will thank you for it.
These basic Fairlife Ninja Creami Recipes are a fantastic starting point. Have fun with them. The kitchen is your playground, and the Ninja Creami is your new favorite toy. Enjoy the process of creating something delicious.
Conclusion
So there you have it. The simplest, most direct path to creamy, high protein homemade ice cream. Using a base of Fairlife milk truly changes the game for home cooks. No more icy textures. No more complicated recipes with hard to find ingredients.
This approach to Fairlife Ninja Creami Recipes proves that sometimes, less is more. One good quality ingredient can deliver amazing results when paired with the right tool. It opens up a world of possibilities for easy, customizable frozen desserts.
I hope you give this a try. Whether you stick with the simple Fairlife chocolate milk Ninja Creami version or go wild with mix ins and new flavors, you are in for a treat. Happy spinning!
FAQ
Can I Use A Different Kind Of Milk?
You can, but your results will vary. Fairlife milk is recommended for these Fairlife Ninja Creami Recipes because its high protein and low water content create a uniquely creamy texture. Other dairy milks may be icier. Plant based milks can also work, but they often require additives like cream cheese or pudding mix to achieve a smooth consistency.
Why Is My Ice Cream Powdery Or Crumbly?
A powdery or crumbly texture after the first spin is very common, especially with low fat or high protein bases. It just means the ice cream needs another spin. Use the ‘Re-Spin’ function. If it is still a bit dry, add one tablespoon of milk and re spin again. This should make it perfectly creamy.
Can I Use Fairlife Protein Shakes Instead Of Milk?
Absolutely! Using a premade protein shake is one of the most popular ways to make Protein Ice Cream Ninja Creami Recipes. Just pour the shake into the pint and freeze for 24 hours. It is a fantastic shortcut to a delicious, protein packed treat. The Ninja Creami Fairlife protein ice cream made this way is a favorite.
Do I Have To Use The Lite Ice Cream Function?
The ‘Lite Ice Cream’ function is designed for recipes that are lower in fat and sugar, just like this one. It spins at a speed optimized for these types of bases. You could use the regular ‘Ice Cream’ setting, but you might find ‘Lite Ice Cream’ followed by a ‘Re-Spin’ gives a better final texture for this specific recipe.
Is This Recipe Budget Friendly?
Considering the cost of a single pint of specialty protein ice cream from the store, making it at home can be quite economical. A carton of Fairlife milk will make several pints of ice cream. Over time, making your own Fairlife Ninja Creami Recipes can certainly save you money while giving you a fresh, tasty product.
Easy Fairlife Ninja Creami Ice Cream
A simple, one-ingredient recipe for making creamy, high-protein chocolate ice cream using a Ninja Creami and Fairlife milk. This method creates a smooth texture without the iciness of many homemade frozen treats.
Ingredients
Instructions
- Pour the 2 cups of Fairlife chocolate milk into a clean Ninja Creami pint. Be careful not to fill past the max fill line.
- Secure the storage lid on the pint and place it on a level surface in your freezer. Freeze for a full 24 hours until completely solid.
- Remove the pint from the freezer, take off the storage lid, and place it in the outer bowl. Attach the processing lid with the blade and lock it onto the outer bowl.
- Place the entire assembly into the Ninja Creami machine and lock it in place. Select the ‘Lite Ice Cream’ function and press the button to start the cycle.
- After the first spin, if the mixture appears dry or powdery, place it back in the machine and press the ‘Re-Spin’ button. This second cycle will make it creamy.
- Once the re-spin is complete, your ice cream will have a smooth, soft-serve texture. Scoop into a bowl and enjoy immediately.
Notes
Use the ‘Mix In’ function after the re-spin to add extras like chocolate chips, nuts, or cookie pieces.
You can also use Fairlife protein shakes for an even simpler, high-protein version. Just pour and freeze.
If the ice cream is still crumbly after one re-spin, add a tablespoon of milk and run the ‘Re-Spin’ cycle again for a smoother texture.
Nutrition
Calories
Sugar
Fat
Carbs