Have you ever found yourself staring into the freezer, wishing for a scoop of ice cream but not wanting to derail your health goals? I know I have. It feels like you have to choose between a satisfying treat and staying on track. It is a common dilemma for anyone who loves sweets but also values fitness.
Well, what if I told you that you could have both? This Ninja Creami Protein Ice Cream Recipe is about to become your favorite kitchen creation. It’s creamy, it’s delicious, and it’s packed with protein. You can finally enjoy a guilt free dessert that tastes amazing and supports your body. Let’s get scooping!
Jump To:
Why You’ll Love This Recipe
Honestly, there are so many reasons to get excited about this recipe. First off, it’s incredibly easy. You just blend a few simple ingredients, freeze them, and let the Ninja Creami do its thing. It’s a straightforward process that anyone can follow, even if you are not a pro in the kitchen.
Another huge win is how customizable it is. You can switch up the protein powder flavor, the type of milk, or the sweeteners. This means you can create a new flavor every single week. It never gets boring. You are in complete control of the taste and the ingredients.
This recipe is also a fantastic addition to your lineup of High Protein Meals. Getting enough protein can sometimes feel like a chore, but not anymore. Turning it into a dessert makes it feel like a reward. It is a smart way to satisfy your sweet tooth while building muscle and staying full.
Plus, the texture is just spot on. If you have tried making homemade healthy ice creams before, you know they can be icy or hard. The Ninja Creami technology creates a super smooth and creamy texture that feels just like real ice cream. It is one of the best Ninja Ice Cream Recipes Healthy options you will find.
You will also love knowing exactly what is in your dessert. No strange preservatives or long lists of ingredients you cannot pronounce. Just simple, wholesome things that you choose yourself. It is a clean and satisfying way to enjoy a frozen treat without any worries.
Ingredients
The beauty of this Ninja Creami Protein Ice Cream Recipe is its simplicity. You only need a few core ingredients to create the base. From there, the flavor possibilities are endless. Here’s what you’ll need to get started.
- 1 cup milk of choice (almond, coconut, soy, oat, or regular)
- 1 to 3 Tbsp extra milk for re spinning if needed
- ¼ cup (about 1 scoop) protein powder (vanilla, chocolate, or flavor of choice)
- Sweetener of choice (see options below)
For the sweetener, you can pick one of the following to suit your taste and dietary needs. Each one brings a slightly different flavor and sweetness level.
- ½ banana
- 1 date
- 1 Tbsp pure maple syrup
- 1 Tbsp honey
- 1 to 2 Tbsp sugar free pudding mix or flavored instant jello powder
The pudding or jello powder is a great little trick. It helps make the ice cream extra thick and creamy, giving it a fantastic texture. It also adds a nice boost of flavor. This little addition really makes it feel like a rich, decadent dessert.
Step By Step Instructions
Making this amazing Protein Shake Ice Cream is a breeze. Just follow these simple steps, and you will be on your way to a delicious frozen treat. The process is pretty hands off, with most of the time spent waiting for it to freeze.
Step 1: Blend The Base
First things first, you need to create your ice cream base. Grab your blender. Combine one cup of your chosen milk, the scoop of protein powder, and your selected sweetener. You want everything to mix together completely.
Blend everything for about 20 seconds. Your goal is a smooth, liquid consistency with no clumps of protein powder. This ensures that your final ice cream will be silky and not grainy. It is a quick but important step for the best texture.
Step 2: Freeze The Mixture
Next, pour your blended base into the Ninja Creami pint container. Be careful not to pour past the max fill line. If you overfill it, the machine will not work correctly, and you could end up with a mess.
Once it is filled, secure the lid tightly. Place the pint on a flat surface in your freezer. A level spot is key to making sure it freezes evenly. Now for the hard part: waiting. Let it freeze for a full 24 hours.
Step 3: Prepare For The First Spin
After 24 hours, your base should be a solid block. Before you spin it, you need to prep it a little. Take the pint out of the freezer. Run the outside of the container under warm water for about a minute. This helps loosen the frozen edges.
This step is a great tip for preventing an icy final product. It helps the blades process the frozen base more effectively. It is a small detail that makes a big difference in the creaminess of your Ninja Creami Protein Ice Cream Recipe.
Step 4: Run The First Spin Cycle
Now for the fun part. Place the pint into the outer bowl, attach the lid with the blade, and lock it into your Ninja Creami machine. Select the Lite Ice Cream function. The machine will do its thing, transforming the solid block into something resembling ice cream.
After the first cycle is complete, take a look at the texture. Don’t be surprised if it looks a bit crumbly or powdery. This is completely normal, especially with lower fat milks or protein bases. The next step will fix this.
Step 5: Re Spin For Creaminess
To get that perfectly smooth texture, a re spin is usually necessary. Add about two tablespoons of extra milk right into the center of the pint. This little bit of liquid is what helps it become super creamy.
Place it back in the machine and run the Mix In cycle. If it is still looking a little powdery after that, do not worry. Just add another tablespoon of milk and re spin again. Plant based milks might need two or three re spins to get just right.
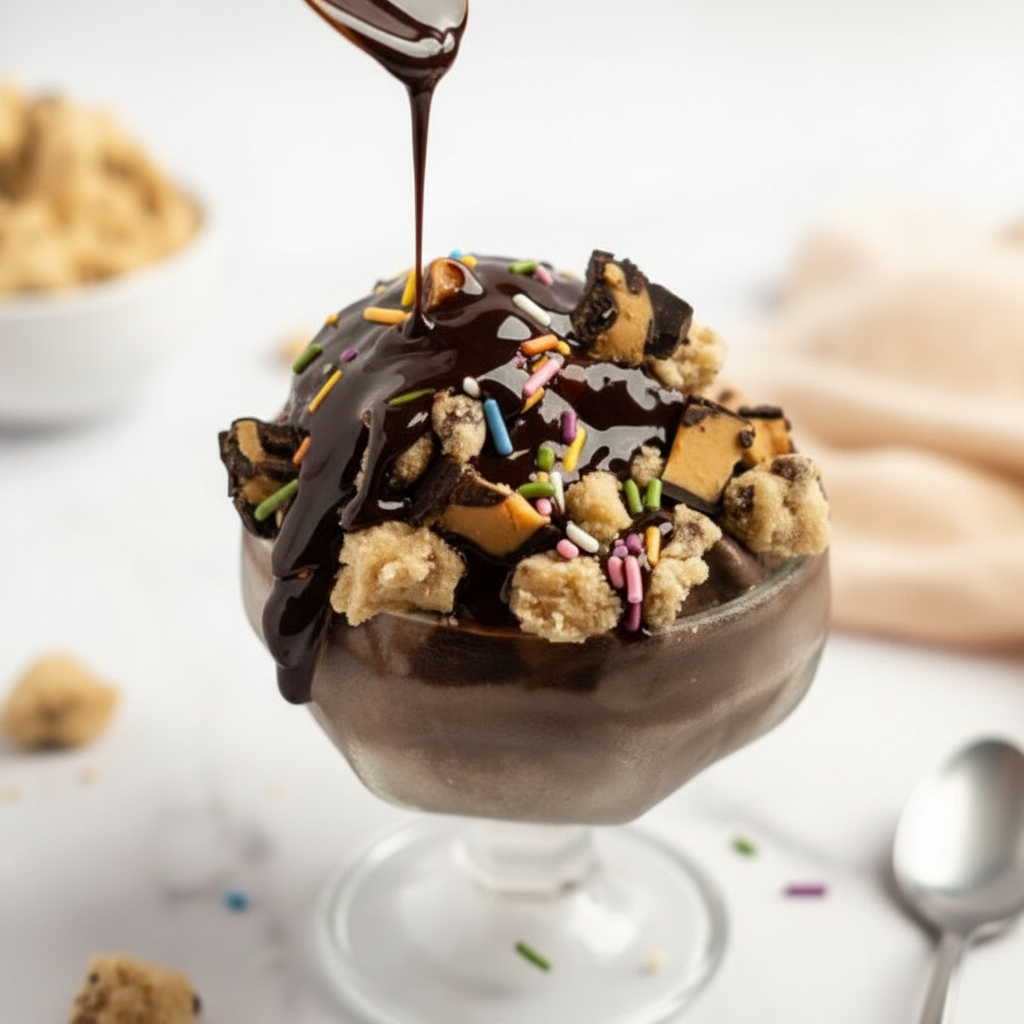
Step 6: Customize With Mix Ins
Once your ice cream is creamy and delicious, you can enjoy it as is. Or, you can take it to another level with some mix ins. This is where you can get really creative with your Ninja Creami Protein Ice Cream Recipe.
Add things like crushed cookies, a swirl of nut butter, chocolate chips, or fresh fruit. Just drop them into the ice cream, place it back in the machine, and use the Mix In cycle one last time. Scoop it out and enjoy your custom creation immediately.


How To Store Leftovers
If you somehow have leftovers, storing them is simple. Just place the lid back on the Ninja Creami pint and pop it back into the freezer. Make sure the top of the ice cream is relatively flat before you freeze it again.
When you are ready to eat it again, you will need to re process it. The ice cream will freeze solid, so you cannot just scoop it out. Just put the pint back in the machine and run the Lite Ice Cream or a re spin cycle until it is creamy again. It is one of the best features of these Ninja Ice Cream Recipes Healthy options.
Tips
Want to make your Ninja Creami Protein Ice Cream Recipe even better? Here are a few handy tips. For an extra creamy result, try using a higher fat milk. Silk Unsweetened Coconut Milk is a fantastic dairy free option that works really well. Whole milk also yields great results.
Always remember to scrape down any icy bits from the sides of the pint before you re spin. This helps ensure that everything gets mixed in evenly, giving you a consistently smooth texture throughout the entire pint.
Don’t be afraid to experiment with flavors. Add a tablespoon of unsweetened cocoa powder for a rich chocolate flavor. A teaspoon of instant coffee will give you a delicious coffee ice cream. A spoonful of peanut butter powder adds flavor without too much fat. The options are truly endless.
Patience is also key. Make sure you freeze the base for the full 24 hours. Rushing this step will result in a less than ideal texture. A solidly frozen base is what allows the Creami to work its magic and create that signature creamy consistency we all love.
Conclusion
So there you have it. A simple, delicious, and healthy way to enjoy ice cream whenever you want. This Ninja Creami Protein Ice Cream Recipe proves you do not have to give up your favorite treats to live a healthy lifestyle. It’s a wonderful way to satisfy your cravings.
Whether you’re looking for a post workout snack or just a sweet dessert, this recipe is a clear winner. It’s a fantastic component of High Protein Meals and a joy to make. I hope you love experimenting with different flavors and creating your own perfect pint of protein ice cream.
FAQ
Can I Use Any Protein Powder?
Yes, you can use almost any protein powder you like. Whey, casein, or plant based blends all work well. The flavor and texture might vary slightly between brands, so feel free to experiment to find your favorite. Some powders absorb more liquid than others.
Why Is My Ice Cream Powdery?
A powdery or crumbly texture is very common after the first spin. This usually happens with bases that are lower in fat and sugar. The solution is simple: just add a tablespoon or two of milk and use the re spin function. This adds the necessary liquid to make it creamy.
What Are Some Good Mix In Ideas?
The possibilities are endless. Some popular choices include chocolate chips, crushed cookies, candy pieces, nut butter swirls, fresh berries, or chopped nuts. Just make sure the pieces are small enough to be mixed in easily by the machine.
Is This Recipe Dairy Free?
Absolutely. You can easily make this a dairy free recipe. Just be sure to use a plant based milk like almond, coconut, or oat milk. Also, choose a plant based protein powder. The Ninja Creami Protein Ice Cream Recipe is very adaptable.
How Long Does It Take To Freeze?
For the best results, you must freeze the base for a full 24 hours. This ensures it is frozen completely solid, which is necessary for the Ninja Creami to process it into a creamy texture. Freezing it on a flat surface in your freezer is also very important for an even result.
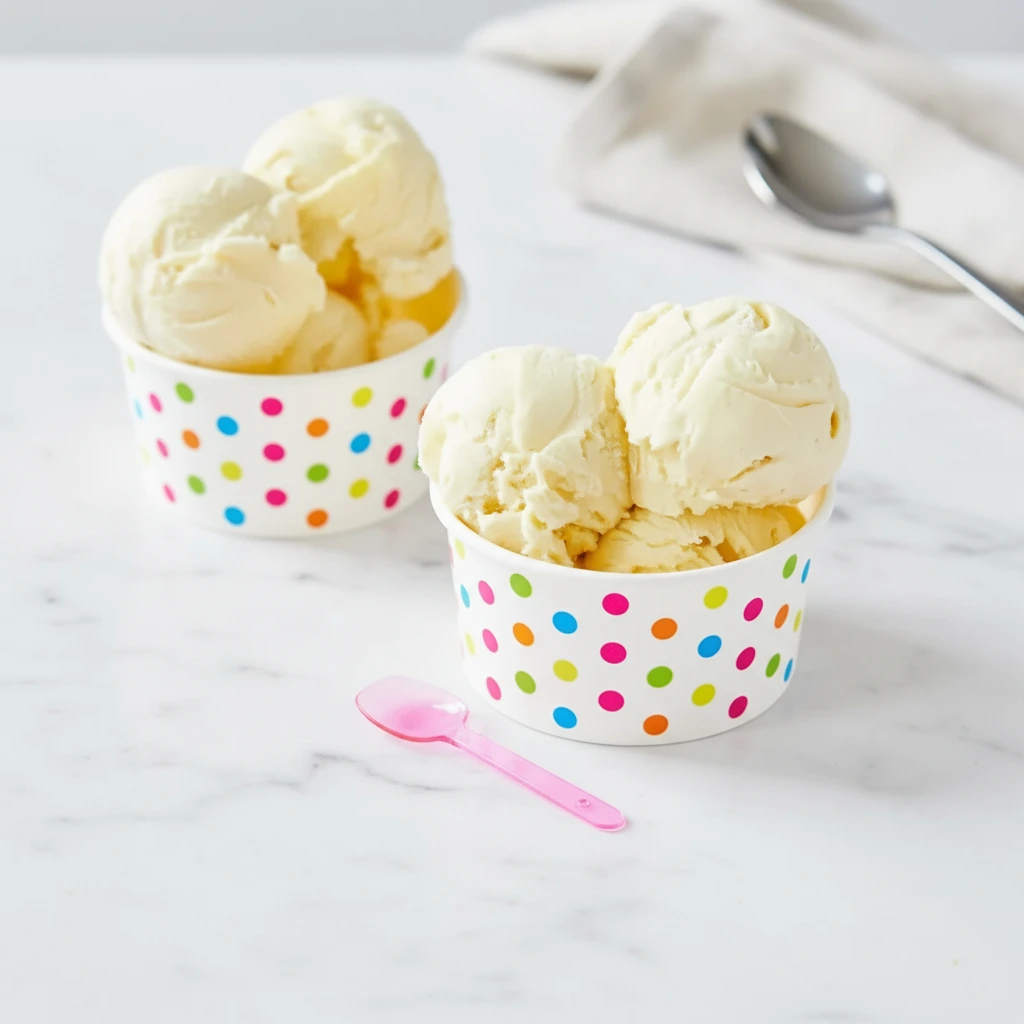
Ninja Creami Protein Ice Cream
A creamy and delicious high-protein ice cream made simple with the Ninja Creami. Enjoy a satisfying, guilt-free frozen dessert that supports your health goals without compromising on taste.
Ingredients
Instructions
- In a blender, combine 1 cup of milk, the protein powder, and your chosen sweetener. Blend for about 20 seconds until the mixture is completely smooth with no clumps.
- Pour the blended base into the Ninja Creami pint container, ensuring not to fill past the max fill line. Secure the lid tightly.
- Place the pint on a flat surface in your freezer and let it freeze for a full 24 hours until solid.
- Remove the pint from the freezer. Place the pint into the outer bowl, attach the blade lid, and lock it into your Ninja Creami machine.
- Select the ‘Lite Ice Cream’ function and run the first spin cycle. The texture may appear crumbly, which is normal.
- To achieve a creamy texture, add 1-2 tablespoons of extra milk to the center of the pint. Install it back in the machine and run the ‘Re-Spin’ cycle.
- If you wish to add mix-ins like chocolate chips or nuts, create a small well in the center, add them, and use the ‘Mix-In’ cycle. Serve immediately and enjoy.
Notes
For an extra creamy result, try using a higher fat milk like whole milk or full-fat coconut milk.
Experiment with flavors by adding a tablespoon of cocoa powder or instant coffee to the base before blending.
Patience is key! Ensure the base is frozen for the full 24 hours for the best, creamiest texture.
Nutrition
Calories
Sugar
Fat
Carbs