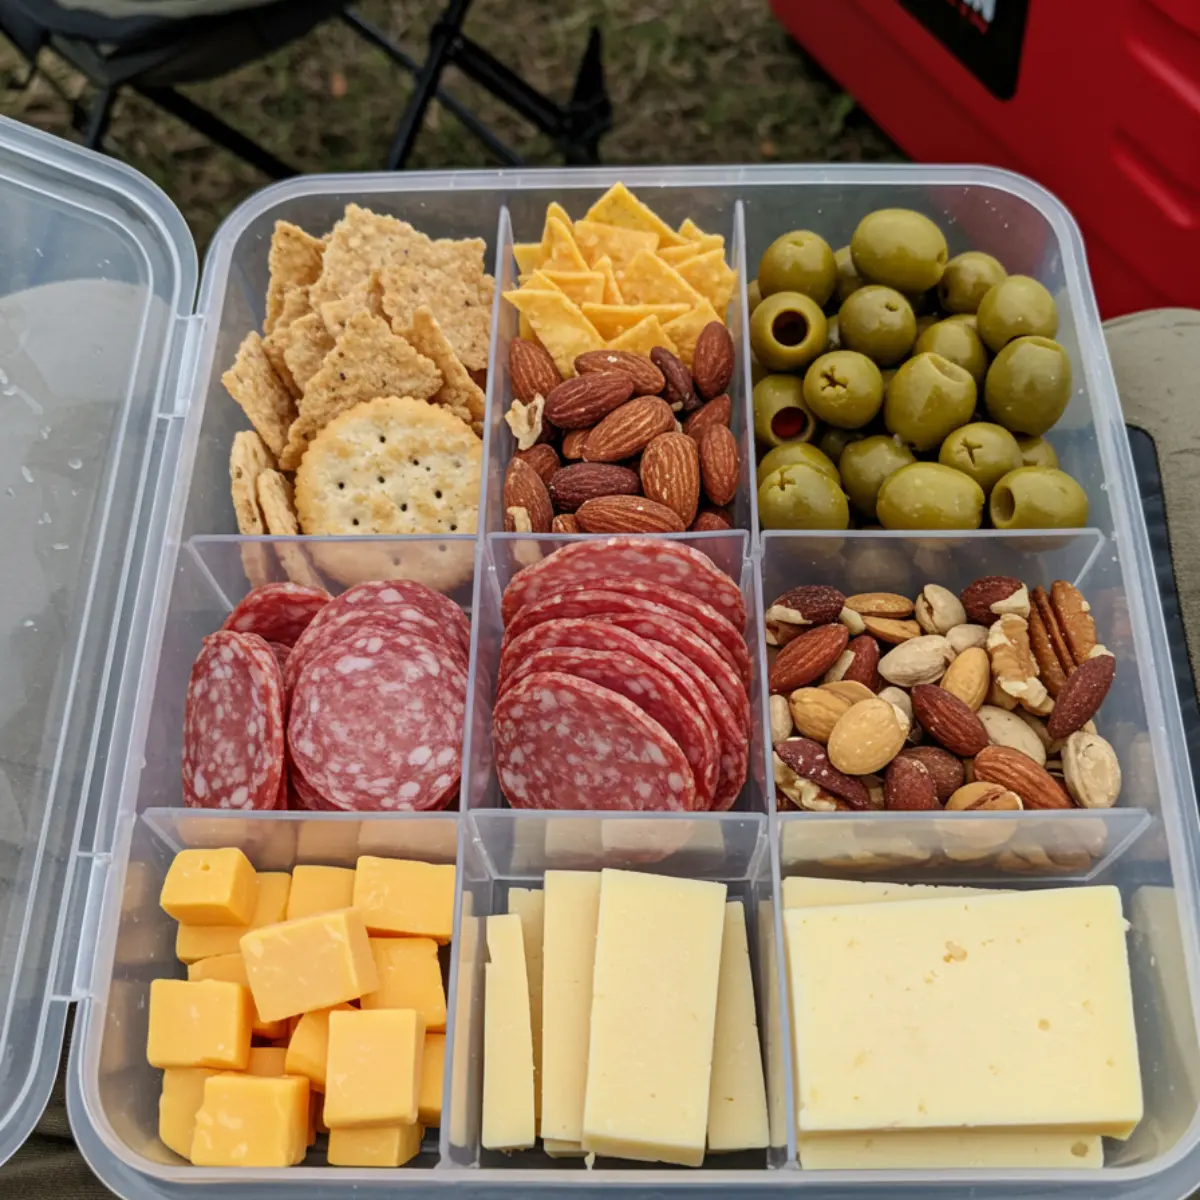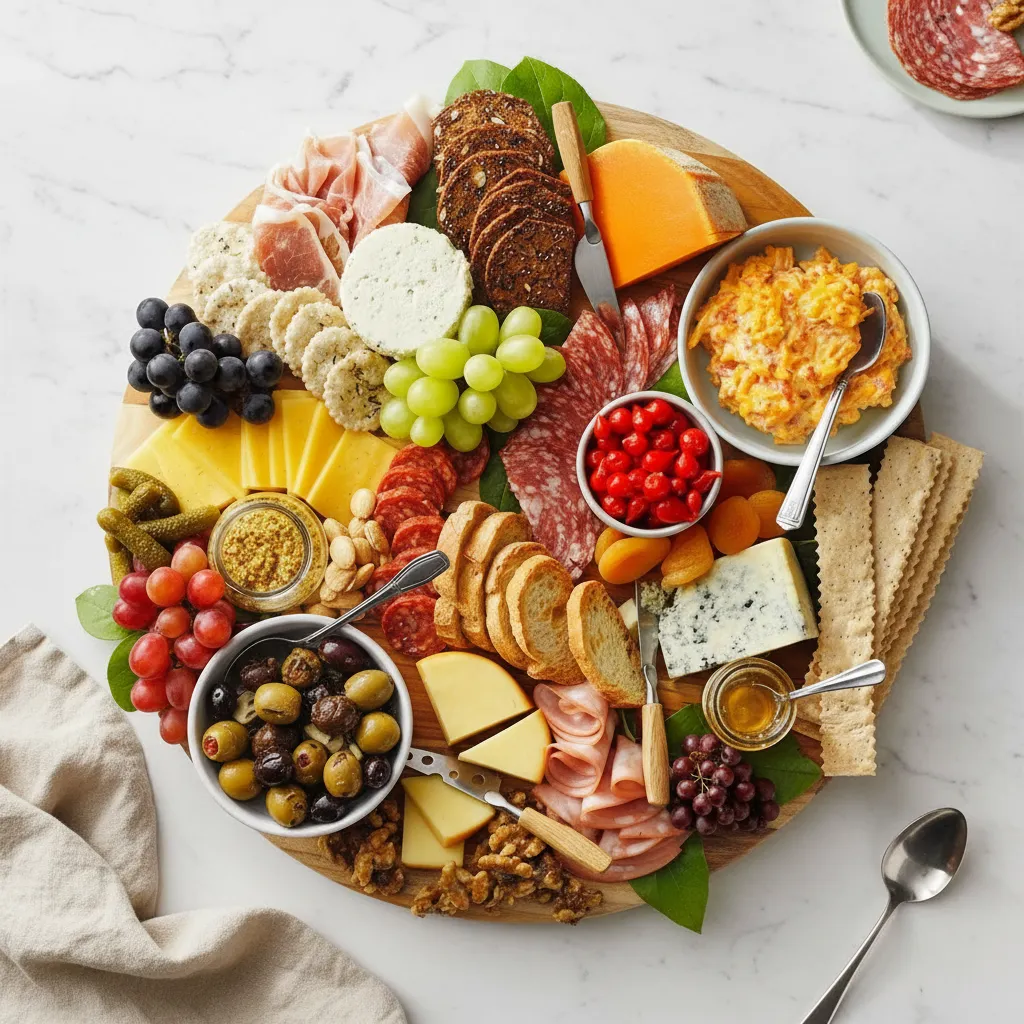
There is something so satisfying about creating a beautiful spread of food for friends and family. A well crafted charcuterie board is more than just a snack; it’s an experience. It invites conversation, encourages sharing, and looks absolutely stunning as the centerpiece of any gathering. If you’ve ever felt intimidated by the idea of making your own, I’m here to show you just how simple and enjoyable it can be. This is truly The Best DIY Charcuterie Board Recipe for Any Party because it’s all about flexibility and fun.
Forget complicated rules and expensive, hard to find ingredients. We are focusing on a balanced, flavorful, and visually appealing board that you can customize to your heart’s content. Whether you’re hosting a casual get together or a more formal celebration, this guide will walk you through creating amazing Food Boards For Parties that will have everyone reaching for more. Let’s build a beautiful Snack Board together.
Jump To:
Why You’ll Love This Recipe
Honestly, what’s not to love? A Diy Charcuterie Board is the definition of easy elegance. It requires absolutely no cooking, which is a huge win for any host. All you need to do is some simple slicing and arranging. It’s a creative outlet that lets you play with colors, textures, and flavors. You get to be an artist, and your canvas is a wooden board. It’s a wonderful way to cater to different tastes and dietary preferences all at once. Someone prefers savory over sweet? No problem. Someone is a cheese fanatic? You’ve got them covered.
This recipe is also incredibly scalable. You can make a small, intimate board for two or a massive one for a huge crowd. It’s budget friendly because you control every single ingredient. You can splurge on a fancy cheese or opt for more affordable deli meats. The versatility is what makes this the go to option for any occasion. From a cozy night in to a holiday feast, a thoughtfully arranged board always feels special. It brings people together, making it a social centerpiece that is as much a conversation starter as it is an appetizer.
Ingredients
Here’s a list of what you need to create a balanced and delicious board. Remember, this is a guide, so feel free to make swaps based on what you love or what’s available.
- Cheeses:
- Boursin garlic and fine herbs cheese
- Smoked Gouda cheese
- Gouda cheese
- Havarti cheese
- Blue cheese
- Southern Pimiento Cheese Spread
- Meats:
- Thinly sliced cured beef (like beef prosciutto)
- Thinly sliced cured beef sausage
- Thinly sliced spicy cured beef sausage (like spicy beef Calabrese)
- All beef or all turkey deli meat (like beef bologna)
- Bread and Crackers:
- Thyme Sea Salt Crackers
- Baguette slices or crostini
- Rye crackers
- Fruits and Vegetables:
- Sweety drop peppers
- Seedless red, green and purple grapes
- Dried apricots
- Pickles and Nuts:
- Marinated Olives
- Rosemary Walnuts
- Cornichons or gherkins
- Marcona almonds
- Condiments:
- Stone ground mustard
- Honey
- Fig spread
Step-By-Step Instructions
Step 1: Choose Your Board
First things first, select your platter. A large wooden cutting board, a slate tile, or even a clean baking sheet can work. The size depends on how many people you’re serving. Make sure you have enough space to spread everything out without it looking too crowded.
Step 2: Place the Bowls
Before you add any food, place your small bowls or jars for condiments like mustard, honey, and fig spread. This helps you anchor the board and build around them. You can also use bowls for smaller items like olives or marinated peppers.
Step 3: Arrange the Cheeses
Now for the stars of the show: the cheese. Distribute your cheeses around the board. Think of them as the main points of interest. I like to slice some of the harder cheeses like Gouda and Havarti, cube some others, and leave soft cheeses like Boursin whole with a small knife for spreading. Place them in different corners to create balance.
Step 4: Add the Meats
Next, it’s time for the cured meats. You can get creative here. Fold larger slices like beef prosciutto into rosettes or little fans. Sliced sausage can be fanned out in a line. Tuck the meats around the cheeses. The goal is to create visual flow and texture.
Step 5: Fill in with Bread and Crackers
Fan out your crackers and baguette slices in the larger open spaces. You can create flowing ‘rivers’ of crackers that weave between the cheese and meat. Offer a variety of shapes and textures to keep things interesting.
Step 6: Add Fruits and Vegetables
This is where your board really comes to life with color. Place bunches of grapes in open spots. Fill smaller gaps with dried apricots, sweety drop peppers, and pickles. These bright additions make the board look so much more appealing.
Step 7: Sprinkle in the Nuts
Use your rosemary walnuts and Marcona almonds to fill in any remaining tiny gaps. They add a great crunch and help make the board look full and abundant. A little sprinkle here and there does the trick.
Step 8: Final Touches and Serving
Take a step back and look at your creation. Does anything look bare? Add a few more crackers or a small bunch of grapes if needed. Make sure each condiment has a small spoon or knife. Serve your beautiful Diy Charcuterie Board immediately and watch it disappear.


How To Store Leftovers
So, the party is over and you have some leftovers. Don’t let them go to waste! The best way to store them is to separate the components. Wrap cheeses and meats individually in plastic wrap or place them in airtight containers. Store them in the refrigerator. They should stay fresh for a few days.
Crackers and breads can be stored in an airtight container at room temperature to keep them from getting stale. Fruits, vegetables, and pickles should also be refrigerated in separate containers. When you’re ready for another snack, you can easily assemble a smaller board in just a few minutes.
Tips
Here are a few extra pointers to make your charcuterie board experience even better. For cheese, it’s a good idea to let it sit at room temperature for about 30 minutes before serving. This really brings out its full flavor. When selecting cheeses, aim for a variety of textures and flavors: something soft and spreadable, something hard and aged, something creamy, and maybe something bold like blue cheese.
Don’t be afraid to mix and match. The beauty of Food Boards For Parties is their customizability. If you don’t like olives, swap them for artichoke hearts. Not a fan of fig spread? Try raspberry jam instead. The possibilities are truly endless. Think about seasonal additions too. In the fall, you could add apple slices and a pumpkin spice dip. In the summer, fresh berries and melon would be lovely.
For a beautiful presentation, think about color and texture. You want a good mix of both. The vibrant red of sweety drop peppers next to the deep green of olives creates a nice contrast. The smooth surface of a cheese wedge next to a pile of crunchy nuts adds textural interest. The goal is to make the board a feast for the eyes as well as the palate.
Conclusion
Creating The Best DIY Charcuterie Board Recipe for Any Party is less about a strict recipe and more about a method. It’s about combining flavors, textures, and colors you love to make something truly special. It’s an approachable, no cook appetizer that always impresses. I hope this guide has shown you just how easy and fun it is to build your own beautiful Snack Board. So go ahead, gather your favorite ingredients, and get creative. Your friends and family will thank you for it.
FAQ
How Far in Advance Can I Make a Charcuterie Board?
You can do most of the prep work ahead of time. Slice your cheeses and meats and store them in separate airtight containers in the fridge a day before. You can also wash your fruits. However, it’s best to assemble the board right before serving to keep everything fresh, especially the crackers and bread.
What If I Don’t Have a Fancy Board?
No problem at all! You can use any large, flat surface. A large platter, a clean baking sheet, or even a few dinner plates placed together can work. The food is the star, not the surface it’s on.
How Much Food Do I Need Per Person?
A good rule of thumb is about 2 to 3 ounces of cheese and 2 ounces of meat per person if the board is an appetizer. If it’s the main meal, you might want to increase that to 4 to 5 ounces of each per person. But honestly, it’s always better to have a little extra than not enough.
The Best DIY Charcuterie Board
A guide to creating a beautiful, balanced, and delicious charcuterie board for any occasion. This no-cook recipe is flexible, easy to assemble, and a wonderful centerpiece for entertaining guests.
Ingredients
Instructions
- Choose Board & Place Bowls: Select a large board or platter. Place small bowls for condiments like mustard, honey, and olives to anchor your design.
- Arrange Cheeses: Distribute the cheeses around the board. Slice hard cheeses, cube others, and leave soft cheese whole with a knife.
- Add Meats: Artfully arrange the meats around the cheeses. Fold larger slices into fans or rosettes for visual appeal.
- Fill in with Crackers: Fan out crackers and bread in any large gaps, creating ‘rivers’ that flow between the meats and cheeses.
- Add Fruits & Color: Use grapes, peppers, and dried fruit to fill in remaining spaces, adding pops of color across the board.
- Sprinkle Nuts & Serve: Fill the last tiny gaps with nuts. Step back, admire your work, and serve immediately.
Notes
Cheese Tip: Let cheeses sit at room temperature for about 30 minutes before serving to enhance their flavor.
Be Creative: Swap ingredients based on preference or season. Try adding apple slices in the fall or fresh berries in the summer.
Storage: Wrap leftover meats and cheeses individually and refrigerate. Store crackers in an airtight container at room temperature.
Nutrition
Calories
Sugar
Fat
Carbs