So, you did it. You brought home the shiny, exciting, and maybe slightly intimidating ninja creami deluxe recipes. It’s sitting on your counter, full of promise. The promise of endless homemade ice cream, sorbet, milkshakes, and glorious frozen treats that you can customize down to the last sprinkle.
But now what? If you’re anything like me, you opened the box, looked at the pint containers, and thought, “Okay, where do I even start?”
You’re in the right place. This is your ultimate starting guide to creating incredible ninja creami deluxe recipes that are simple, delicious, and way better than what you can buy at the store. We’re talking creamy, dreamy textures and flavors you actually control. Say goodbye to icy, chalky protein ice cream and hello to scoops of perfection.
What is the Ninja Creami Deluxe?

First things first, what makes the “Deluxe” so… deluxe? If you’re new to the Creami world, it can be a bit confusing. The Ninja Creami isn’t a traditional ice cream maker that churns a liquid base for 30-40 minutes. Instead, it uses a unique process where it shaves and churns a pre-frozen solid block into a creamy texture in just a couple of minutes. It’s pretty amazing technology.
The Deluxe model is the bigger, more capable sibling in the Creami family.
A Quick Comparison: Creami vs. Creami Deluxe
- Pint Size: The original Ninja Creami uses 16-ounce (pint) containers. The Deluxe steps it up with larger 24-ounce (pint-and-a-half) containers. This means you can make about 50% more ice cream in one go, which is a game-changer for families or anyone who likes having leftovers.
- Functions: The Deluxe comes with more pre-set functions. Besides the classic Ice Cream, Sorbet, and Gelato, it often includes settings like “Slushi,” “Italian Ice,” “Creamiccino,” and “Frozen Yogurt,” giving you more creative freedom right out of the box.
- Power & Design: The Deluxe generally has a more powerful motor to handle the larger frozen blocks and a slightly different physical design.
Honestly, both machines are fantastic, but if you want to make bigger batches and have more built-in options, the Deluxe is a solid choice.
Jump To:

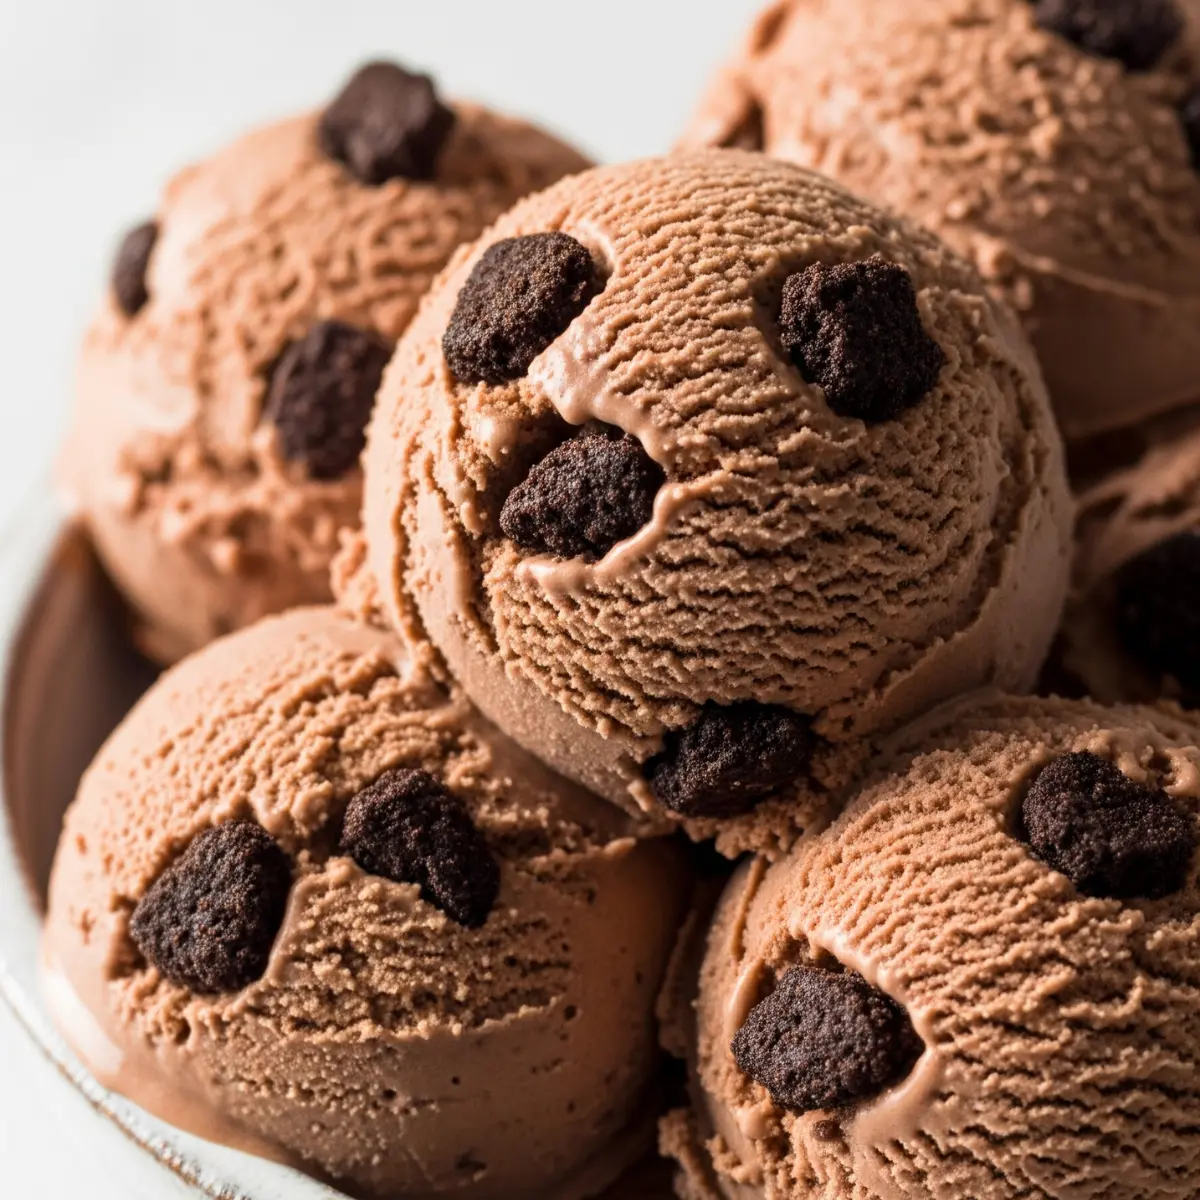
Ninja Creami Deluxe Recipes: Classic Chocolate Ice Cream
A rich and decadent classic chocolate ice cream made from scratch for the Ninja Creami. This recipe uses simple, high-quality ingredients for a smooth, creamy, and intensely chocolatey flavor that rivals any premium store-bought brand.
- Total Time: 24 hours 10 minutes
- Yield: 1 pint 1x
Ingredients
1 cup heavy cream
1 cup whole milk
1/2 cup granulated sugar
1/2 cup unsweetened cocoa powder
1 teaspoon vanilla extract
Pinch of salt
Instructions
1. In a medium bowl, whisk together the sugar, cocoa powder, and salt until no lumps remain.
2. Slowly pour in the heavy cream and whole milk while continuously whisking until the mixture is smooth and the sugar has dissolved completely.
3. Stir in the vanilla extract.
4. Pour the chocolate base into a Ninja Creami pint container, securing the lid tightly.
5. Freeze the pint on a level surface for at least 24 hours.
6. Once fully frozen, remove the pint, place it in the outer bowl, and process using the ‘ICE CREAM’ function.
7. If the texture appears crumbly, add one tablespoon of milk and use the ‘RE-SPIN’ function for a perfectly creamy texture.
8. Serve immediately or add mix-ins like chocolate chips using the ‘MIX-IN’ function.
Notes
For a deeper chocolate flavor, use Dutch-processed cocoa powder.
Ensure the base is frozen completely solid for the best results.
A splash of milk before a re-spin is the key to fixing a crumbly texture.
- Prep Time: 10 minutes
- Freeze Time: 24 hours
- Cook Time: 0 minutes
- Category: Ninja Creami Recipes
- Method: Frozen
- Cuisine: American
- Diet: Vegetarian
Nutrition
- Serving Size: 1/2 cup
- Calories: 285
- Sugar: 22g
- Sodium: 85mg
- Fat: 20g
- Saturated Fat: 12g
- Unsaturated Fat: 6g
- Trans Fat: 0g
- Carbohydrates: 26g
- Fiber: 3g
- Protein: 4g
- Cholesterol: 65mg


Ninja CREAMi Deluxe Ice Cream & Frozen Treat Maker, Includes (4) Family-Sized 24 oz. Tubs, for Ice Cream, Sorbet, Milkshakes, Frozen Yogurt, & More, 11-in-1, XL Capacity, Silver
Limited time deal: $249.99
You save 12%
As an Amazon Associate, I earn from qualifying purchases. Pricing and availability may change.
Why You’ll Love This Ninja Creami Deluxe Recipe Guide
We’re skipping the overly complicated recipes with a million ingredients. This guide is all about giving you the foundational knowledge and easy-to-follow ninja creami deluxe recipes you need to get confident with your machine.

You’ll learn:
- The simple science behind a perfect, creamy base.
- The step-by-step process, from mixing to spinning.
- Five foolproof recipes to get you started immediately.
- Tips to avoid common mistakes (like the dreaded powdery pint!).
Ready to make some magic? Let’s get to it. And hey, if you get hooked, be sure to check out our complete Ninja Creami recipe hub for even more ideas.
Key Ingredients for the Perfect Creami Base

The secret to amazing homemade ice cream isn’t a long list of fancy ingredients. It’s about understanding what a few key components do. Get this right, and you’re golden.
The Science of the Scoop: Why These Ingredients Matter
Ever wonder why some recipes are creamy and others are icy? It all comes down to a little food science. A great Creami base is a balancing act between fat, protein, sugar (or sweetener), and water.
- Fat (from cream, full-fat milk, coconut cream): Fat molecules get in the way of water molecules, preventing them from forming large, crunchy ice crystals. More fat generally means a creamier, smoother texture.
- Protein (from milk, protein powder): Protein adds body and structure. It also helps trap tiny air bubbles during the churning process, making the final product lighter and less dense. (NIH Office of Dietary Supplements)
- Sugar/Sweeteners: Sugar does more than add sweetness; it lowers the freezing point of the mixture. This is crucial for preventing your base from turning into a solid, un-churnable brick of ice.
- Thickeners/Gums: Ingredients like xanthan gum or guar gum are miracle workers. They are stabilizers that absorb water, preventing iciness and creating an incredibly smooth, professional-grade texture, even in low-fat or low-sugar recipes. (U.S. Food & Drug Administration)
The Best Protein Powders to Use

Using protein powder is one of the most popular ways to make a healthy frozen dessert in the Creami. But not all powders are created equal. The wrong one can leave you with a gritty texture or a weird aftertaste.
- Whey/Casein Blends: These are the holy grail for Creami recipes. Whey is fast-digesting, while casein is slow-digesting and mixes up much thicker. This combination creates a fantastic, creamy base that mimics real ice cream. Brands like Quest or PEScience Select are community favorites.
- Whey Isolate: This is a leaner protein option. It works well but might not be quite as creamy as a blend. You’ll definitely want to use a gum or a little extra fat to help it along.
- Plant-Based Powders (Pea, Soy, Brown Rice): These can be tricky. Some plant proteins are naturally a bit gritty. Look for brands known for having a fine, smooth texture. You may need to experiment to find one you love.
Choosing Your Liquid Base (Milk, Cream, Alternatives)
Your liquid choice has a huge impact on the final result.
- Heavy Cream & Whole Milk: For a truly decadent, traditional ice cream experience, this is the combo to beat. The high fat content in the heavy cream guarantees a rich, smooth texture.
- Fairlife Milk: This is a powerhouse for high-protein, lower-fat recipes. It’s ultra-filtered, so it has more protein and less sugar than regular milk, which helps create a surprisingly creamy base without all the fat.
- Unsweetened Almond or Cashew Milk: Great for dairy-free or low-calorie options. Just be aware that their low-fat, low-protein content means you’ll likely need a good protein powder and a thickener (like xanthan gum) to avoid an icy result.
- Canned Coconut Cream: The secret weapon for dairy-free recipes! Use the full-fat canned version for a rich, creamy texture that’s absolutely divine.
Sweeteners and Thickeners (Xanthan Gum, Guar Gum)
These are your texture insurance policy.
- Sweeteners: You can use almost anything here. Regular sugar, maple syrup, allulose, erythritol, or monk fruit sweetener all work. Just remember that liquid sweeteners add water, so you might need to adjust your base slightly.
- Xanthan Gum & Guar Gum: Don’t be scared by the names! These are common food additives that work as thickeners and stabilizers. You only need a tiny amount (usually 1/4 teaspoon or less) to make a huge difference. They prevent ice crystals from forming and give your creami a silky-smooth mouthfeel. You can find them in the baking aisle of most grocery stores.


How to Make Ice Cream in the Ninja Creami Deluxe (Step-by-Step)
The process is surprisingly simple once you get the hang of it. It’s all about a little prep work.
Step 1: Mix and Freeze the Base
This is the most important step. In your 24-ounce Deluxe pint container, combine all your base ingredients. This usually includes your liquid, protein powder, sweetener, flavorings like vanilla extract, and a pinch of salt and gum.
Whisk everything together thoroughly until it’s completely smooth. An immersion blender or a small milk frother works wonders here to eliminate any clumps.
Once mixed, secure the lid and place the pint on a level surface in your freezer. It needs to freeze for a full 24 hours. No cheating! An improperly frozen base is the number one cause of crumbly, powdery results. (USDA FoodSafety.gov)
Step 2: Process with the “Ice Cream” Function
After 24 hours, take the pint out of the freezer. It should be frozen solid. Remove the lid, place the pint into the outer bowl, attach the creamerizer paddle lid, and lock it into the machine.
Select the “Full” setting (since you’re using the whole Deluxe pint) and then press the “Ice Cream” button. The machine will be loud—that’s normal! In about two minutes, the paddle will descend, work its magic, and retract.
Step 3: The “Re-Spin” for Perfect Texture
The first spin often comes out looking a bit crumbly or powdery. Don’t panic! This is completely normal, especially for low-fat or high-protein recipes.
The fix is the “Re-Spin” button. Simply add a splash (about 1-2 tablespoons) of your liquid base (milk, cream, etc.) to the top of the frozen mixture and put it back in the machine. Press the “Re-Spin” button. This second spin almost always transforms a powdery pint into a perfectly creamy, scoopable ice cream.
Step 4: Adding Your Favorite Mix-Ins
This is where the real fun begins. After your base is creamy, use a spoon to create a well or hole down the center of the pint, about an inch wide, all the way to the bottom.
Now, it’s time to get creative. Fill that hole with your chosen goodies.
The Ultimate Mix-In Idea Guide
- For the Crunch:
- Crushed cookies (Oreos, Biscoff, chocolate chip)
- Cereal (Fruity Pebbles, Cinnamon Toast Crunch)
- Chopped nuts (pecans, almonds, walnuts)
- Magic Shell or chocolate chips
- Toffee bits or crushed candy bars
- For the Gooey & Chewy:
- Brownie or cookie dough chunks (use edible dough!)
- Mini marshmallows
- Caramel or chocolate syrup swirls
- Jam or fruit preserves
- Peanut butter or cookie butter
- For a Fruity Burst:
- Frozen berries (blueberries, raspberries)
- Chopped frozen mango or pineapple
- Shredded coconut
- For the Health-Conscious:
- Cacao nibs
- Lily’s sugar-free chocolate chips
- Toasted unsweetened coconut flakes
- Powdered peanut butter mixed with a little water to form a paste
Once you’ve added your mix-ins, put the pint back in the machine and press the “Mix-In” button. This function gently folds everything together without completely pulverizing it.
5 Easy and Delicious Ninja Creami Deluxe Recipes
Here are five tried-and-true ninja creami deluxe recipes to get you started. Each recipe is designed for the 24-ounce Deluxe pint.
1. High-Protein Vanilla Bean Ice Cream
A classic for a reason. This is the perfect base for nearly any mix-in you can dream of.
- Ingredients:
- 2 cups Fairlife 2% milk (or whole milk)
- 1 scoop (30-35g) vanilla whey/casein blend protein powder
- 1 tbsp allulose or sweetener of choice
- 1 tsp vanilla extract or vanilla bean paste
- Pinch of salt
- 1/4 tsp guar gum or xanthan gum
- Instructions:
- Whisk all ingredients in the Deluxe pint until smooth.
- Freeze for 24 hours.
- Spin on “Ice Cream.” Re-spin with a splash of milk if needed.
- Use the “Mix-In” function to add crushed cookies, sprinkles, or chocolate chips.
2. Decadent Chocolate Fudge Brownie
This chocolate ice cream is rich, satisfying, and feels like a cheat meal (but doesn’t have to be!).
- Ingredients:
- 2 cups chocolate Fairlife milk (or milk of choice)
- 1 scoop (30-35g) chocolate protein powder
- 2 tbsp unsweetened cocoa powder
- 1 tbsp sweetener of choice
- Pinch of salt
- 1/4 tsp xanthan gum
- Mix-Ins:
- 1/3 cup chopped brownie pieces
- Instructions:
- Blend all base ingredients in the pint until very smooth.
- Freeze for 24 hours.
- Spin on “Ice Cream.” Re-spin with a splash of chocolate milk if powdery.
- Create a well, add brownie chunks, and process using the “Mix-In” function.
3. Low-Carb Strawberry Cheesecake
All the flavor of cheesecake in a scoopable, low carb form.
- Ingredients:
- 1 cup whole milk
- 1/2 cup heavy cream
- 4 oz (1/2 block) full-fat cream cheese, softened
- 1/4 cup powdered erythritol or monk fruit sweetener
- 1 tsp vanilla extract
- 1/4 tsp guar gum
- Mix-Ins:
- 1/2 cup chopped fresh strawberries
- 1/4 cup crushed keto-friendly cookies or graham crackers
- Instructions:
- In a blender, combine all base ingredients until perfectly smooth. Pour into the pint.
- Freeze for 24 hours.
- Spin on “Ice Cream.” It should be creamy on the first spin due to the high fat content, but re-spin if needed.
- Add strawberries and crushed cookies, then use the “Mix-In” function.
4. Sugar-Free Mint Chocolate Chip
A refreshing and surprisingly simple sugar-free treat.
- Ingredients:
- 2 cups unsweetened almond milk
- 1 scoop vanilla protein powder
- 2 tbsp powdered monk fruit/erythritol blend
- 1/2 tsp peppermint extract (a little goes a long way!)
- Optional: 1-2 drops of green food coloring
- 1/4 tsp xanthan gum
- Mix-Ins:
- 1/4 cup sugar-free chocolate chips (like Lily’s)
- Instructions:
- Whisk all base ingredients together in the pint.
- Freeze for 24 hours.
- Spin on “Ice Cream.” Re-spin with a splash of almond milk.
- Add chocolate chips and use the “Mix-In” function.
5. Simple 3-Ingredient Mango Sorbet
Proof that you don’t need dairy or protein powder to make something amazing.
- Ingredients:
- 1 can (15 oz) mango chunks in juice, undrained
- Juice of half a lime
- 1 tbsp maple syrup or agave (optional, for sweetness)
- Instructions:
- Pour the entire can of mangoes (juice and all) into a blender. Add lime juice and optional sweetener.
- Blend until completely smooth. Pour into the Deluxe pint.
- Freeze for 24 hours.
- Spin on the “Sorbet” function. You may need one re-spin with a tablespoon of water or lime juice for the perfect texture.
Pro Tips for the Best Results
- Always Freeze on a Level Surface: An angled frozen base can damage the machine.
- Don’t Overfill: Never fill the pint past the max fill line. The mixture will expand slightly as it freezes.
- Patience is Key: Don’t rush the 24-hour freeze. A fully frozen base is essential for the machine to work correctly.
- A Little Fat Goes a Long Way: Even in a healthy recipe, adding a tablespoon of heavy cream or a small amount of cream cheese can dramatically improve the texture.
Troubleshooting Common Ninja Creami Problems
Even with the best recipes, you might run into a few snags. Don’t worry, most issues are an easy fix. Let’s walk through the most common ones.
Help! My Ice Cream is Powdery or Icy.
This is the number one issue new users face, but it’s also the easiest to solve. A powdery or dry texture almost always means the base is very low in fat and/or sugar, which makes it freeze harder and resist becoming creamy on the first spin.
- The Fix: Your best friend is the “Re-Spin” button. Add one or two tablespoons of your base liquid (milk, almond milk, etc.) directly to the top of the powdery mixture and process it again on the “Re-Spin” cycle. This little bit of extra liquid is almost always enough to transform it into a perfectly smooth and creamy dessert.
- Prevention: To avoid it in the future, make sure your base has enough fat or stabilizers. Even in a healthy recipe, a tablespoon of cream cheese, a good protein powder blend, or 1/4 teaspoon of xanthan gum can work wonders to ensure a creamy first spin.
Why is the Machine So Loud?
Yes, the Ninja Creami is loud. There’s no getting around it. That noise is the sound of a very powerful motor and a specialized paddle shaving and churning a block of solid ice at high speed. A loud whirring sound is completely normal.
- What to Listen For: You should be concerned if you hear a violent scraping, grinding, or cracking noise. This often means the pint was frozen with an uneven, slanted top. If that happens, stop the machine immediately, take the pint out, and let it thaw slightly on the counter so you can smooth the top before refreezing.
- How to Help: While you can’t make it silent, placing the machine on a sturdy, level surface can help. Some users place a small silicone mat underneath to dampen vibrations slightly.
My Mix-Ins Are Getting Crushed into Dust!
You envisioned beautiful chunks of cookies or brownies, but the “Mix-In” cycle pulverized them. This is a common frustration, especially with more delicate ingredients.
- The Fix: The “Mix-In” function is powerful and works best for sturdy items like chocolate chips, chopped nuts, or hard candy pieces. For softer items like brownie chunks, cake pieces, or soft cookie dough, your best bet is to stir them in by hand.
- The Method: After your base is fully spun and creamy, just take the pint out, add your delicate mix-ins, and gently fold them in with a spoon or spatula. You’ll get those perfect, chunky textures you’re looking for without turning them into powder.
Storing Your Homemade Ice Cream
If you have leftovers (which is more likely with the Deluxe!), you have a couple of options. You can smooth the top flat, put the lid back on, and pop it back in the freezer.
Here’s the thing: because homemade ice cream doesn’t have all the preservatives and stabilizers of store-bought kinds, it will freeze very hard. When you want to eat it again, you’ll need to run it through the Creami on the “Ice Cream” or “Re-Spin” setting to restore its creamy texture. Don’t try to scoop it straight from the freezer, you might bend a spoon!
Frequently Asked Questions
What is the difference between the Ninja Creami and the Ninja Creami Deluxe?
How do I make my Ninja Creami ice cream creamy instead of icy or powdery?
Can I make these recipes without using protein powder?
What are the best healthy mix-ins for Ninja Creami recipes?
How long should I freeze the base before processing it?
Final Thoughts: Your Creami Adventure Awaits
And there you have it! The Ninja Creami Deluxe might seem complex at first, but it’s an incredibly fun and versatile tool once you understand the basics. The key is to get your base right, be patient with the freezing process, and never underestimate the power of a Re-Spin. Now you have the foundation to move beyond basic recipes and start creating your own signature flavors.
We’d love to hear from you! What recipe are you most excited to try first? Drop a comment below with your favorite flavor combination or any questions you still have. For more inspiration, don’t forget to check out our complete Ninja Creami recipe hub. Happy churning!