Ah, the school year. It’s a whirlwind of new schedules, homework, and the never-ending question: “What’s for snack?” If you’re tired of the pre-packaged stuff or just running out of creative lunchbox ideas, you’ve come to the right place. Finding healthy school snacks that are both simple to make and kid-approved can feel like a huge challenge. But honestly, it doesn’t have to be. USDA MyPlate
We’ve put together a giant list of 35 genuinely easy snack ideas for school that will save your sanity and make your kids happy. From no-bake energy bites to savory pinwheels, there’s something here for every picky eater CDC. These are quick snacks for school that you can prep ahead of time, saving you from that morning rush.
Jump To:
1. No-Bake Chocolate Energy Bites
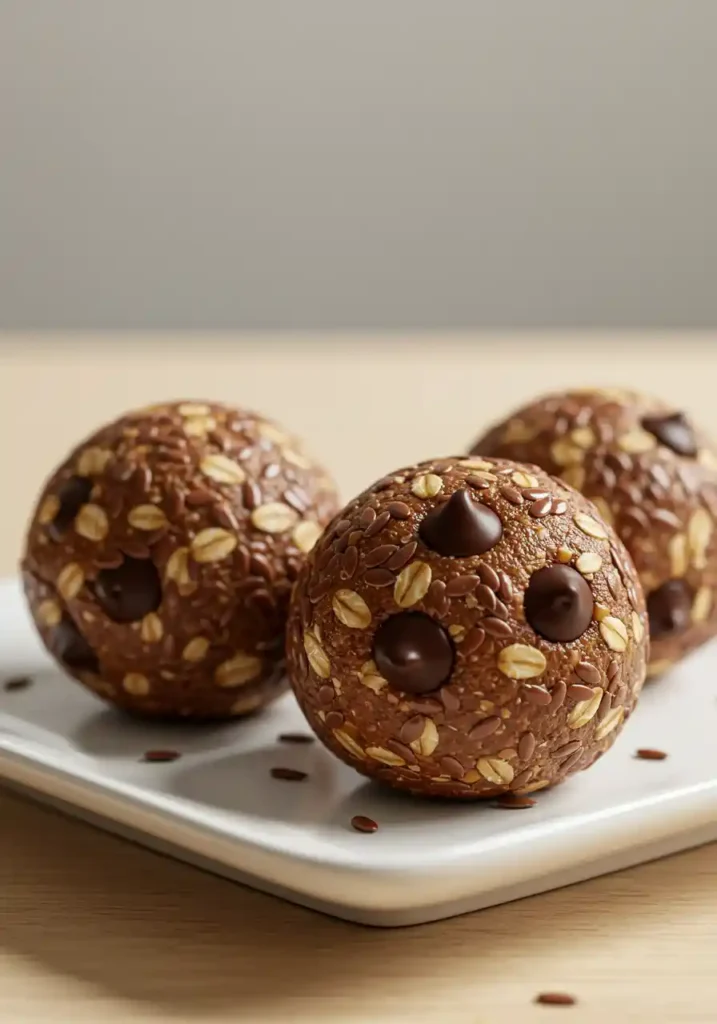
These nutrient-dense bites are a perfect make-ahead snack, packed with protein and healthy fats to keep kids satisfied. They satisfy sweet cravings without refined sugars and can be customized endlessly. Two primary methods offer different textures and flavor profiles.
Ingredients (Date-Based Method):
- 1 cup pitted dates (Medjool or Deglet Noor)
- 1/4 cup unsweetened cocoa powder
- 1/4 cup old-fashioned rolled oats
- 1/4 cup unsalted cashews (or other nuts like almonds)
- 3 tbsp almond butter
- 2 tbsp almond flour or meal
- 1 tbsp maple syrup or honey
- 1 1/2 tbsp coconut oil
- 1 1/2 tsp vanilla extract
- Optional coating: Unsweetened shredded coconut, ground flaxseed, or chia seeds. NIH National Center for Complementary and Integrative Health.
Instructions (Date-Based Method):
- Combine all ingredients (except the coating) in a high-speed food processor.
- Process the mixture until it forms a dry, fine crumble. Then, with the processor running, stream in the maple syrup or honey until a sticky, cohesive ball of dough forms. Scrape down the sides as needed.
- Transfer the dough to a bowl. Using a small scoop or your hands, portion the dough into bite-sized balls.
- Roll each ball between your palms to create a smooth surface, then roll in your desired coating.
- Place the bites in the refrigerator for at least 20 minutes to firm up before serving.
Ingredients (Oat-Based Method):
- 1 cup old-fashioned or quick-cooking rolled oats
- 1/4 cup all-natural, drippy peanut butter (or sunflower seed butter)
- 1/4 cup honey or brown rice syrup
- 2 tbsp cocoa powder
- Pinch of salt
- Optional mix-ins: 1/4 cup mini chocolate chips, ground flaxseed, or chia seeds
Instructions (Oat-Based Method):
- In a medium bowl, combine all ingredients and mix thoroughly until a sticky dough forms.
- If the dough seems too dry, add a bit more honey or peanut butter; if too mushy, add a little more oats.
- Wet your hands slightly to prevent sticking, then use a tablespoon or small cookie scoop to portion and roll the mixture into balls.
- Store in an airtight container in the refrigerator.
Expert Tips & Variations
- Binding is Key: For oat-based bites, using a “drippy” natural peanut butter is crucial. The oils help bind the ingredients together. If your nut butter is stiff, you may need to add more liquid sweetener.
- Kid-Friendly Prep: Kids love rolling the dough into balls and coating them in shredded coconut or sprinkles.
- Storage: Store energy bites in an airtight container in the refrigerator for up to 2 weeks or in the freezer for up to 3 months.
- Nutrient Boost: Add ground flaxseed, chia seeds, or hemp seeds for extra fiber and omega-3s.
2. Rainbow Fruit Kabobs
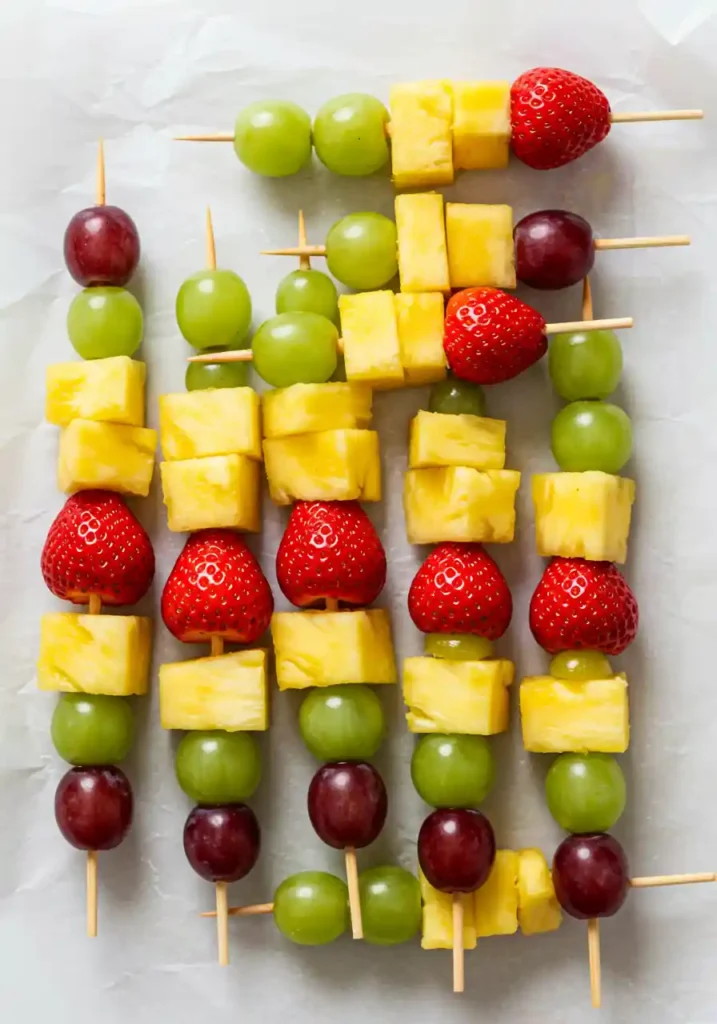
A visually stunning and fun way to serve fruit, these kabobs are a great source of vitamins and minerals. They can be customized with any seasonal fruit and are perfect for parties or a simple afternoon snack.
Ingredients:
- Red: Strawberries (halved), raspberries, watermelon chunks
- Orange: Mandarin orange segments, cantaloupe, mango chunks
- Yellow: Pineapple chunks, peaches, banana slices
- Green: Green grapes, kiwi slices, honeydew melon
- Blue/Purple: Blueberries, blackberries, purple grapes
- Equipment: Wooden or metal skewers (use blunt-tipped skewers for younger children)
Instructions:
- Wash all fruit thoroughly. Cut larger fruits like strawberries, pineapple, kiwi, and melons into uniform, bite-sized chunks.
- Carefully thread the fruit onto the skewers in rainbow order: red, orange, yellow, green, blue, purple.
- Serve immediately or refrigerate until ready. They are excellent paired with a simple yogurt dip.
Expert Tips & Variations
- Prevent Browning: If making ahead with fruits that oxidize, such as apples or bananas, toss the cut pieces in a small amount of lemon juice to keep them from turning brown.
- Kid-Friendly Prep: This is a perfect activity for kids. Let them assemble their own skewers, which encourages them to eat the fruit. For a fun twist, use small cookie cutters to make shapes out of melon or pineapple.
- Storage: Assembled kabobs can be stored in an airtight container in the refrigerator for a few hours, or up to a day if you avoid easily perishable fruits like bananas.
- Yogurt Dip: To make a simple dip, combine 1 cup of plain or vanilla Greek yogurt with 1 tablespoon of honey and 1/2 teaspoon of cinnamon.
3. Apple & SunButter “Sandwiches”
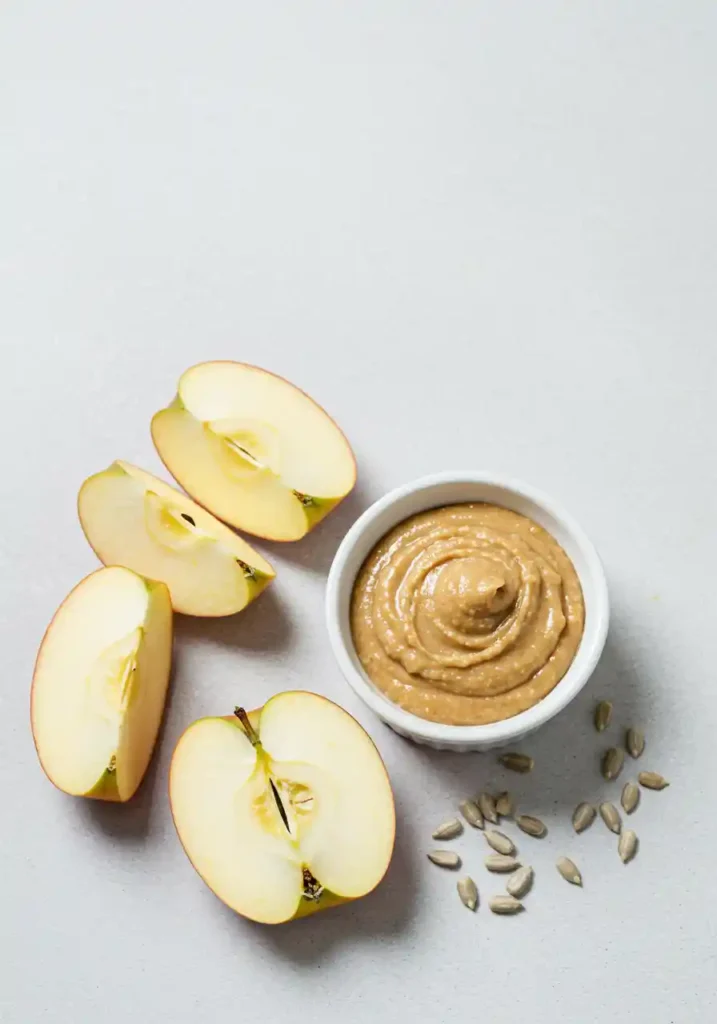
A fantastic nut-free alternative to peanut butter, sunflower seed butter pairs perfectly with crisp apples for a simple, satisfying snack that combines protein, fiber, and healthy fats. This can be served as a classic “sandwich” or deconstructed as “nachos.”
Ingredients:
- 1 large apple (Fuji, Honeycrisp, or Granny Smith work well)
- 2-3 tbsp sunflower seed butter (like SunButter)
- Optional toppings: Granola, mini chocolate chips, raisins, shredded coconut, chia seeds, hemp seeds
- Pinch of ground cinnamon
Instructions (Sandwich Style):
- Core the apple and slice it crosswise into 1/4-inch thick rings.
- Spread a layer of sunflower seed butter on one apple ring.
- Sprinkle with granola, cinnamon, or other desired toppings.
- Top with a second apple ring to create a sandwich. Repeat with remaining slices.
Instructions (Nacho Style):
- Slice the apple into thin wedges and arrange them on a plate.
- Sprinkle the apple slices with cinnamon.
- Warm the sunflower seed butter slightly to make it easier to drizzle, then drizzle it over the apple slices.
- Top with granola, chocolate chips, dried fruit, and seeds as desired. Serve immediately.
Expert Tips & Variations
- Nut-Free Priority: Sunflower seed butter is an excellent choice for school snacks, as most schools have nut-free policies.
- Make Ahead: To prep this snack, apple slices can be stored in an airtight container with a squeeze of lemon juice to prevent browning. Pack toppings in a separate small container to be assembled just before eating.
- Other Butters: If nut allergies are not a concern, this works wonderfully with peanut butter, almond butter, or cashew butter.
4. Cream Cheesy Cucumber Sandwiches
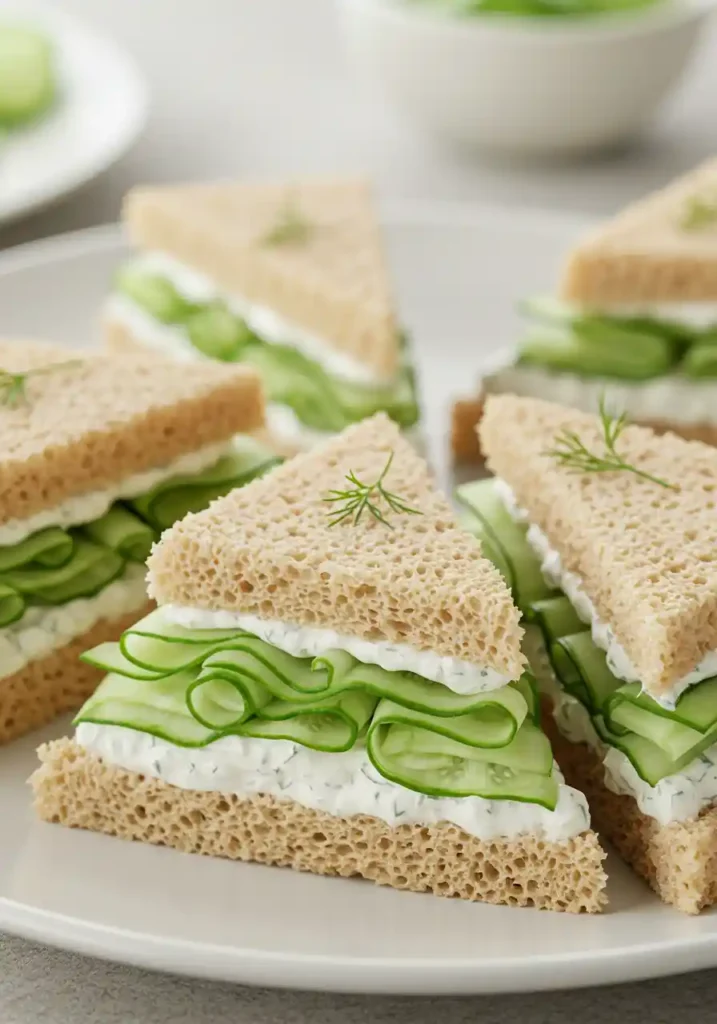
A classic and refreshing snack, these simple sandwiches are light, crunchy, and incredibly easy to make. The key to success is creating a moisture barrier to prevent the bread from becoming soggy.
Ingredients:
- 4 slices of soft whole-wheat or white bread
- 1/4 cup cream cheese, softened (whipped cream cheese is easier to spread)
- 1/2 a large cucumber, thinly sliced (Persian or English cucumbers have thinner skin and smaller seeds)
- Optional flavorings for cream cheese: 1 tsp fresh dill or chives (chopped), 1/4 tsp onion or garlic powder, 1 tsp lemon juice
Instructions:
- If desired, mix the softened cream cheese with any optional flavorings like dill, onion powder, or lemon juice in a small bowl.
- Spread a thin, even layer of the cream cheese mixture on one side of all four slices of bread, making sure to go all the way to the edges.
- Arrange a single layer of cucumber slices on two of the bread slices.
- Top with the remaining two slices of bread, cream cheese side down.
- Gently press down. If desired, trim the crusts for a traditional tea sandwich style.
- Cut the sandwiches into quarters or triangles to serve.
Expert Tips & Variations
- The Moisture Barrier: The most critical step for make-ahead success is spreading cream cheese on both slices of bread, edge to edge. The fat in the cream cheese creates a barrier that prevents the water from the cucumbers from seeping into the bread and making it soggy.
- Make Ahead: Sandwiches can be assembled a few hours ahead of time. Wrap them tightly in plastic wrap and refrigerate until ready to pack.
- Add Protein: For a more substantial snack, add a thin slice of smoked salmon or shredded chicken to the sandwich.
- Kid-Friendly Prep: Kids can help spread the cream cheese and arrange the cucumber slices.
5. DIY Trail Mix Packs
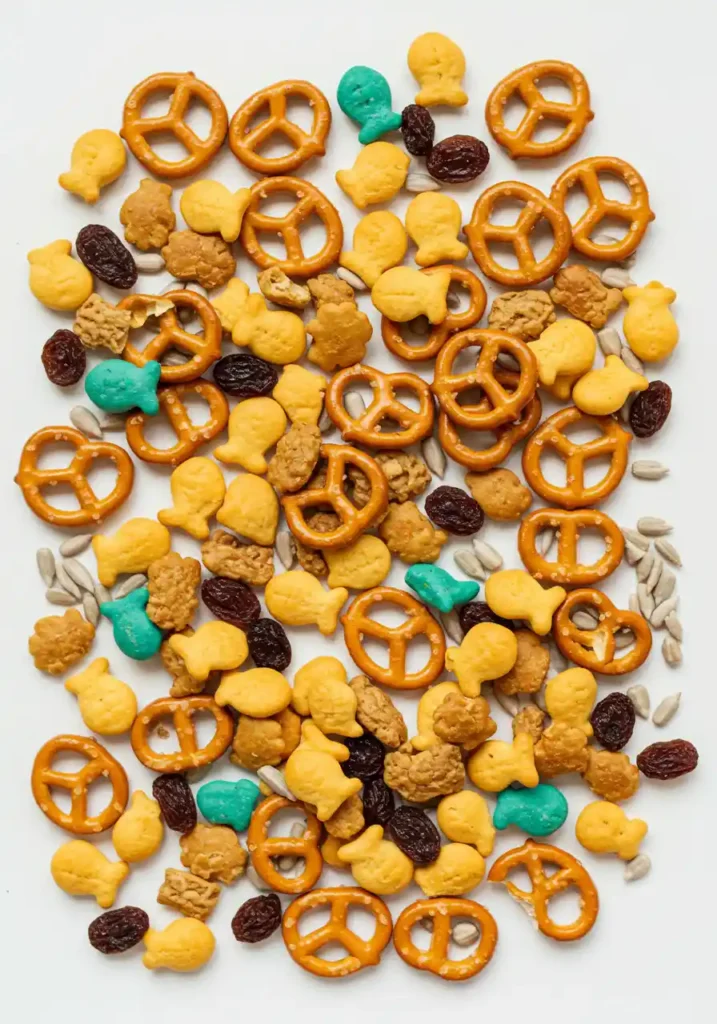
Homemade trail mix is a cost-effective, healthy, and endlessly customizable snack. By creating your own, you can control the sugar content and cater to specific allergies or preferences. The best approach is to think of it as a formula with three core components.
The Trail Mix Formula (Choose at least one from each category):
- Category 1: Carbohydrates (for energy)
- Low-sugar cereals (O’s like Cheerios, Chex, shredded wheat squares)
- Whole-grain pretzels or mini crackers (like Goldfish)
- Popcorn
- Category 2: Fruits & Veggies (for vitamins and fiber)
- Dried fruits (raisins, cranberries, chopped apricots or mango)
- Freeze-dried fruits (strawberries, blueberries, apple slices)
- Banana chips or apple chips
- Category 3: Healthy Fats & Protein (for staying full)
- Nut-Free Options: Pumpkin seeds (pepitas), sunflower seeds, toasted coconut flakes
- If nuts are allowed: Almonds, cashews, walnuts, pecans
- Category 4: A Fun Treat (optional)
- Mini chocolate chips or M&Ms
- Mini marshmallows
- Yogurt-covered raisins
Instructions:
- Choose your ingredients from the categories above. A good starting ratio is about equal parts from each of the three main categories, with the “fun treat” used more sparingly.
- Combine all chosen ingredients in a large bowl and toss to mix evenly.
- Portion the mix into small, airtight containers or reusable snack bags for easy grab-and-go snacks.
Expert Tips & Variations
- Kid-Friendly Prep: Set up a “trail mix bar” with bowls of different ingredients and let kids create their own custom mix. This gives them a sense of ownership and makes them more likely to eat it.
- Storage: Store the bulk trail mix in a large airtight container at room temperature for several weeks.
- Allergy-Safe: For nut-free schools, focus on seeds, coconut flakes, and roasted chickpeas or peas for the protein component.
6. Ants on a Log (and Its Creative Cousins)
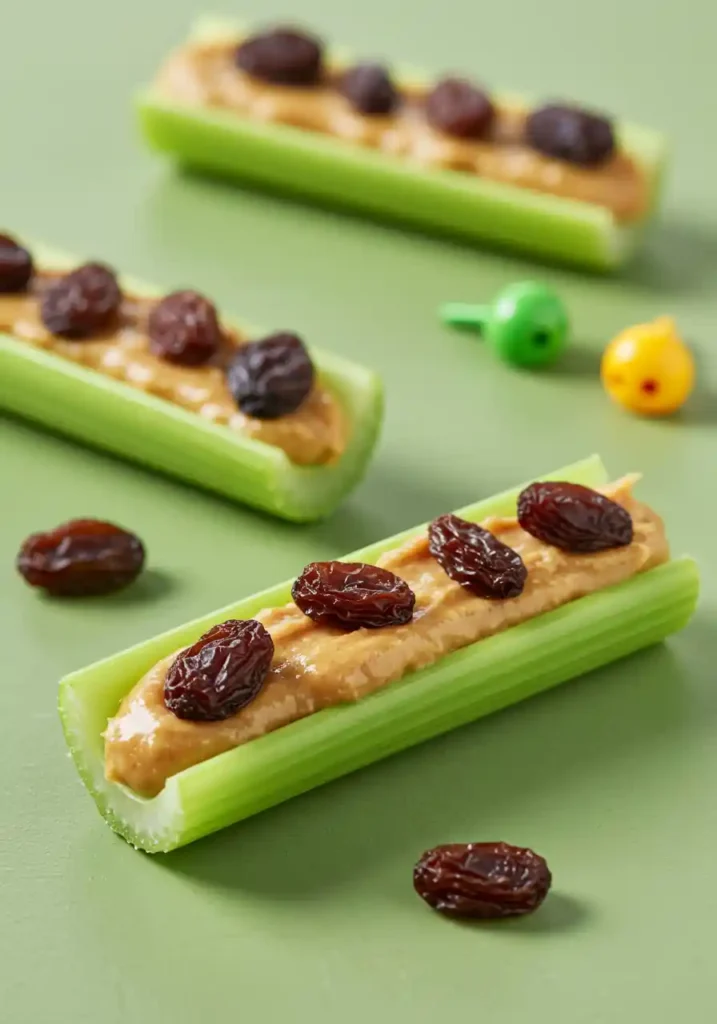
This classic snack is a triple threat of crunch, creaminess, and sweetness. It’s also a fantastic vehicle for protein and vegetables, and its playful name makes it a perennial kid favorite.
Ingredients (Classic Version):
- 3 celery stalks
- 1/4 cup creamy peanut butter (or sunflower seed butter for a nut-free option)
- 1/4 cup raisins
Instructions:
- Wash and dry the celery stalks thoroughly. Cut them into 2-3 inch pieces.
- Spread the peanut butter or other filling into the concave part of each celery stick.
- Press raisins onto the peanut butter to look like “ants” on a log.
Expert Tips & Variations
- The Log: Swap celery for carrot sticks, apple slices, or halved bananas.
- The Filling: Use cream cheese, hummus, or mashed avocado instead of peanut butter. For a fun twist, mix equal parts peanut butter and cream cheese or yogurt.
- The Ants: Get creative with the toppings!
- Red Ants on a Snowy Log: Cream cheese with dried cranberries.
- Caterpillars: A line of grapes or blueberries.
- Fish in a Stream: Cream cheese filling with Goldfish crackers pressed on top.
- Ants on Vacation: Just the filling, no “ants”!
- Kid-Friendly Prep: This is an ideal snack for kids to make themselves. They can practice spreading and placing the “ants.”
7. 5-Minute Yogurt Parfaits
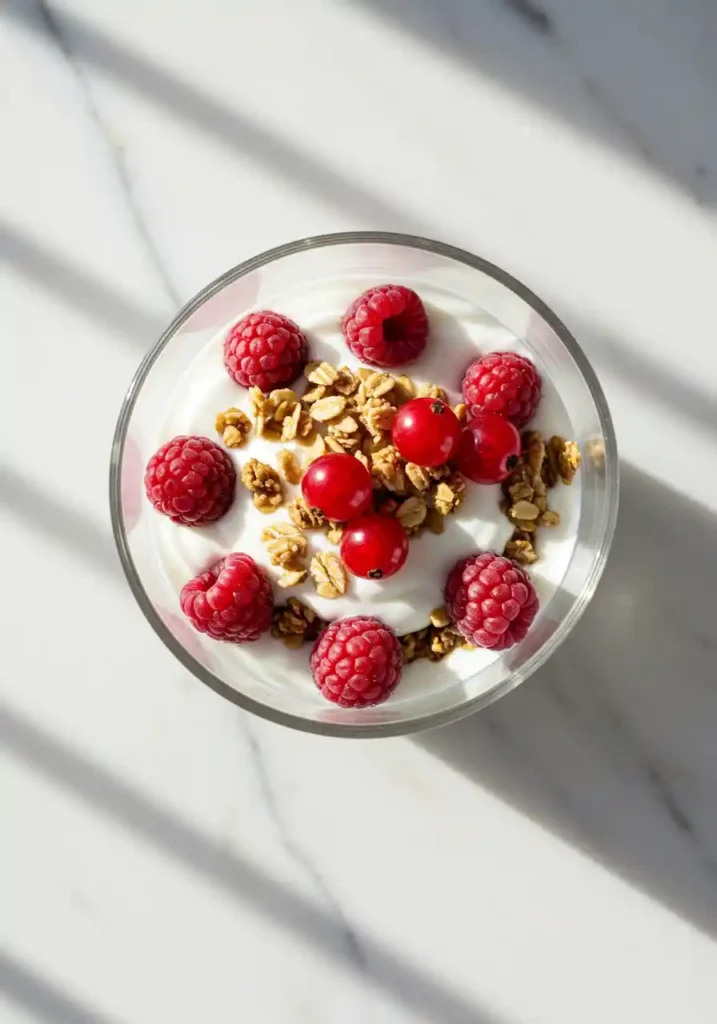
Layering yogurt, fruit, and granola in a clear cup transforms simple ingredients into a special treat. This snack is packed with protein, calcium, and fiber, making it a well-rounded option.
Ingredients:
- 1/2 cup plain or vanilla Greek yogurt (whole milk yogurt is great for kids)
- 1/4 cup mixed berries (fresh or thawed frozen) or other fruit like diced mango or peaches
- 2 tbsp granola or low-sugar cereal
- Optional: 1 tsp honey or maple syrup (if using plain yogurt)
Instructions:
- In a small glass, jar, or bowl, create the first layer by spooning in half of the yogurt.
- Add a layer of half the fruit.
- Sprinkle a layer of half the granola.
- Repeat the layers: yogurt, fruit, and a final sprinkle of granola on top.
- Serve immediately to ensure the granola stays crunchy.
Expert Tips & Variations
- Make-Ahead Strategy: To prevent soggy granola, pack the components separately in a bento-style container. Kids can assemble their own parfait at snack time.
- Crunchy Toppers: Besides granola, try crushed graham crackers, mini animal crackers, or a sprinkle of chia or hemp seeds.
- Fruit Fun: Use whatever fruit is in season. Applesauce or fruit jam can also be used as a fruit layer.
- Kid-Friendly Prep: Let kids choose their own fruit and crunchy toppings and layer their own parfaits. This autonomy can make them more excited to eat it.
8. Bell Pepper Strips with Hummus
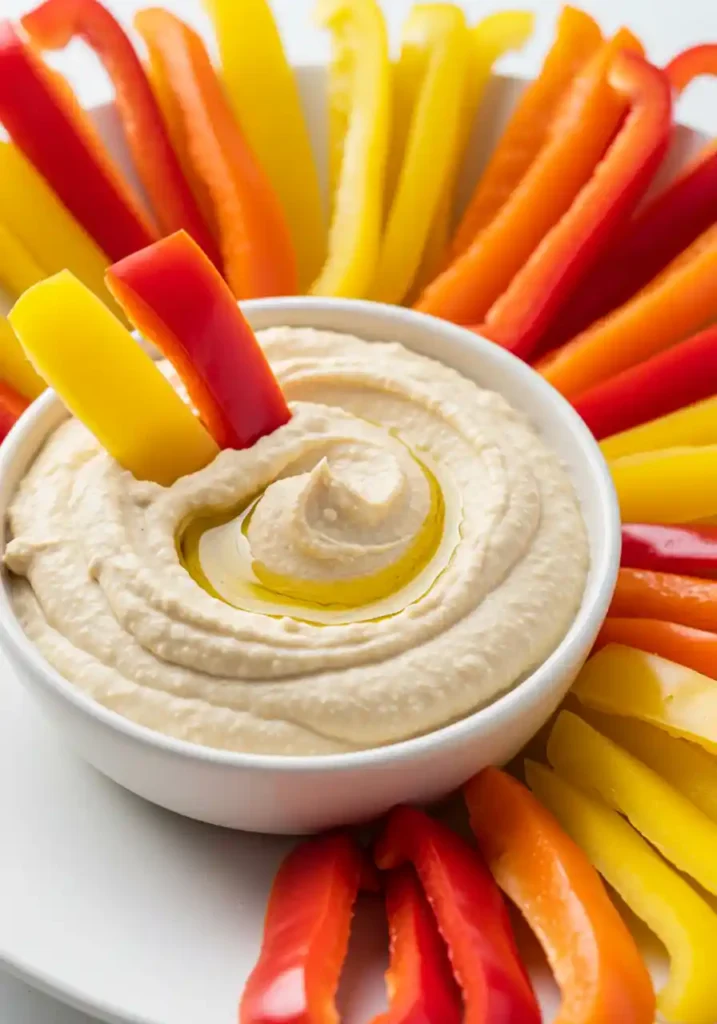
A simple, crunchy, and hydrating snack that’s packed with nutrients. Mini bell peppers are naturally sweet and perfectly sized for dipping, or they can be stuffed for a more substantial bite.
Ingredients:
- 10 mini sweet bell peppers (assorted colors)
- 1 cup hummus (store-bought or homemade)
- Optional garnish: chopped fresh parsley or everything bagel seasoning
Instructions (For Dipping):
- Wash the bell peppers. Cut them in half lengthwise and remove the stems and seeds.
- Slice the halves into strips.
- Serve with a side of hummus for dipping.
Instructions (For Stuffing):
- Wash the bell peppers. Cut them in half lengthwise and remove the stems and seeds.
- Use a small spoon to fill each pepper half with 2-3 teaspoons of hummus.
- Sprinkle with parsley or other seasonings, if desired. Serve immediately or store in the fridge for up to an hour.
Expert Tips & Variations
- Homemade Hummus: For a flavorful homemade option, roast one red bell pepper at 400°F (200°C) for 20 minutes. Peel off the skin and blend it with a can of chickpeas, 2 tbsp tahini, 1 clove garlic, and the juice of half a lemon until smooth.
- Air Fryer Twist: For a warm and savory treat, stuff the mini peppers with hummus, top with a sprinkle of feta cheese, and air fry at 350°F (177°C) for about 10 minutes until the peppers are tender and the hummus is warm.
- Veggie Confetti: For extra crunch and nutrients, top the stuffed peppers with a mix of finely diced carrots, cucumbers, and red onion.
9. Avocado Rice Cakes
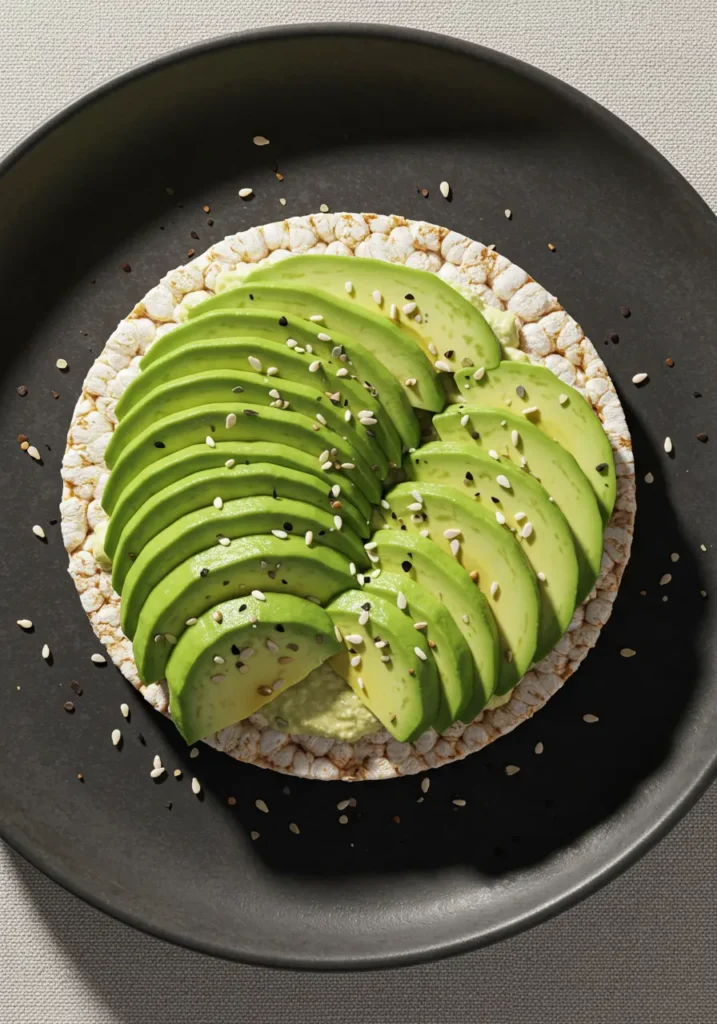
Rice cakes provide a crunchy, gluten-free base for creamy avocado, a source of healthy monounsaturated fats. This snack is quick to assemble and can be customized with sweet or savory toppings.
Ingredients:
- 2 brown rice cakes
- 1/2 ripe avocado
- 1 tsp lemon or lime juice
- Pinch of salt and pepper
Savory Topping Ideas:
- Sliced cherry tomatoes
- Everything bagel seasoning
- A drizzle of soy sauce or tamari and sesame seeds
Sweet Topping Ideas:
- Sliced berries and granola
- A drizzle of honey
Instructions:
- In a small bowl, mash the avocado with the lemon or lime juice, salt, and pepper until it reaches your desired consistency.
- Spread the mashed avocado evenly over the two rice cakes.
- Add your choice of savory or sweet toppings.
- Serve immediately to prevent the rice cakes from becoming soggy.
Expert Tips & Variations
- Choosing Avocados: A ripe avocado should yield slightly to gentle pressure but not feel mushy. The lemon or lime juice is not just for flavor; its acidity helps prevent the avocado from turning brown through oxidation.
- Not Make-Ahead: This snack is best assembled right before eating, as the moisture from the avocado will soften the rice cake over time. However, you can pack the components separately for on-the-go assembly.
- Kid-Friendly Prep: Kids can easily mash the avocado and spread it on the rice cakes themselves.
10. Cottage Cheese & Peaches
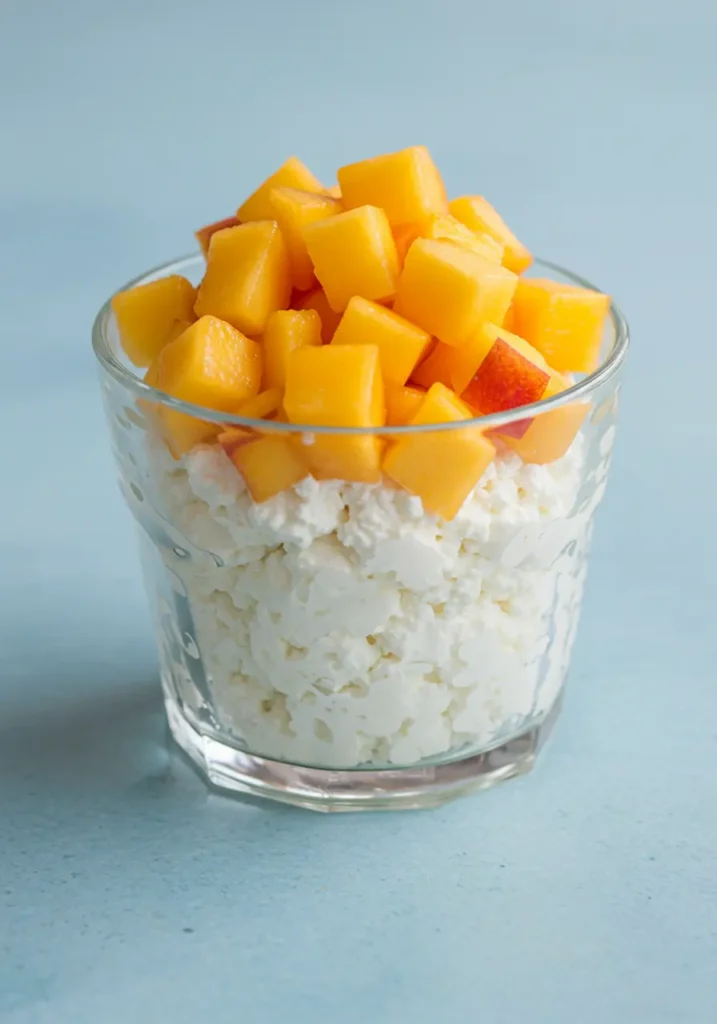
This high-protein snack is simple, creamy, and naturally sweet. It’s a fantastic way to keep kids feeling full and energized, combining protein, calcium, and vitamins from the fruit.
Ingredients:
- 1/2 cup cottage cheese (4% fat is often preferred for flavor and creaminess)
- 1/2 cup diced peaches (fresh, or thawed from frozen)
- Optional: 1 tsp honey or maple syrup, pinch of cinnamon, 1 tbsp chopped pecans or chia seeds
Instructions:
- Spoon the cottage cheese into a small bowl or container.
- Top with the diced peaches.
- Drizzle with honey or maple syrup and sprinkle with cinnamon, if using.
- Gently stir to combine or serve layered.
Expert Tips & Variations
- Fruit Swaps: When peaches are not in season, this snack works wonderfully with berries, diced mango, or even orange segments.
- Make it Creamy: For a smoother, mousse-like texture that might appeal more to some kids, blend the cottage cheese with a tablespoon of instant pudding mix or a little honey until creamy before adding the fruit.
- Make Ahead: This snack can be prepped in individual containers and stored in the refrigerator for a quick grab-and-go option.
11. Guacamole & Baked Tortilla Chips
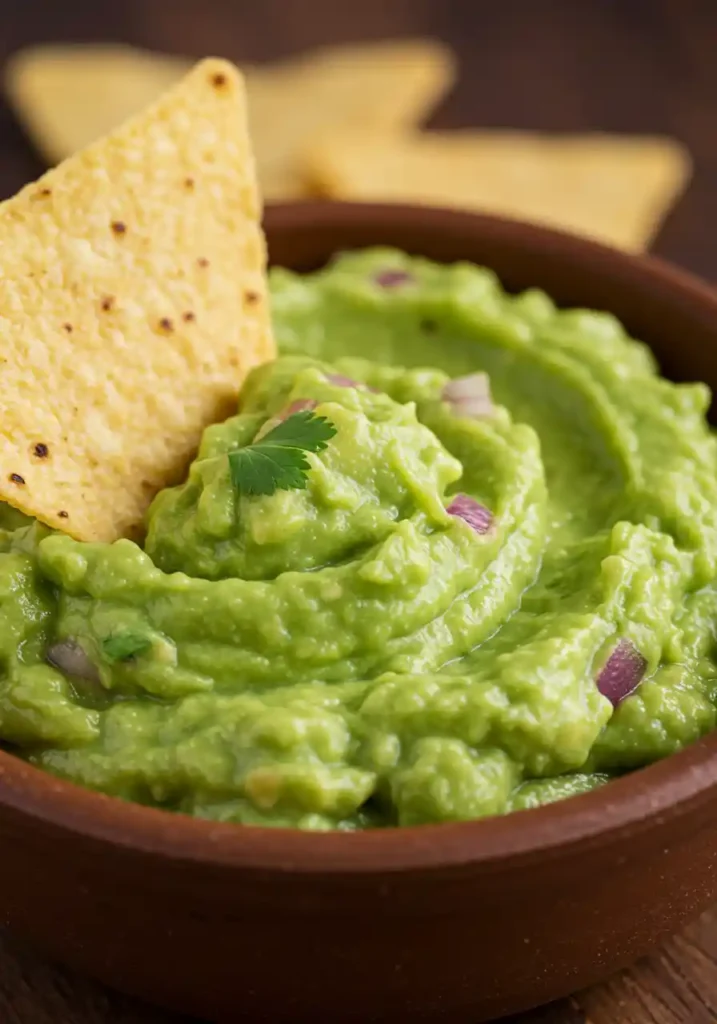
A kid-friendly version of a classic favorite, this guacamole is mild and creamy. Paired with homemade baked tortilla chips, it’s a wholesome snack that provides healthy fats and fiber.
Ingredients (Guacamole):
- 2 ripe avocados
- 1 lime, juiced
- 1/4 cup finely diced red onion (optional, can be reduced for kids)
- 1/4 cup finely diced Roma tomato, seeds removed
- 1 clove garlic, minced (or 1/4 tsp garlic powder)
- 1/2 tsp salt, or to taste
Ingredients (Baked Tortilla Chips):
- 5-6 corn or whole wheat tortillas
- Cooking spray or 1 tbsp olive oil
- Salt for sprinkling
Instructions:
- For the Chips: Preheat the oven to 400°F (200°C). Cut the tortillas into 8 triangles each, like a pizza. Arrange them in a single layer on a baking sheet, spray or brush lightly with oil, and sprinkle with salt. Bake for 6-8 minutes, or until golden and crisp.
- For the Guacamole: Cut the avocados in half, remove the pits, and scoop the flesh into a medium bowl.
- Add the lime juice and salt, then mash with a fork or potato masher to your desired consistency (smooth or chunky). The lime juice is essential for preventing browning.
- Stir in the diced onion, tomato, and garlic until just combined.
- Taste and adjust seasoning if needed. Serve immediately with the baked chips.
Expert Tips & Variations
- Kid-Friendly Guac: The key to making guacamole appealing to kids is often keeping it simple. Start with just mashed avocado, lime juice, and salt. You can add other ingredients like tomato or a tiny bit of garlic powder as they become more adventurous.
- Storage: To store leftover guacamole, press a piece of plastic wrap directly onto the surface of the dip to prevent air from getting to it, which will minimize browning. It can be kept in the fridge for up to two days.
- Kid-Friendly Prep: Kids are great at mashing avocados! Give them a fork and let them help prepare the dip.
12. Pretzel Sticks with Cheese Cubes
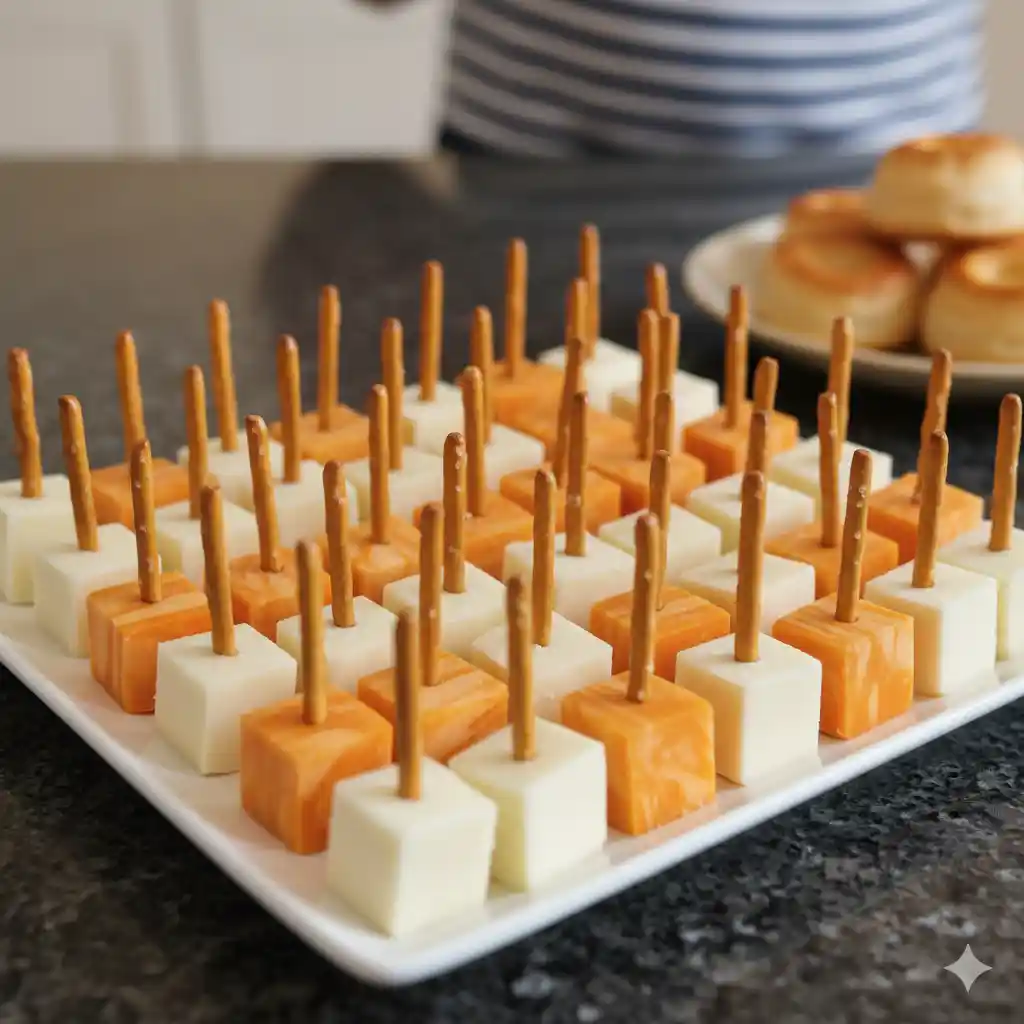
This is the ultimate low-prep, high-satisfaction snack. The combination of salty, crunchy pretzels and savory, creamy cheese is a classic for a reason. It can be served simply or assembled into fun skewers.
Ingredients:
- 1 small bag of pretzel sticks
- 1 block of cheese (Cheddar, Havarti, or Colby Jack work well)
- Optional additions for skewers: Sliced salami, gherkins (mini pickles), cherry tomatoes
Instructions:
- Cut the block of cheese into 1/2-inch cubes.
- Serve the cheese cubes alongside the pretzel sticks for dipping and building.
- For Skewers: Gently thread a piece of folded salami, a gherkin, or a cherry tomato onto a pretzel stick, followed by a cheese cube at the end.
Expert Tips & Variations
- Cheese Balls: For a party-worthy version, make mini cheese balls. Combine 8 oz softened cream cheese, 1/2 cup grated cheddar, and seasonings. Roll into small balls, coat in chopped nuts or bacon bits, and insert a pretzel stick as an edible skewer.
- Make Ahead: The cheese can be cubed ahead of time and stored in an airtight container in the refrigerator. Assemble skewers just before serving to ensure the pretzels stay crisp.
- Kid-Friendly Prep: Kids can easily assemble their own pretzel and cheese skewers, choosing their favorite combinations.
13. Seaweed Snack Wraps
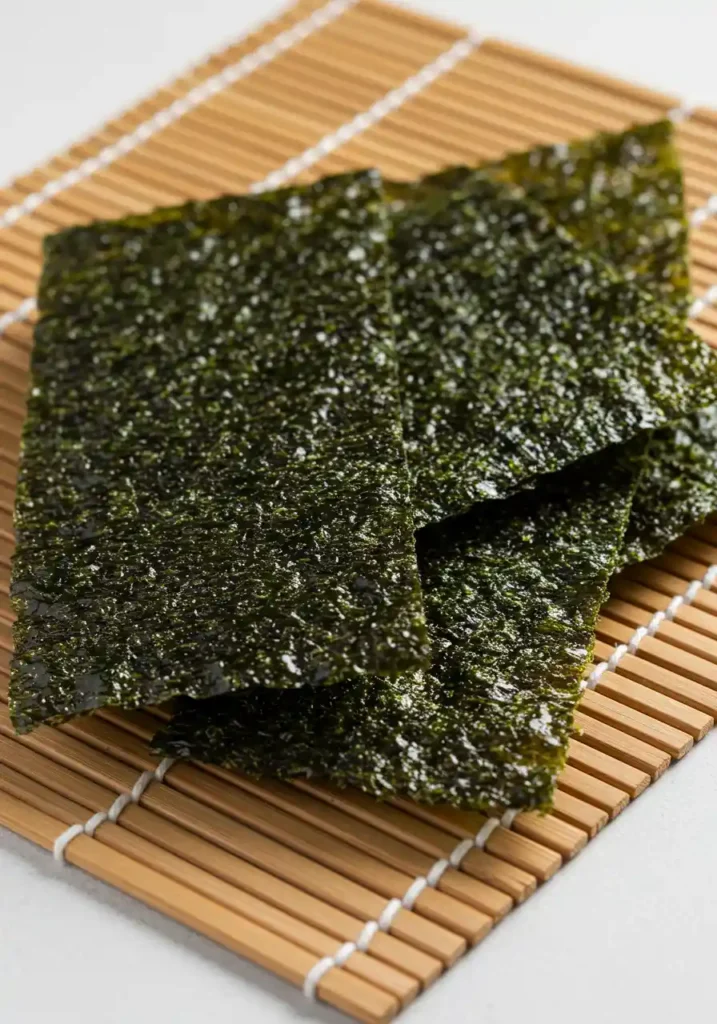
Roasted seaweed snacks are a fantastic, nutrient-dense alternative to chips. They are crispy, savory, and can be used as a fun, edible wrapper for a variety of fillings, creating tiny, bite-sized “seaweed-ritos”.
Ingredients:
- 1 package roasted seaweed snacks (like Gimme Seaweed)
- Filling Ideas:
- String cheese
- Thin slices of turkey or ham
- Cucumber or red pepper sticks
- Avocado slices
- A small amount of cooked rice and mashed chickpeas
Instructions:
- Lay a sheet of roasted seaweed flat.
- Place a small amount of your chosen filling in the center. For example, a piece of string cheese, a folded slice of turkey, or a few veggie sticks.
- Roll the seaweed snack tightly around the filling. The natural moisture from the fillings will help the seaweed stick to itself.
- Serve immediately for the best crunch.
Expert Tips & Variations
- Soften for Rolling: If the seaweed snacks are too brittle, you can soften them slightly by placing them between two lightly damp paper towels for a few minutes before rolling.
- Kid-Friendly Prep: Set up a “sushi rolling” station and let kids choose their own fillings to wrap. This interactive element makes snack time more engaging.
- Flavor Combos: Experiment with different flavors of seaweed snacks. A teriyaki-flavored seaweed pairs well with cheese, while a wasabi flavor is great with turkey.
14. Black Bean and Corn Salsa
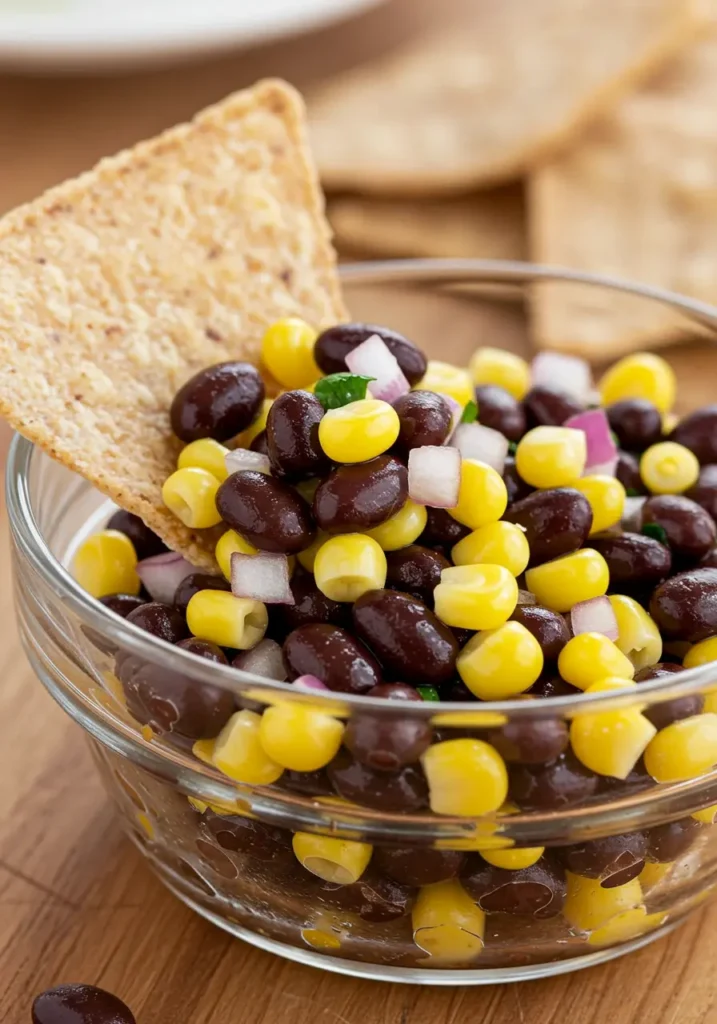
This colorful, hearty salsa is packed with fiber and protein. It’s incredibly easy to make by combining a few pantry staples with fresh ingredients. It can be served as a dip with tortilla chips or as a side dish.
Ingredients:
- 1 can (15 oz) black beans, drained and rinsed thoroughly
- 1 can (15 oz) sweet corn, drained
- 1 cup diced tomatoes (fresh Roma tomatoes are great)
- 1/2 cup diced red bell pepper
- 1/4 cup finely diced red onion
- 1 jalapeño, seeded and finely minced (optional, for heat)
- 1/4 cup chopped fresh cilantro (optional)
- Juice of 1-2 limes
- 1 tbsp olive oil
- 1/2 tsp cumin
- Salt and pepper to taste
Instructions:
- In a large bowl, combine the drained and rinsed black beans, corn, diced tomatoes, red bell pepper, red onion, and jalapeño (if using).
- In a small bowl, whisk together the lime juice, olive oil, cumin, salt, and pepper.
- Pour the dressing over the bean and corn mixture and stir gently to combine.
- Stir in the fresh cilantro, if using.
- For best results, cover and refrigerate for at least 30 minutes to allow the flavors to meld together.
- Serve with tortilla chips or as a side.
Expert Tips & Variations
- Make Ahead: This salsa is an excellent make-ahead snack. The flavors actually improve as it sits in the refrigerator. It can be made a day or two in advance.
- Using Frozen Corn: If using frozen corn, thaw it completely and drain any excess water before adding it to the salsa.
- Kid-Friendly Version: To make it appealing for kids, omit the jalapeño and cilantro if they are sensitive to spice or strong herbs. The salsa is still delicious with just the beans, corn, peppers, and lime dressing.
15. Mini Pizza Muffins

These savory muffins capture the beloved flavor of pizza in a convenient, portable form. They are easy to customize with favorite toppings and can even be a clever way to incorporate extra vegetables.
Ingredients (Muffin Base):
- 1 cup all-purpose flour
- 3/4 cup whole wheat flour
- 1 1/2 cups milk
- 1 cup shredded mozzarella cheese
- 1/4 cup grated Parmesan cheese
- 1 cup grated carrot (optional, for hidden veggies)
- 1/4 cup melted butter or neutral oil
- 2 eggs, lightly beaten
- 2 1/2 tsp pizza seasoning (or a mix of dried oregano and garlic powder)
- 1 tsp baking powder
- 1/2 tsp baking soda
- Optional mix-ins: 1/4 cup diced pepperoni, chopped olives, or finely diced bell peppers
Instructions:
- Preheat the oven to 375°F (190°C) and grease a standard 12-cup muffin tin well.
- In a large bowl, stir together the wet ingredients: milk, grated carrot (if using), cheeses, butter, eggs, and any mix-ins like pepperoni.
- In a separate bowl, whisk the dry ingredients: flours, baking powder, baking soda, and pizza seasoning.
- Pour the wet ingredients into the dry ingredients and stir until just combined. Do not overmix.
- Divide the batter evenly among the prepared muffin cups, filling each about 3/4 full.
- Bake for 18-25 minutes, or until a toothpick inserted into the center comes out clean and the tops are golden brown.
- Let cool in the pan for a few minutes before transferring to a wire rack. Serve warm with marinara sauce for dipping.
Expert Tips & Variations
- English Muffin Pizzas: For a super-quick version, split whole wheat English muffins in half, top each with 1 tbsp of tomato sauce, 1 tbsp of shredded cheese, and favorite toppings. Bake at 400°F (200°C) for 10 minutes.
- Storage: Store cooled muffins in an airtight container in the refrigerator for up to 5 days. They can also be frozen for up to 3 months. Reheat briefly in the microwave or oven.
- Mini Muffins: To make mini muffins, reduce the baking time to 12-14 minutes.
- Egg-Free Option: To make these egg-free, omit the eggs, increase the milk to 1 3/4 cups, and increase the baking soda to 1 teaspoon.
16. Homemade Granola Bars
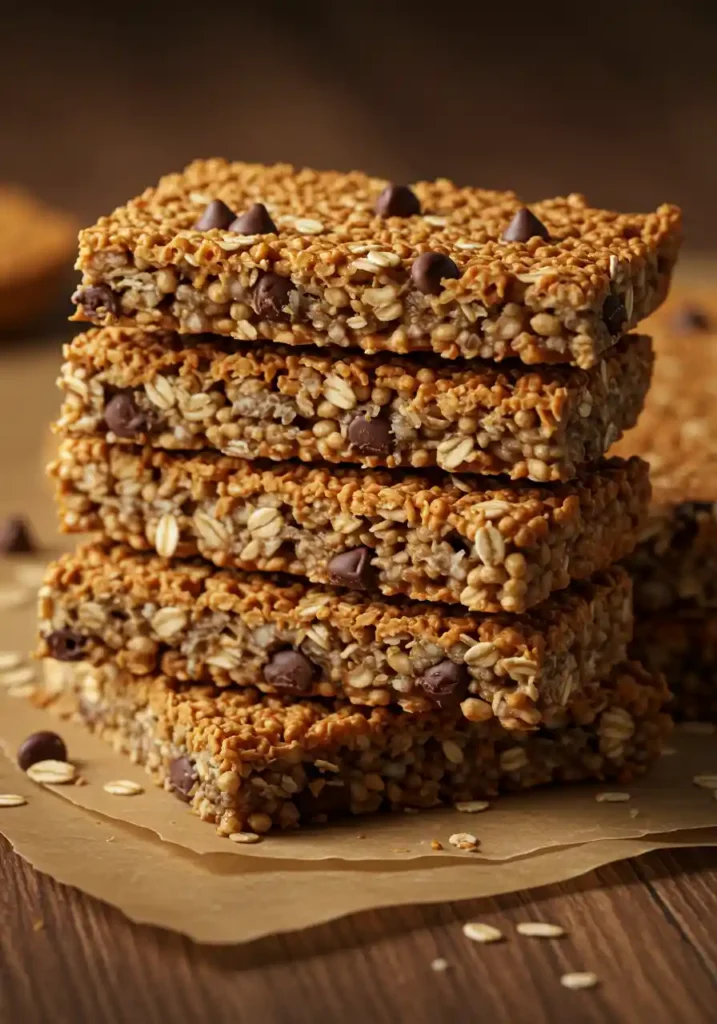
Making granola bars at home allows for complete control over ingredients, avoiding the excess sugar and preservatives found in many store-bought versions. The key to a bar that holds together is the right combination of binders and firm pressing.
Ingredients (No-Bake Version):
- 2 1/2 cups whole rolled oats (use certified gluten-free if needed)
- 1 cup creamy natural peanut butter or other nut/seed butter (must be runny)
- 2/3 cup honey or maple syrup
- 1 tsp vanilla extract
- 1/2 tsp sea salt
- 1/3 cup mini chocolate chips
- 1/4 cup mix-ins like pepitas, sunflower seeds, or chopped dried fruit
Instructions (No-Bake Version):
- Line an 8×8 inch baking pan with parchment paper, leaving an overhang on the sides to use as handles.
- In a large bowl, stir together the peanut butter, honey, vanilla, and salt until smooth and well-combined.
- Add the oats, chocolate chips, and other mix-ins. The mixture will seem dry at first, but keep stirring until everything is fully incorporated.
- Transfer the mixture to the prepared pan. This next step is critical: press the mixture down very firmly and evenly. Place another piece of parchment paper on top and use the bottom of a glass or measuring cup to compact the mixture as tightly as possible. The firmer you press, the better the bars will hold together.
- Chill in the refrigerator for at least 1-2 hours, or in the freezer for 30 minutes, until firm.
- Use the parchment handles to lift the slab out of the pan. Cut into bars or squares with a sharp knife.
Expert Tips & Variations
- The Binder Rule: The success of no-bake bars depends on sticky binders. Use a natural, runny nut or seed butter. Stiff, dry butters will not work well. Maple syrup is not as sticky as honey or brown rice syrup, so if using it, consider rolling the mixture into balls instead of bars if they don’t hold together well.
- Baked Version: For a baked bar, combine 2 cups rolled oats, 1 cup natural peanut butter, 1/2 cup maple syrup, and 2 eggs. Press into a lined 9×9 pan and bake at 350°F (175°C) for 15-17 minutes.
- Storage: Store bars in an airtight container in the refrigerator for up to a week, or in the freezer for up to 3 months, with parchment paper between layers.
- Kid-Friendly Prep: Kids can help measure dry ingredients, stir the mixture, and (most importantly) press it down into the pan.
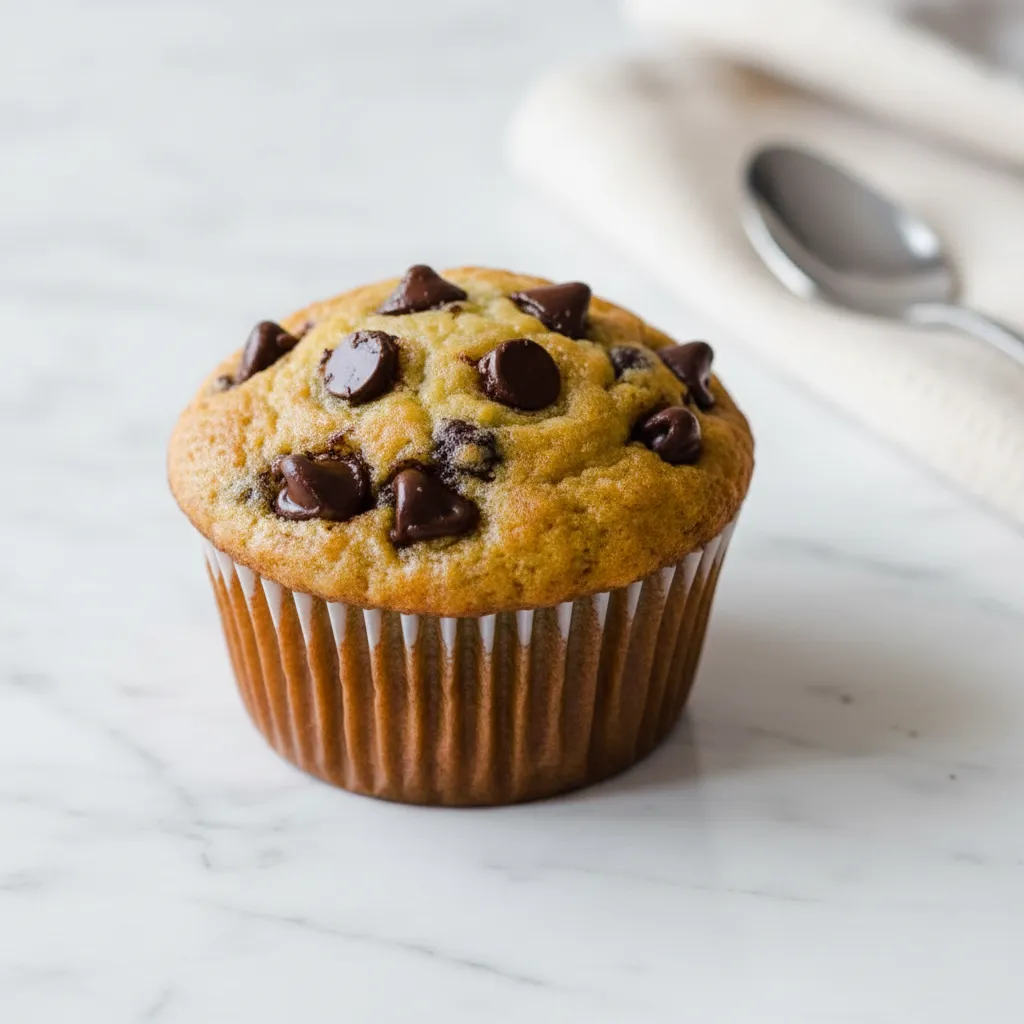
17. Mini Banana Bread Muffins
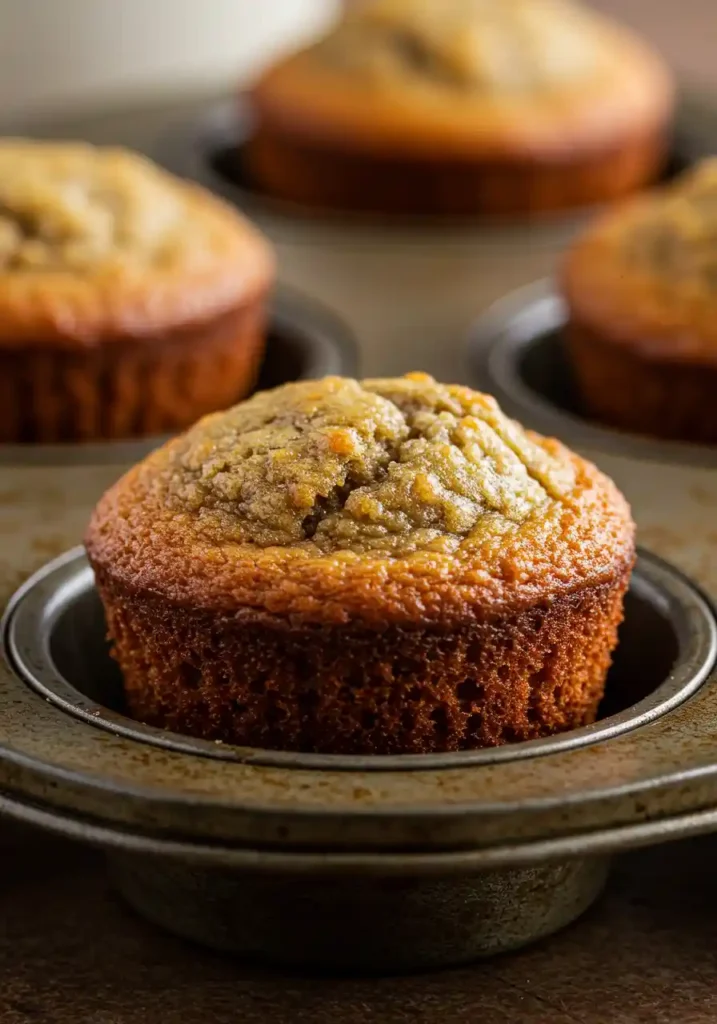
These bite-sized muffins are moist, tender, and naturally sweetened with ripe bananas, making them a healthier alternative to store-bought snacks. They are perfect for using up overripe bananas that are past their prime for eating fresh.
Ingredients:
- 1 1/2 cups all-purpose flour
- 1 tsp baking soda
- 1/2 tsp baking powder
- 1/2 tsp ground cinnamon
- Pinch of salt
- 3-4 very ripe bananas, mashed (about 1 cup)
- 1/2 cup sugar (can use a mix of brown and white)
- 1/3 cup melted butter or vegetable oil
- 1 large egg
- 1 tsp vanilla extract
- Optional: 1/2 cup mini chocolate chips or chopped walnuts
Instructions:
- Preheat the oven to 350°F (177°C). Grease or line a 24-cup mini muffin tin.
- In a medium bowl, whisk together the flour, baking soda, baking powder, cinnamon, and salt.
- In a large bowl, mash the ripe bananas well. Whisk in the sugar, melted butter, egg, and vanilla extract until well combined.
- Add the dry ingredients to the wet ingredients and stir with a spatula until just blended. Do not overmix.
- Gently fold in the mini chocolate chips or nuts, if using.
- Use a small cookie scoop (about 1 1/2 tablespoons) to fill each mini muffin cup about 3/4 full.
- Bake for 12-15 minutes, or until a toothpick inserted into the center comes out clean and the tops are golden brown.
- Let the muffins cool in the pan for 5 minutes before transferring them to a wire rack to cool completely.
Expert Tips & Variations
- The Riper, The Better: The key to moist and flavorful banana muffins is using bananas that are heavily speckled or even black. The riper they are, the more natural sugar and moisture they contribute to the batter.
- Storage: Store cooled muffins in an airtight container at room temperature for up to 3 days, or freeze them in a freezer-safe bag for up to 3 months. They thaw quickly at room temperature, making them a perfect grab-and-go snack.
- Kid-Friendly Prep: This is a great recipe for kids to help with. They can mash the bananas, whisk the ingredients, and scoop the batter into the muffin tin.
18. Mini Spinach Quiches

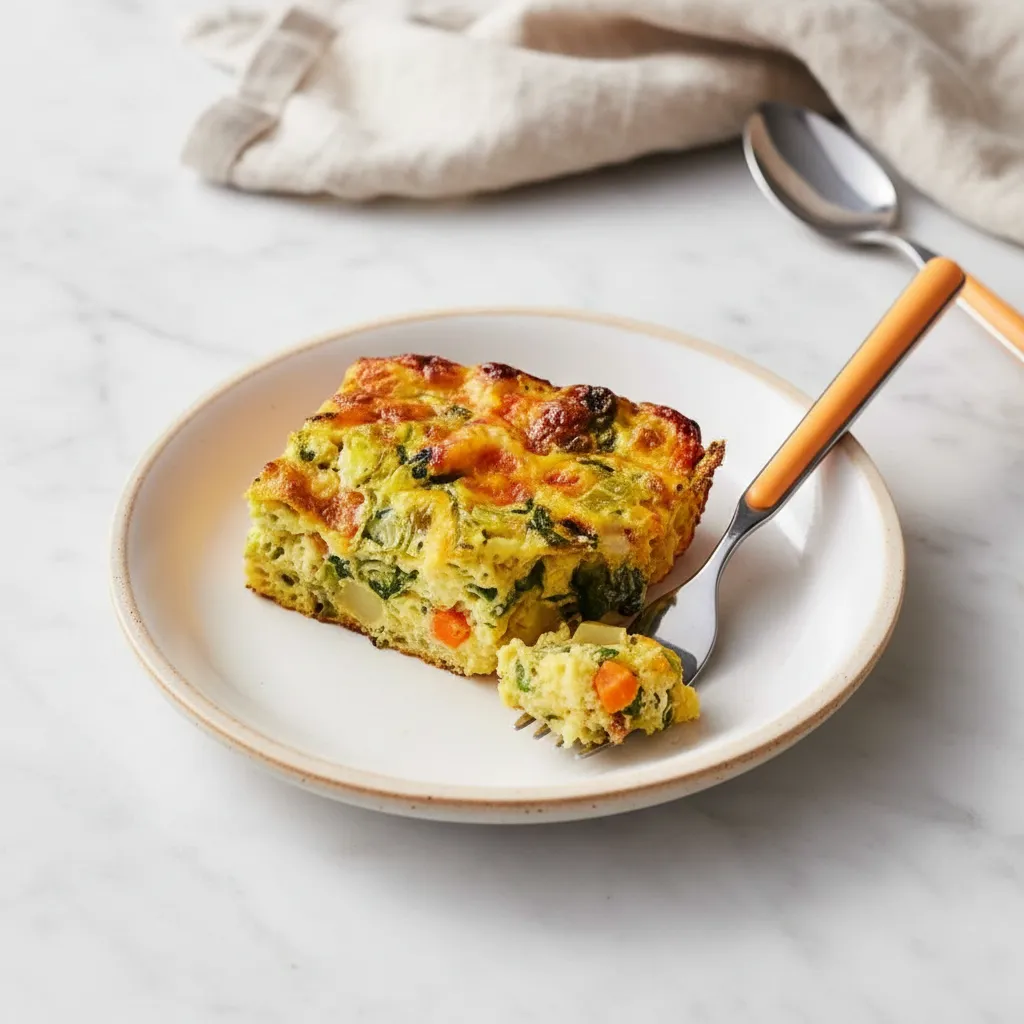
These savory, protein-packed bites are like a mini omelet you can hold in your hand. They are incredibly versatile and can be made with or without a crust. They freeze beautifully, making them an ideal make-ahead snack for busy weeks.
Ingredients (Crustless Version):
- 6 large eggs
- 3/4 cup milk or heavy cream
- 1 (10 oz) package frozen chopped spinach, thawed and squeezed very dry
- 3/4 cup shredded cheese (Cheddar, Swiss, or a blend)
- 1/4 cup diced onion or shallot
- Salt and pepper to taste
- Optional: Pinch of nutmeg
Instructions:
- Preheat the oven to 375°F (190°C). Generously grease a 12-cup standard muffin tin or a 24-cup mini muffin tin. Using silicone or foil liners can also help prevent sticking.
- The most important step for the spinach is to remove as much water as possible. After thawing, place it in a clean kitchen towel or cheesecloth and wring it out until it is very dry.
- In a large bowl, whisk the eggs and milk together until smooth.
- Stir in the squeezed spinach, shredded cheese, diced onion, salt, pepper, and nutmeg.
- Pour the egg mixture evenly into the prepared muffin cups, filling each about 3/4 full.
- Bake for 20-25 minutes for standard size (15-18 for mini), or until the centers are set and a knife inserted comes out clean. The quiches will puff up during baking and then settle as they cool.
- Let cool in the pan for 5 minutes before removing. Serve warm or at room temperature.
Expert Tips & Variations
- Crust Version: For a version with crust, use refrigerated pie crust. Unroll the dough and use a 2.5-inch round cutter to cut circles. Press the circles into the bottom and up the sides of a mini muffin tin before adding the filling.
- Freezing: Let the quiches cool completely, then place them on a baking sheet in the freezer until solid. Transfer to a freezer-safe bag and store for up to 2 months. Reheat from frozen in the microwave or in the oven at 350°F (175°C) until warmed through.
- Customization: These are endlessly customizable. Add other finely chopped vegetables like bell peppers or mushrooms, or cooked, crumbled bacon or sausage.
19. Low-Sugar Oatmeal Raisin Cookies
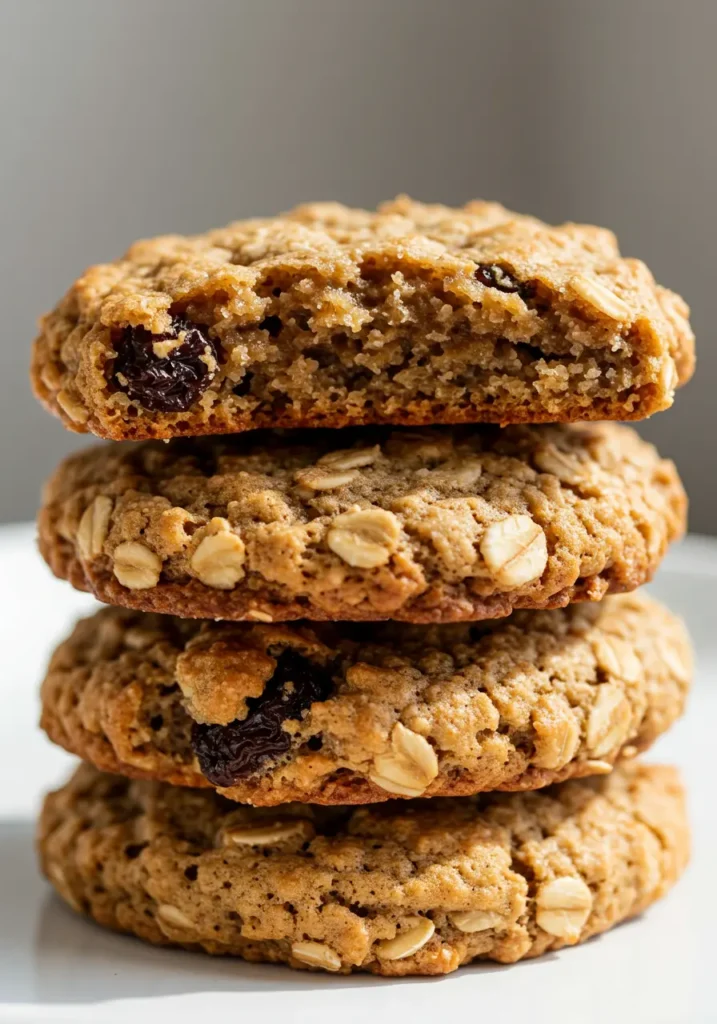
These soft-baked oatmeal cookies offer a healthier twist on a classic, using natural sweeteners like applesauce or banana to reduce the amount of refined sugar. They are packed with fiber from whole grains and are a satisfyingly chewy treat.
Ingredients:
- 1 cup rolled oats
- 1 cup whole wheat flour
- 1/3 cup packed brown sugar
- 1/2 cup unsweetened applesauce
- 1/4 cup unsalted butter, melted
- 1 large egg, lightly beaten
- 1/2 cup raisins (or other dried fruit like cherries or cranberries)
- 1 tsp vanilla extract
- 1 tsp cinnamon
- 1/2 tsp baking soda
- 1/8 tsp salt
Instructions:
- Preheat the oven to 375°F (190°C). Line a baking sheet with parchment paper.
- In a large bowl, mix the dry ingredients: oats, flour, brown sugar, baking soda, cinnamon, salt, and raisins.
- In a separate small bowl, whisk together the wet ingredients: melted butter, applesauce, egg, and vanilla extract.
- Pour the wet ingredients into the dry ingredients and stir with a spoon until thoroughly combined. The dough will be sticky.
- Drop rounded tablespoons of dough onto the prepared baking sheet, about 2 inches apart. Gently press down on each cookie to flatten it slightly.
- Bake for 10-12 minutes, or until the edges and bottoms are lightly browned.
- Let the cookies cool on the baking sheet for a few minutes before transferring to a wire rack to cool completely.
Expert Tips & Variations
- No-Added-Sugar Version: For a cookie with no refined sugar, use 3 mashed ripe bananas as the base. Blend 1 cup of oats into a flour, then mix with another cup of whole oats, the mashed bananas, and 1/2 cup of raisins. Bake at 350°F (180°C) for 15-20 minutes.
- Storage: Store cookies in an airtight container at room temperature for up to 3 days, or freeze for up to 3 months.
- Allergy Swaps: To make these dairy-free, use melted coconut oil instead of butter. For gluten-free, use certified gluten-free oats and a cup-for-cup gluten-free flour blend.
20. Mini Corn Dog Muffins
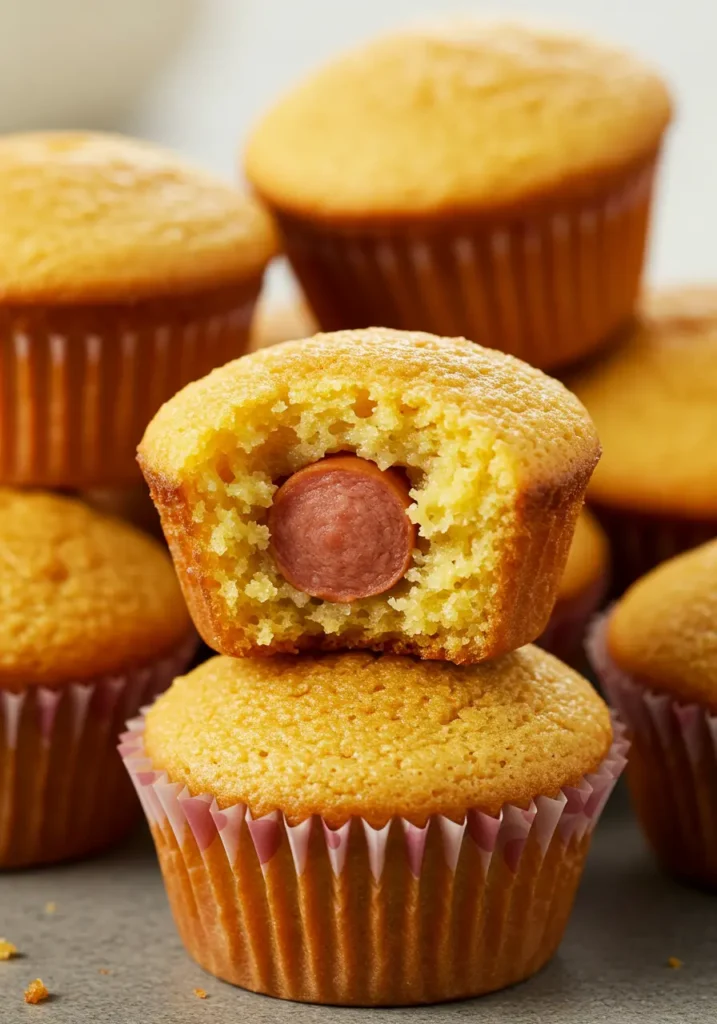
A beloved fair food transformed into a simple, baked snack. Using either a boxed mix or a from-scratch batter, these muffins are a guaranteed hit with kids and are much healthier than their deep-fried counterparts.
Ingredients (Using JIFFY Mix):
- 1 package (8.5 oz) JIFFY Corn Muffin Mix
- 1 egg
- 1/3 cup milk
- 4 hot dogs (all-beef or turkey), each cut into 6 pieces
Instructions (Using JIFFY Mix):
- Preheat the oven to 400°F (200°C). Grease a 24-cup mini muffin tin.
- In a medium bowl, combine the corn muffin mix, egg, and milk. Stir until just combined; do not overmix.
- Spoon the batter into the prepared muffin cups, filling each about 2/3 full.
- Press one piece of hot dog into the center of each muffin cup.
- Bake for 10-12 minutes, or until the cornbread is golden brown and cooked through.
- Let cool for a few minutes before serving with ketchup and mustard for dipping.
Expert Tips & Variations
- From-Scratch Batter: To make from scratch, whisk together 1 1/4 cups all-purpose flour, 3/4 cup yellow cornmeal, 2 tsp baking powder, and 1/2 tsp salt. In a separate bowl, whisk 1 cup milk, 1/4 cup honey, 1/4 cup vegetable oil, and 1 egg. Combine wet and dry ingredients and proceed with the recipe.
- Add-Ins: For extra flavor, add 1/2 cup of shredded cheddar cheese or a tablespoon of creamed corn to the batter.
- Diced Dogs: Instead of a whole piece, some find that dicing the hot dogs and mixing them into the batter provides a more even distribution of flavor and a better texture for younger children.
- Storage: Store cooled muffins in an airtight container in the refrigerator for a few days or freeze for longer storage. Reheat in the microwave or oven.
21. Apple Cinnamon Oatmeal Bites
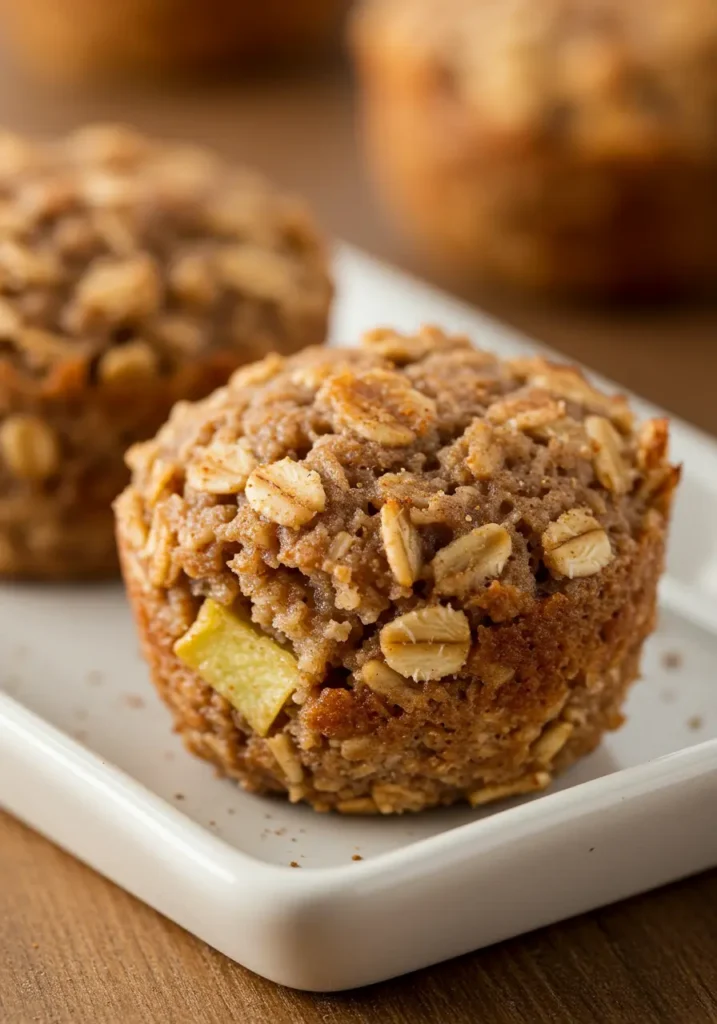
These baked oatmeal bites are like a warm bowl of oatmeal in a convenient, portable form. They are naturally sweetened with apple and maple syrup and packed with fiber from oats and flax seeds, making them a filling and nutritious snack.
Ingredients (Baked Version):
- 1 1/2 cups old-fashioned rolled oats
- 1 small apple, peeled and finely chopped
- 1/4 cup unsweetened applesauce
- 2/3 cup milk (dairy or non-dairy)
- 3 tbsp maple syrup
- 1 egg
- 1/2 tsp ground cinnamon
- 1/2 tsp baking powder
Instructions (Baked Version):
- Preheat the oven to 350°F (180°C). Grease a 24-cup mini muffin tin.
- In a medium bowl, mix the dry ingredients: oats, cinnamon, and baking powder.
- In a separate bowl, whisk the wet ingredients: milk, applesauce, maple syrup, and egg.
- Pour the wet ingredients into the dry and stir to combine. Let the mixture sit for 5 minutes to allow the oats to absorb some of the liquid.
- Fold in the finely chopped apple.
- Spoon the batter into the mini muffin cups.
- Bake for 20-25 minutes, or until the bites are firm and cooked through. Let cool completely before removing from the pan.
Expert Tips & Variations
- No-Bake Energy Ball Version: For a no-bake option, combine 1 1/2 cups rolled oats, 1 cup pitted dates (softened in hot water), 1 cup grated apple, 1/2 tsp cinnamon, and a pinch of salt in a food processor. Blend until a sticky dough forms, then roll into balls.
- Storage: Store baked bites in an airtight container in the fridge for up to a week, or freeze for up to 3 months. No-bake balls should be stored in the fridge.
- Allergy-Friendly: To make the baked version egg-free, use a flax egg (1 tbsp ground flaxseed mixed with 3 tbsp water). Use a certified gluten-free oat for a gluten-free snack.
22. Homemade Cheddar Crackers

These savory, cheesy crackers are a wholesome and delicious alternative to store-bought versions. Made with real cheese and whole wheat flour, they have a rich flavor and satisfying crunch that kids love.
Ingredients:
- 1 cup whole wheat flour (or all-purpose)
- 8 oz sharp cheddar cheese, finely grated
- 4 tbsp cold butter, cut into small pieces
- 1/2 tsp salt
- 1/4 tsp onion powder
- 1/4 tsp garlic powder
- 2-3 tbsp ice water
Instructions:
- In a food processor, combine the flour, grated cheese, cold butter, salt, onion powder, and garlic powder. Pulse until the mixture resembles coarse crumbs or wet sand.
- With the processor running, slowly add the ice water, one tablespoon at a time, until the dough just comes together into a rough ball.
- Remove the dough, form it into a disk, wrap it in plastic, and refrigerate for at least 1 hour to chill.
- Preheat the oven to 350°F (175°C). Line two baking sheets with parchment paper.
- On a lightly floured surface, roll the chilled dough out very thin, about 1/8-inch thick.
- Use a pizza cutter or knife to cut the dough into 1-inch squares. Use a toothpick or skewer to poke a small hole in the center of each cracker.
- Carefully transfer the squares to the prepared baking sheets.
- Bake for 15-17 minutes, or until the crackers are puffed and the edges are lightly golden brown.
- Let cool completely on the baking sheets; they will crisp up as they cool.
Expert Tips & Variations
- The Food Processor is Key: Using a food processor is highly recommended to properly incorporate the cold butter and cheese, which creates the cracker’s flaky texture.
- Storage: Store cooled crackers in an airtight container at room temperature for up to a week.
- Shapes and Sizes: Use small cookie cutters to make fun shapes for kids.
- Kid-Friendly Prep: Kids can help with rolling the dough (with assistance) and poking the holes in the crackers.


Hamilton Beach Food Processor & Vegetable Chopper for Slicing, Shredding, Mincing, and Puree, 10 Cups + Easy Clean Bowl Scraper, Black and Stainless Steel (70730)
As an Amazon Associate, I earn from qualifying purchases. Pricing and availability may change.
23. Ham & Cheese Pinwheels (3 Ways)
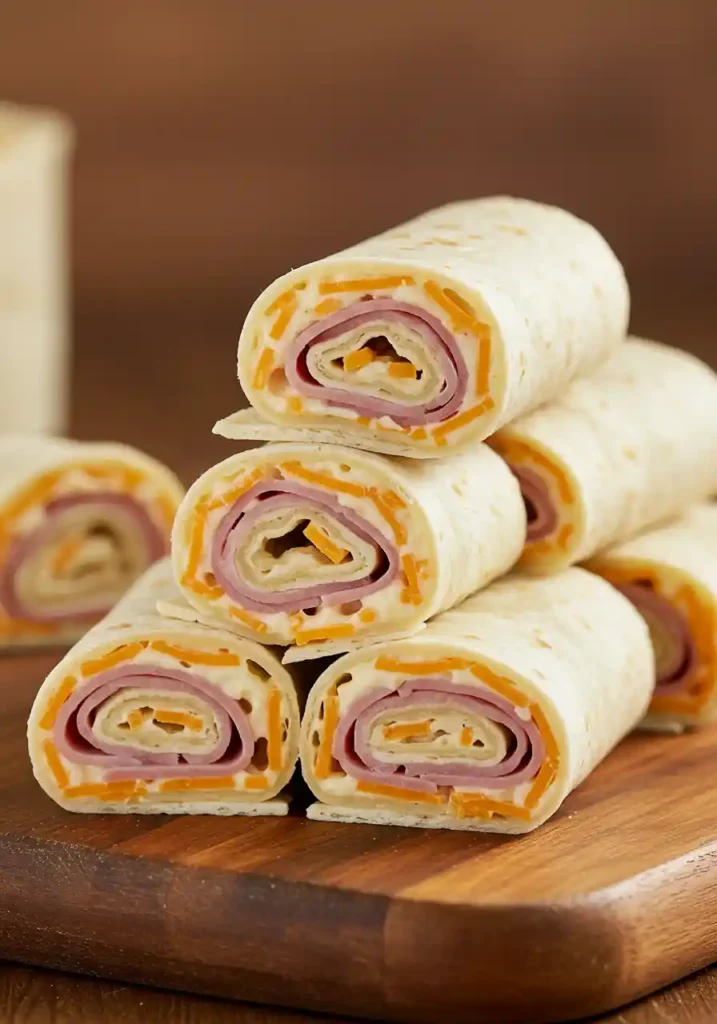
Pinwheels are a fun, visually appealing alternative to a standard sandwich. This versatile concept can be adapted into three distinct methods: a classic no-cook wrap, a flaky baked puff pastry version, and a warm, melty crescent roll snack.
Method 1: The Classic No-Cook Tortilla Pinwheel This is the quickest and easiest version, perfect for packing in a lunchbox.
Ingredients:
- 2 large flour tortillas (8-10 inch)
- 4 oz cream cheese, softened
- Optional spread flavorings: 1 tbsp mustard, ranch seasoning, or a touch of honey
- 6-8 slices of deli ham
- 4 slices of cheese (Muenster, Cheddar, or Provolone)
- Optional additions: A handful of baby spinach or shredded lettuce
Instructions:
- In a small bowl, mix the softened cream cheese with any desired flavorings.
- Spread the cream cheese mixture evenly over each tortilla, reaching the edges.
- Layer the ham, cheese, and spinach over the cream cheese.
- Roll the tortilla up tightly into a log. For the cleanest cuts, wrap the log in plastic wrap and chill for at least 30 minutes.
- Using a serrated knife, slice the log into 1-inch thick pinwheels.
Method 2: The Baked Puff Pastry Pinwheel This version elevates the pinwheel into a warm, flaky, and savory treat, ideal for an after-school snack or party appetizer.
Ingredients:
- 1 sheet of frozen puff pastry, thawed
- 2 tbsp Dijon mustard
- 6 slices of deli ham
- 1 cup shredded Gruyère, Swiss, or sharp cheddar cheese
Instructions:
- Preheat oven to 375°F (190°C).
- Gently unfold the puff pastry sheet on a lightly floured surface and roll it into a rectangle.
- Spread the Dijon mustard over the dough, leaving a small border on one long edge.
- Layer the ham and then the shredded cheese over the mustard.
- Starting from the long edge, roll the pastry into a tight log. Wrap in plastic and chill for 20 minutes to firm up.
- Slice the chilled log into 1/2-inch thick rounds and place them on a parchment-lined baking sheet.
- Bake for 15-18 minutes, or until the pastry is golden brown and the cheese is bubbly.
Method 3: The Warm Crescent Roll Pinwheel Using refrigerated crescent roll dough makes this a quick and comforting snack that’s warm, cheesy, and satisfying.
Ingredients:
- 1 can (8 oz) refrigerated crescent roll dough
- 2 tbsp Dijon mustard (optional)
- 8-10 slices of deli ham
- 8-10 slices of Provolone or Swiss cheese
- 2 tbsp melted butter
- Optional topping: Everything bagel seasoning
Instructions:
- Preheat oven to 350°F (175°C).
- Unroll the crescent dough and press the perforations together to form one large rectangle.
- Spread the mustard over the dough, if using. Layer with ham and then cheese.
- Starting from one long edge, roll the dough into a tight log and pinch the seam to seal.
- Slice the log into 10-12 even pieces and place them in a greased baking dish.
- Brush the tops with melted butter and sprinkle with everything bagel seasoning, if desired.
- Bake for 15-20 minutes, or until golden brown and the cheese is melted.
Expert Tips & Variations
- Pinwheel Integrity: For all versions, rolling the log tightly is key to ensuring the pinwheels don’t fall apart. Chilling the log before slicing is highly recommended for the no-cook and puff pastry versions, as it helps the filling firm up and allows for cleaner cuts.
- Storage: No-cook pinwheels can be stored in the fridge for up to 2 days. Baked versions are best served warm but can be refrigerated and reheated.
- Meat & Cheese Swaps: Feel free to swap ham for turkey or roast beef, and try different cheeses like Swiss, Gouda, or Monterey Jack.
24. Crispy Roasted Chickpeas
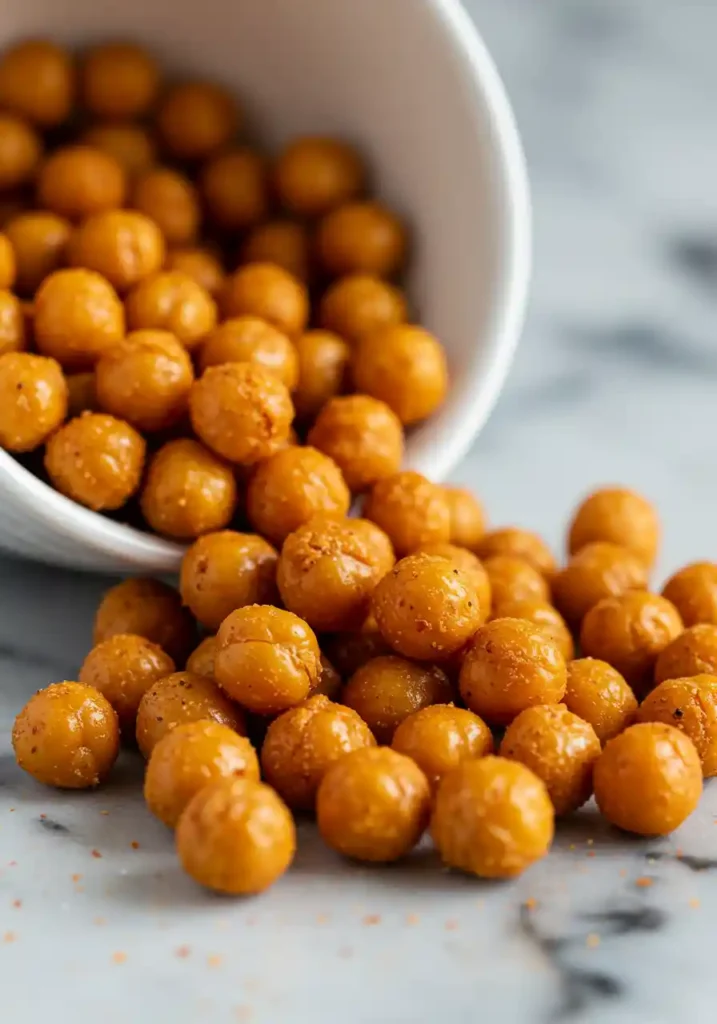
A crunchy, savory, and protein-packed snack that is a fantastic alternative to chips. The secret to achieving an irresistible, long-lasting crunch is to get the chickpeas as dry as possible before they hit the oven. NIH MedlinePlus.
Ingredients:
- 1 can (15 oz) chickpeas (garbanzo beans)
- 1-2 tbsp olive oil
- 1/2 tsp salt
- Seasoning Ideas:
- Smoky: 1 tsp smoked paprika, 1/2 tsp garlic powder
- Sweet & Spicy: 1 tbsp brown sugar, 1/2 tsp cinnamon, pinch of cayenne
- Ranch: 1 tbsp nutritional yeast, 1/2 tsp garlic powder, 1/2 tsp dried dill
- Curry: 1 tsp curry powder, 1/2 tsp cumin
Instructions:
- Preheat the oven to 400°F-425°F (200°C-220°C). A higher temperature helps create a crispier exterior.
- Drain and rinse the chickpeas thoroughly.
- This step is crucial for crispiness: Spread the chickpeas on a clean kitchen towel or paper towels and pat them completely dry. Gently rub them to remove any loose skins; discard the skins as they can burn.
- Spread the dried chickpeas on a baking sheet. For the best results, bake them directly on the pan without parchment paper, as this direct contact aids in crisping.
- Drizzle with olive oil and sprinkle with salt. Toss to coat evenly.
- Roast for 20-30 minutes, stirring or shaking the pan every 10 minutes to ensure even cooking. They are done when they are golden brown and feel dry and crispy to the touch. They will continue to crisp up as they cool.
- Remove from the oven and immediately toss with your desired spice blend while they are still warm. The spices will adhere better this way.
Expert Tips & Variations
- The Science of the Crunch: The primary barrier to crispy chickpeas is moisture. Oil traps moisture, so some methods suggest roasting the chickpeas for 10-15 minutes before adding any oil, which helps dehydrate them first. Another technique is to leave the roasted chickpeas in the oven after turning it off, allowing them to slowly cool and dry out further as the oven cools.
- Storage: Roasted chickpeas are best eaten the same day, as they lose their crispiness over time. To store, keep them in a loosely covered container or a paper bag at room temperature for up to two days. Do not store them in a sealed airtight container, as this will trap any residual moisture and make them chewy.
- Sweet Version: For a sweet version, roast the chickpeas with oil and salt as directed. In the last 5 minutes of roasting, pull them out, toss with brown sugar and spices like cinnamon, and return to the oven. This prevents the sugar from burning. USDA FoodSafety.gov.
25. Perfect Hard-Boiled Eggs
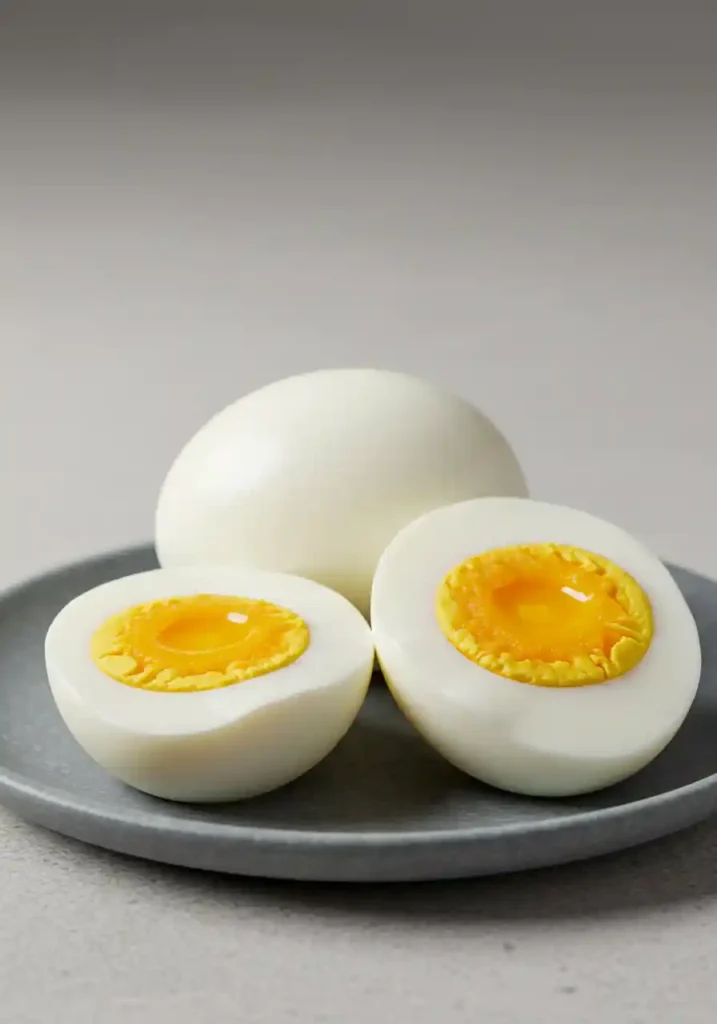
Hard-boiled eggs are a powerhouse of protein and nutrients, making them an ideal school snack. Mastering the cooking and peeling process is simple with a few key techniques that ensure a tender white, a perfectly cooked yolk, and a shell that slips off easily.
Ingredients:
- 6 large eggs (using eggs that are 7-10 days old is ideal for easier peeling)
Instructions:
- Place the eggs in a single layer in a saucepan. Add cold water to cover the eggs by at least 1 inch.
- Place the pan over high heat and bring the water to a full, rolling boil.
- As soon as the water reaches a boil, turn off the heat, cover the pan with a lid, and remove it from the burner.
- Let the eggs stand in the hot water. The timing determines the doneness of the yolk:
- 10 minutes: Firm but creamy yolk.
- 12 minutes: Fully cooked, pale yellow yolk.
- 15 minutes: Very firm, chalky yolk (best for deviled eggs).
- While the eggs are cooking, prepare an ice bath: fill a large bowl with ice and cold water.
- When the time is up, use a slotted spoon to immediately transfer the hot eggs to the ice bath. Let them cool completely in the ice water for at least 10-15 minutes.
- To peel, gently tap the cooled egg on a hard surface to crack the shell all over. Roll it between your palms to loosen the shell. Start peeling from the wider end, where the air pocket is located. Peeling under cool running water can help wash away small shell fragments.
Expert Tips & Variations
- The Peeling Secret: The combination of using slightly older eggs and shocking them in an ice bath makes them significantly easier to peel. As an egg ages, its pH changes and the air pocket at the large end expands, helping the membrane separate from the shell. The ice bath causes the egg white to contract, further separating it from the shell membrane.
- Storage: Unpeeled hard-boiled eggs can be stored in the refrigerator for up to one week. It is best to peel them just before eating for maximum freshness.
- No Green Ring: The gentle cooking method (removing the pan from the heat) and immediate cooling prevent the formation of a harmless but unappealing green-gray ring around the yolk, which is caused by overcooking.
26. Turkey & Cheese Roll-ups
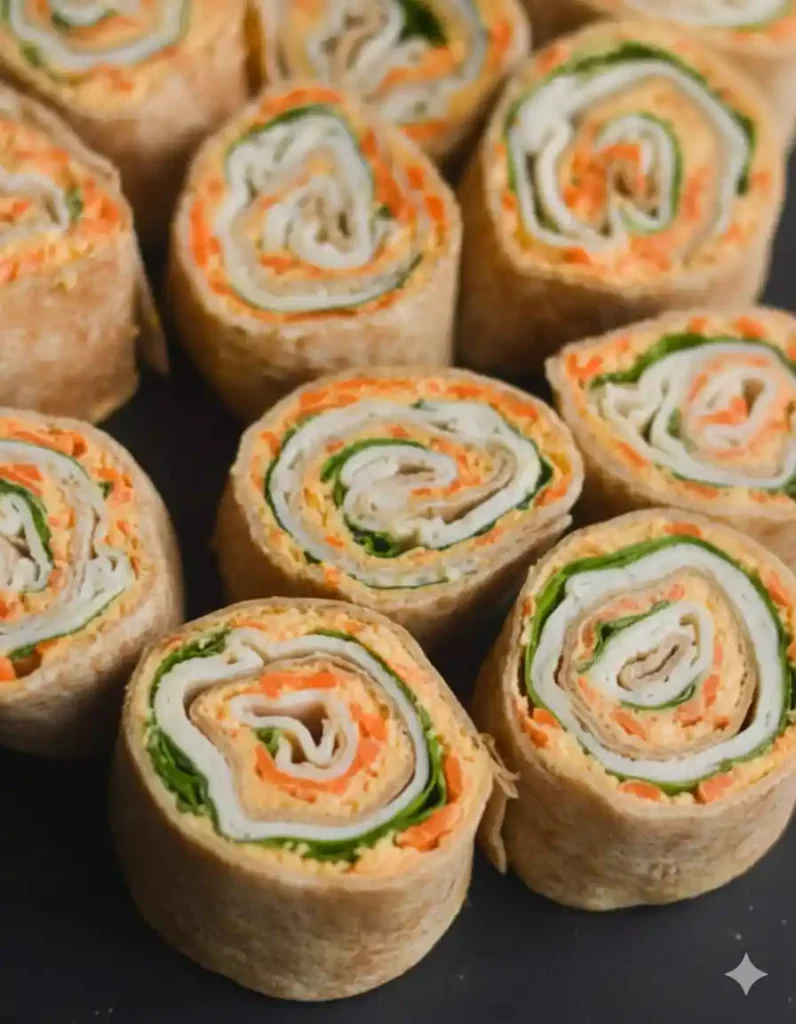
A simple, protein-packed snack that can be made in minutes. This is a great alternative to a full sandwich and can be customized with different spreads and veggies.
Ingredients:
- 1 whole wheat tortilla (fajita size)
- 1-2 tbsp spread of choice (cream cheese, hummus, or mayonnaise)
- 2-3 slices of deli turkey
- 1-2 slices of cheese (Cheddar, Provolone, or Gouda)
- Optional: Shredded lettuce, thinly sliced bell pepper, or a pickle spear
Instructions:
- Lay the tortilla on a clean surface. If the tortilla is cold from the fridge, warm it in the microwave for 10-15 seconds to make it more pliable and less likely to crack when rolled.
- Spread your chosen condiment evenly over the tortilla, leaving a small border at the edge.
- Layer the cheese, turkey, and any vegetables down one side of the tortilla.
- Starting from the side with the fillings, roll the tortilla up as tightly as you can. The spread will help seal the edge.
- Slice in half or into 1-inch spirals to serve as pinwheels.
Expert Tips & Variations
- Gluten-Free Option: For a no-carb, gluten-free version, lay out the turkey slices, top with a piece of cheese (like a halved string cheese stick) and a pickle, and roll them up without the tortilla.
- Make Ahead: Whole, unsliced wraps can be made ahead, wrapped tightly in plastic wrap, and stored in the refrigerator for up to 24 hours. Slice just before packing to keep them fresh.
- Freezing: These can be frozen. Wrap the whole, unsliced tortilla tightly in plastic wrap and place in a freezer bag. Thaw overnight in the refrigerator.
27. Steamed Edamame Pods
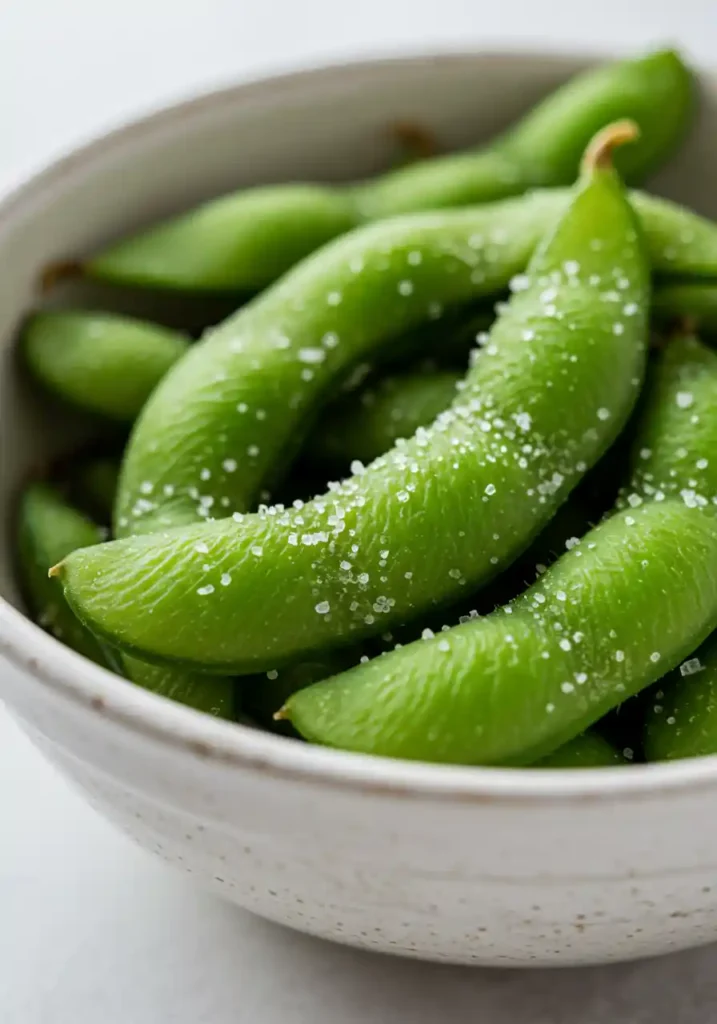
Edamame (young soybeans) served in the pod are a fun, interactive, and highly nutritious snack. They are an excellent source of plant-based protein and fiber. Keeping a bag of frozen edamame on hand makes for a quick and easy snack anytime.
Ingredients:
- 1 bag (12-16 oz) frozen edamame in pods
- Coarse sea salt for sprinkling
Instructions (Boiling Method):
- Bring a large pot of water to a boil. Add about 1 tablespoon of salt to the water.
- Add the frozen edamame to the boiling water.
- Cook for 4-5 minutes, until the beans are tender. You don’t need to wait for the water to return to a boil before starting the timer.
- Drain the edamame thoroughly. Do not rinse.
- Toss the hot edamame in a bowl with a generous sprinkle of coarse sea salt and serve warm or at room temperature.
Instructions (Steaming Method):
- Bring about an inch of water to a boil in a pot. Place the edamame in a steamer basket over the water.
- Cover the pot and steam for 5-10 minutes, until the beans are tender.
- Drain and season with salt as directed above.
Expert Tips & Variations
- How to Eat: The fun of this snack for kids is popping the beans out of the pod directly into their mouths. The pod itself is tough and not meant to be eaten.
- Flavor Boost: After draining, toss the hot pods with a drizzle of sesame oil, a splash of soy sauce, or a sprinkle of everything bagel seasoning for extra flavor.
- Microwave Method: For an even faster method, place the frozen edamame in a microwave-safe bowl, cover with water, and microwave on high for 4-6 minutes until hot. Drain and season.
- Storage: Cooked edamame can be stored in an airtight container in the refrigerator for up to 3 days.
28. Zucchini Pizza Bites
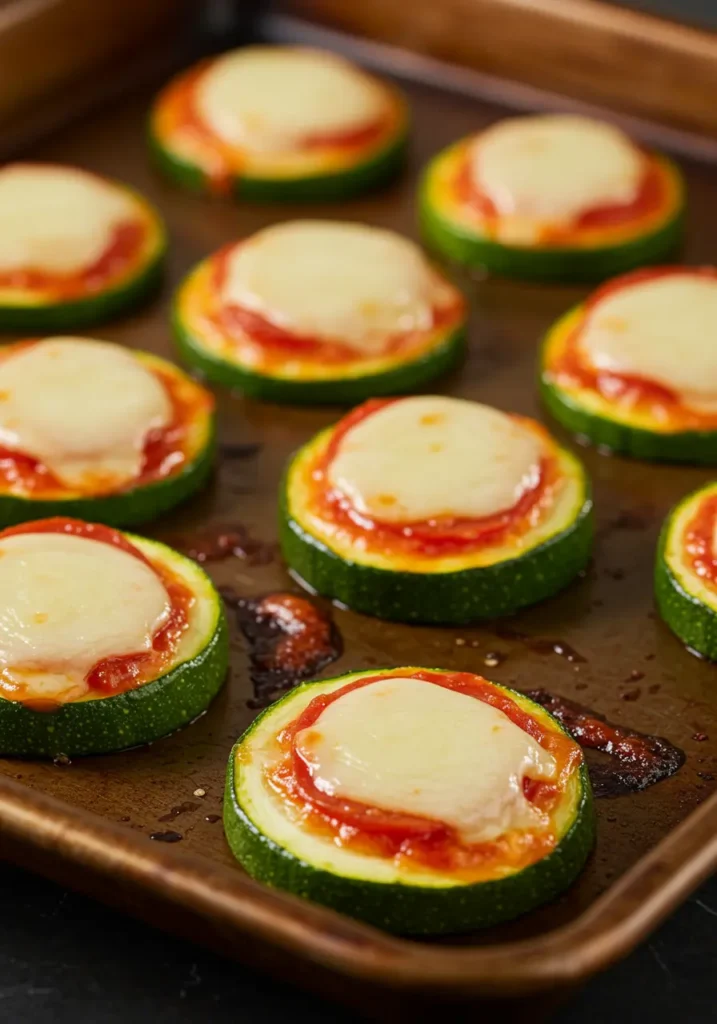
These mini pizzas use zucchini rounds as a low-carb, veggie-packed crust. They are quick to make, endlessly customizable, and a fantastic way to get kids excited about eating vegetables.
Ingredients:
- 1-2 medium zucchini
- 1 tbsp olive oil
- Salt and pepper to taste
- 1/3 cup marinara or pizza sauce
- 3/4 cup shredded mozzarella cheese
- Toppings: Mini pepperoni, chopped olives, diced bell peppers
Instructions:
- Preheat the oven to 400°F (200°C) or set your air fryer to 375°F (190°C).
- Slice the zucchini into 1/4-inch thick rounds.
- Place the zucchini slices on a parchment-lined baking sheet. Brush both sides with olive oil and season with salt and pepper.
- Pre-bake (or broil) the zucchini slices for 6-8 minutes, flipping once. This step is important as it draws out some of the zucchini’s natural moisture, preventing the final pizza bites from being watery.
- Remove the baking sheet from the oven. Top each zucchini round with a small amount of pizza sauce, a sprinkle of mozzarella cheese, and your desired toppings.
- Return to the oven and bake for another 4-5 minutes (or air fry for 6 minutes) until the cheese is melted and bubbly.
- Let cool slightly before serving.
Expert Tips & Variations
- Don’t Overbake: Zucchini can become mushy if overcooked. The goal is for it to be tender-crisp. As soon as the cheese is melted, the bites are likely ready.
- Topping Ideas: Get creative with toppings just like a regular pizza. Cooked sausage, mushrooms, or a sprinkle of Parmesan cheese are all great additions.
- Storage: Leftover zucchini pizza bites can be stored in the refrigerator and are delicious cold or reheated in an oven or air fryer to re-crisp.
29. Pesto Pasta Salad Cups
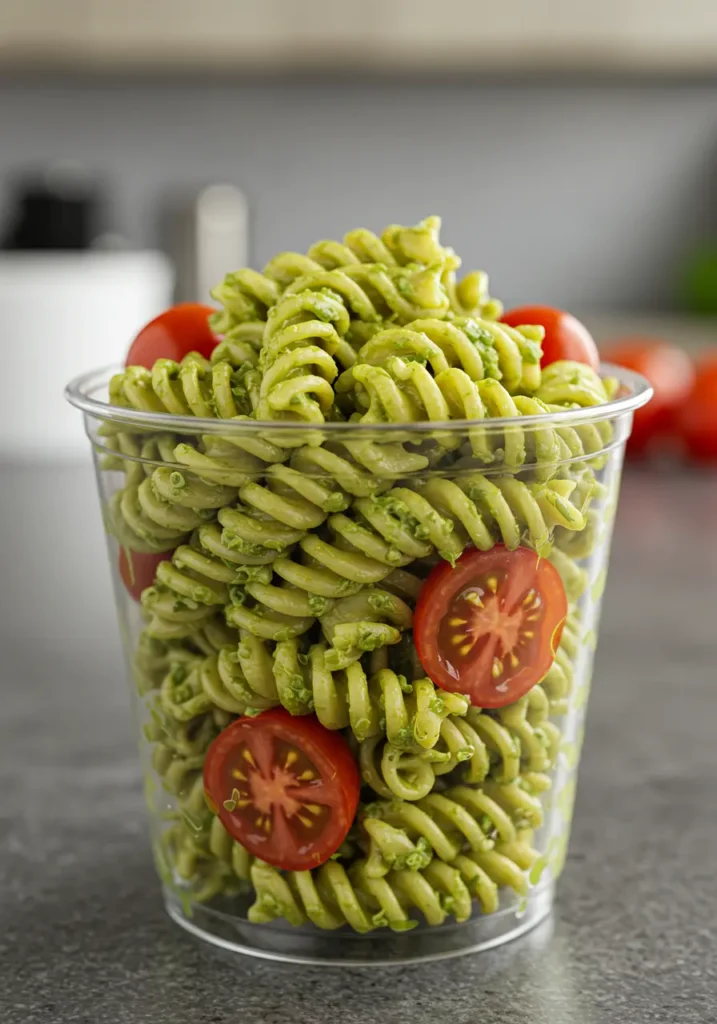
A make-ahead pasta salad is a perfect mini-meal for a lunchbox. Using a corkscrew-shaped pasta helps the pesto sauce cling to every bite. This recipe is easy to portion into small cups for a convenient snack.
Ingredients:
- 8 oz fusilli or rotini pasta
- 1/2 cup basil pesto (store-bought or homemade)
- 1 cup cherry tomatoes, halved
- 1/2 cup mini mozzarella balls (bocconcini), halved
- Optional additions: Diced zucchini, chickpeas, or black olives
- Optional: 2 tbsp mayonnaise or Greek yogurt for a creamier sauce
Instructions:
- Cook the pasta in a large pot of salted boiling water. For pasta salad, it’s best to cook it for about a minute longer than the package directions for al dente, as pasta firms up as it cools.
- Drain the pasta and rinse briefly under cold water to cool it down and stop the cooking process.
- In a large bowl, toss the cooled pasta with the pesto until evenly coated. If the pesto is very thick, you can thin it with a tablespoon of the reserved pasta water or a little olive oil.
- Gently stir in the halved cherry tomatoes, mozzarella balls, and any other desired add-ins.
- Portion into small, airtight containers for school snacks.
Expert Tips & Variations
- Pasta Shape Matters: Shapes with lots of nooks and crannies like fusilli, rotini, or cavatappi are ideal for catching and holding onto the pesto sauce.
- Make Ahead: This salad can be made up to 3 days in advance and stored in the refrigerator. The flavors will meld and become even more delicious.
- Protein Boost: Add shredded chicken, chickpeas, or diced ham to make it a more substantial and filling snack.
- Kid-Friendly Prep: Kids can help by washing the tomatoes and stirring all the ingredients together.
30. Homemade Fruit Leather

Making your own fruit roll-ups is surprisingly simple and allows you to create a naturally sweet snack without any added sugar or artificial ingredients. The key is to use a very low oven temperature to dehydrate the fruit puree rather than cook it.
Ingredients:
- 4 cups fresh or frozen (and thawed) fruit, such as strawberries, peaches, mangoes, or a mix of berries
- 1 tbsp lemon juice (especially for lighter colored fruits like peaches or apples to prevent browning)
- Optional: 1-2 tbsp honey or maple syrup if the fruit is tart
Instructions:
- Preheat your oven to its lowest temperature, typically around 150-170°F (65-75°C).
- Line a large, rimmed baking sheet with a silicone baking mat (Silpat) or parchment paper. A silicone mat often yields the best results for easy peeling.
- Combine the fruit and lemon juice in a blender or food processor. Blend until completely smooth. If using fruits with seeds like raspberries, you can press the puree through a fine-mesh sieve to remove them.
- Pour the fruit puree onto the prepared baking sheet. Use an offset spatula to spread it into a thin, even layer, about 1/8-inch thick. Try to ensure the edges are not thinner than the center to prevent them from burning.
- Place the baking sheet in the oven and bake for 4-8 hours. The time will vary greatly depending on the water content of your fruit and the thickness of the puree. The fruit leather is done when it is no longer sticky or tacky to the touch in the center.
- Remove from the oven and let it cool completely to room temperature.
- Once cool, gently peel the fruit leather off the mat. Place it on a sheet of parchment paper, then use scissors or a pizza cutter to cut it into long strips. Roll up the strips with the parchment paper to prevent them from sticking to each other.
Expert Tips & Variations
- Using Pouches: For an incredibly simple version, you can use 3-4 pre-made fruit puree pouches (like Once Upon a Farm). Simply squeeze them onto the lined baking sheet, spread evenly, and bake as directed.
- Storage: Store the rolled-up fruit leather in an airtight container at room temperature for up to a month.
- Add Veggies: You can sneak in vegetables! Blend in 1/2 cup of boiled carrots or steamed beets with the fruit. The sweet fruit will mask the veggie flavor.
31. Sun-Dried Tomato and Basil Pinwheels
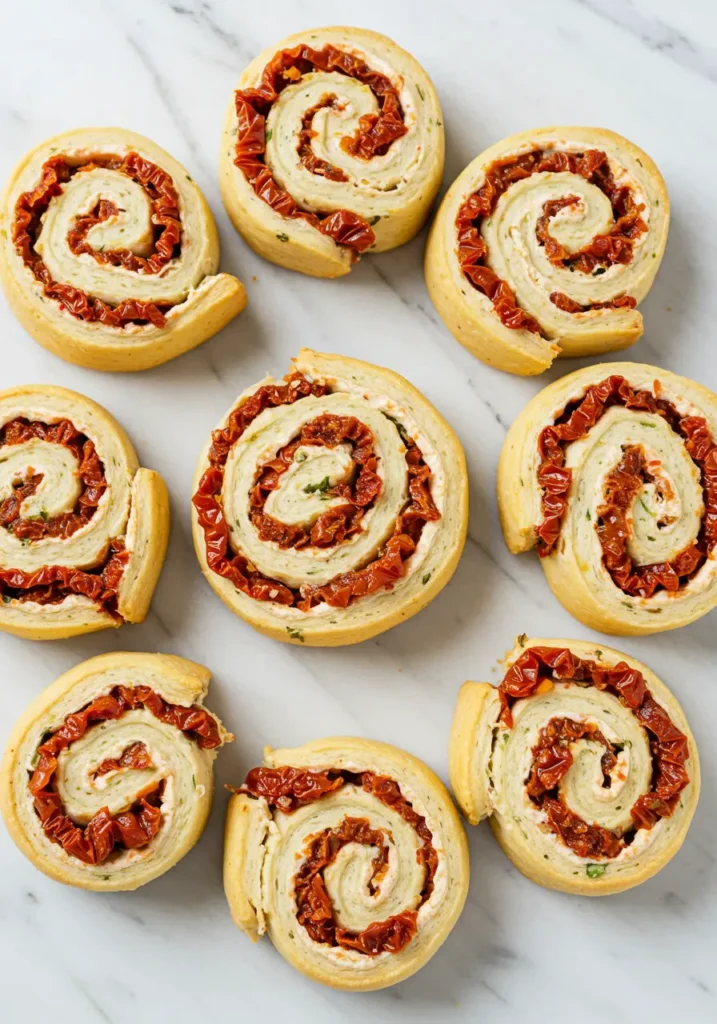
These savory pinwheels are a vibrant and flavorful vegetarian option, packed with the taste of Italy. They can be made with a classic cream cheese base or a healthier, dairy-free white bean spread.
Ingredients:
- 2 large flour tortillas
- 8 oz cream cheese, softened (or 1 can of white beans, rinsed and blended with olive oil and lemon juice for a vegan option)
- 1/2 cup sun-dried tomatoes (dry, not packed in oil), finely chopped
- 1/4 cup fresh basil leaves
- Optional: 1/4 cup thawed frozen spinach (squeezed dry), 2 cloves minced garlic, 1/4 cup Parmesan cheese
Instructions:
- In a medium bowl, combine the softened cream cheese (or white bean spread) with the chopped sun-dried tomatoes and any other optional mix-ins like garlic, spinach, or Parmesan cheese.
- Spread the mixture evenly over the two tortillas, all the way to the edges. Spreading to the edge acts as a “glue” to seal the rolls.
- Arrange the fresh basil leaves in a single layer over the spread, leaving about a 1-inch border on one side.
- Starting from the basil-covered side, roll the tortilla up as tightly as possible, finishing at the bare edge.
- For best results, wrap the logs in plastic wrap and chill for at least 30 minutes to firm up.
- Use a serrated knife to slice the logs into 1/2 to 1-inch pinwheels.
Expert Tips & Variations
- Puff Pastry Version: For a warm, baked version, spread the filling on a sheet of puff pastry, roll it up, slice, and bake at 400°F (200°C) for 20-25 minutes until golden.
- Make Ahead: The unsliced logs can be made a day in advance and stored in the refrigerator. Slice just before serving for the freshest appearance.
- Kid-Friendly Prep: Kids can help chop the sun-dried tomatoes (with a kid-safe knife), spread the filling, and arrange the basil leaves.
32. Frozen Yogurt Bark
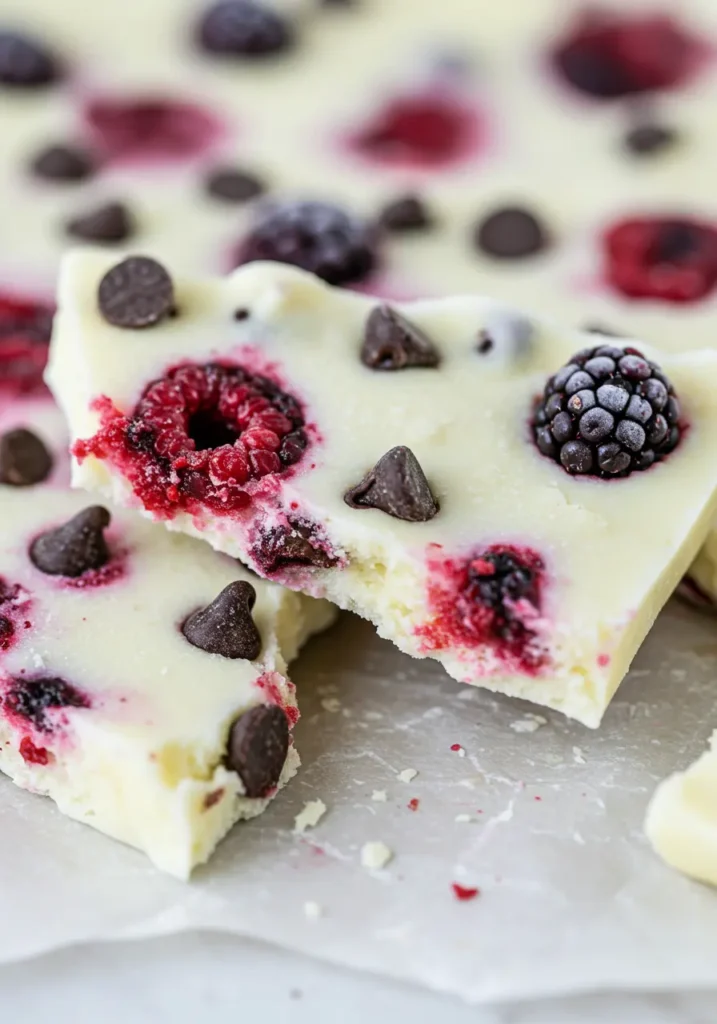
This is a fun, healthy, and customizable frozen treat that’s like a yogurt popsicle in bark form. It’s incredibly easy to make and a great way to use up leftover yogurt and fruit.
Ingredients:
- 2 cups plain or vanilla whole milk Greek yogurt (full-fat yogurt creates a creamier, less icy texture)
- 2-3 tbsp honey or maple syrup (adjust to taste, or omit if using sweetened yogurt)
- 1 tsp vanilla extract
- Topping Ideas:
- Sliced strawberries, blueberries, raspberries
- Granola or low-sugar cereal
- Mini chocolate chips or white chocolate chips
- Shredded coconut
- Rainbow sprinkles
Instructions:
- Line a rimmed baking sheet with parchment paper or a silicone mat. This is essential to prevent the bark from sticking.
- In a medium bowl, stir together the Greek yogurt, honey or maple syrup, and vanilla extract until smooth.
- Pour the yogurt mixture onto the prepared baking sheet and use a spatula to spread it into a thin, even layer, about 1/4-inch thick.
- Sprinkle your desired toppings evenly over the yogurt.
- Place the baking sheet flat in the freezer and freeze for at least 4 hours, or overnight, until completely solid.
- Once frozen, remove the bark from the freezer, lift it off the baking sheet using the parchment paper, and break it into irregular pieces.
- Serve immediately, as it melts quickly.
Expert Tips & Variations
- Blended Version: For a smoother, fruit-flavored bark, blend the yogurt and fruit together before spreading it on the pan. Using frozen fruit will create a brighter color.
- Storage: Store the broken pieces of yogurt bark in a freezer-safe bag or container in the freezer for up to a month.
- Kid-Friendly Prep: This is a perfect recipe for kids to help with. They can spread the yogurt and have fun sprinkling on all the colorful toppings.
- Peanut Butter Swirl: For a peanut butter version, swirl a few tablespoons of melted peanut butter into the yogurt base before topping with banana slices and mini chocolate chips.
33. Chocolate Avocado Mousse
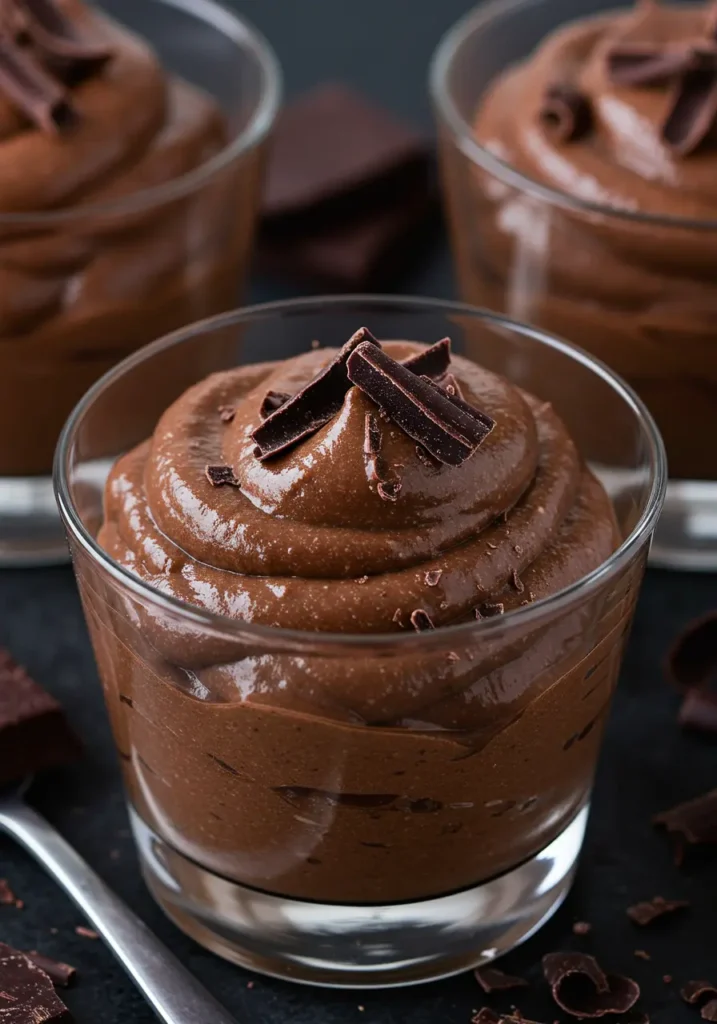
This rich, creamy, and decadent-tasting mousse has a secret healthy ingredient: avocado! The avocado provides a silky smooth texture and healthy fats, while its flavor is completely masked by the cocoa powder and sweetener. It’s a fantastic dairy-free and nutrient-dense dessert or snack.
Ingredients:
- 1 large ripe avocado, peeled and pit removed
- 1 ripe banana (for natural sweetness and creamy texture)
- 1/4 cup unsweetened cocoa or cacao powder
- 3-4 tbsp maple syrup or honey (adjust to taste)
- 2 tbsp milk of choice (dairy or non-dairy, as needed for blending)
- 1/2 tsp vanilla extract
- Pinch of salt
Instructions:
- Combine all ingredients—avocado, banana, cocoa powder, maple syrup, milk, vanilla, and salt—in a high-speed blender or food processor.
- Blend on high until the mixture is completely smooth and creamy, with no visible green specks of avocado. You may need to stop and scrape down the sides of the blender a few times to ensure everything is incorporated.
- Taste the mousse and adjust sweetness or chocolate intensity as desired by adding more maple syrup or cocoa powder.
- Spoon the mousse into small bowls or jars. It can be served immediately, but the flavor and texture improve after chilling in the refrigerator for at least 30 minutes.
Expert Tips & Variations
- Ripe Ingredients are Key: Using a perfectly ripe avocado and a ripe banana is essential for a smooth, non-lumpy texture and natural sweetness. An unripe avocado will result in a chunky, unpleasant mousse.
- Storage: Store the mousse in an airtight container in the refrigerator for up to 2-3 days. Pressing a piece of plastic wrap directly onto the surface can help prevent it from browning.
- Protein Boost: For an extra protein hit, add 1/2 cup of cottage cheese to the blender. It adds a slight tang and makes the mousse even richer.
- Serving Suggestion: Serve topped with fresh berries, like raspberries, for a beautiful color and flavor contrast.
34. Strawberry Yogurt Smoothie Pouches
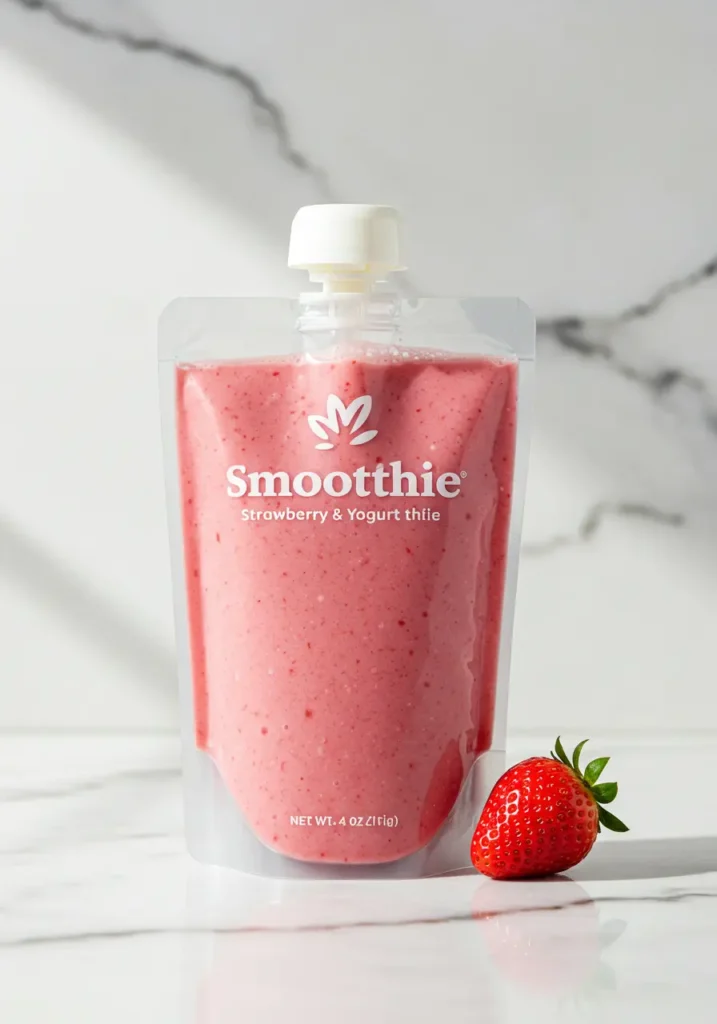
Making your own yogurt pouches is a great way to provide a healthy, portable snack without the added sugars often found in store-bought versions. Using reusable pouches is an eco-friendly and cost-effective solution.
Ingredients:
- 2 cups fresh or frozen strawberries, trimmed
- 2 cups plain whole-milk Greek yogurt (Greek yogurt creates a thicker smoothie)
- 1-2 tbsp maple syrup or honey (optional, to taste)
- 1 ripe banana (optional, for creaminess and sweetness)
Instructions:
- Add the strawberries (and banana, if using) to a blender. Blend until completely smooth.
- Add the Greek yogurt and optional sweetener to the blender. Instead of blending again, which can make the mixture too thin, it is best to stir the yogurt into the fruit puree with a spatula or spoon until well combined. This maintains a thicker consistency similar to store-bought pouches.
- Taste the mixture and adjust sweetness if necessary. The amount of sweetener needed will depend on the ripeness of your fruit.
- Using a small funnel, carefully pour the smoothie mixture into reusable food pouches.
- Seal the pouches and store in the refrigerator or freezer.
Expert Tips & Variations
- Achieving the Right Consistency: Greek yogurt is recommended for its thick texture. If using regular yogurt, the smoothie may be a bit runnier. Adding 1/4 cup of rolled oats or 1 tablespoon of chia seeds can help thicken it up and add extra fiber and nutrients.
- Storage: Filled pouches can be stored in the refrigerator for up to 5 days or in the freezer for up to 6 months. A frozen pouch packed in a lunchbox will thaw by snack time and also help keep other items in the lunchbox cool.
- Flavor Swaps: This recipe works well with other fruits like mango, blueberries, or peaches. You can also sneak in a handful of fresh spinach; the sweet fruit will mask its flavor.
35. Savory Popcorn Trail Mix
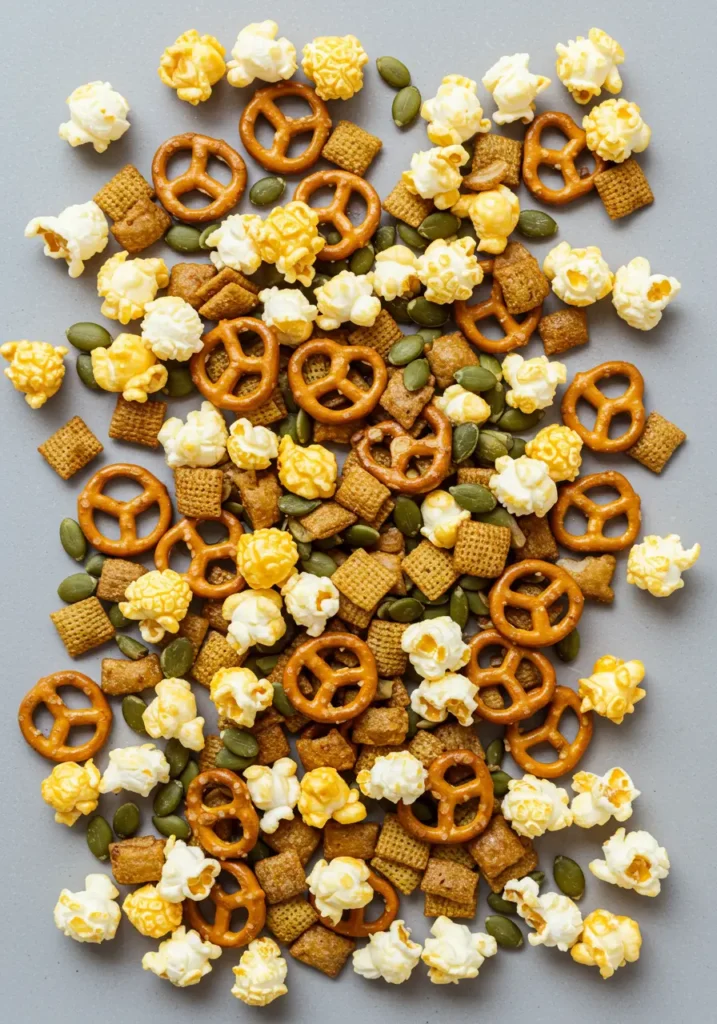
A savory, baked trail mix is a delicious and crunchy alternative to sweet versions. Baking the mix with a seasoned butter or oil coating makes it extra flavorful and irresistible.
Ingredients:
- 6-7 cups of plain, popped popcorn
- 1 1/2 cups pretzels
- 1 1/2 cups mini cheddar crackers (like Goldfish or Annie’s Bunnies)
- 1 cup nuts or seeds (peanuts, pecans, or sunflower seeds)
- 1/3 cup melted butter or olive oil
- Seasoning Blend:
- 1 tsp garlic powder
- 3/4 tsp onion powder
- 1 tsp dried Italian seasoning or oregano
- 1/2 tsp paprika
- 2 tsp nutritional yeast (for a cheesy flavor, optional)
Instructions:
- Preheat the oven to a low temperature, around 250-275°F (120-135°C).
- In a very large bowl, combine the popcorn, pretzels, crackers, and nuts/seeds.
- In a small bowl, whisk together the melted butter or oil with all the seasonings (garlic powder, onion powder, Italian seasoning, paprika, nutritional yeast).
- Pour the seasoned butter mixture over the popcorn mix and toss thoroughly to ensure everything is evenly coated.
- Spread the mixture in a single layer on one or two large, rimmed baking sheets.
- Bake for 20-45 minutes, stirring every 10-15 minutes, until the mix is lightly toasted and dry to the touch.
- Let the trail mix cool completely on the baking sheets before storing.
Expert Tips & Variations
- Storage: Once completely cool, store the savory trail mix in a large airtight container at room temperature for up to 2 weeks.
- Customization: This recipe is highly adaptable. Feel free to use different cereals (like Chex), add roasted chickpeas, or use your favorite savory spice blends.
- Sweet & Salty: For a sweet and salty version, you can make a simple glaze by boiling 1/4 cup honey and 2 tbsp brown sugar, pouring it over the popcorn, and baking. Add chocolate candies after the mix has cooled completely.
FAQ
How long do homemade school snacks last?
Baked Goods like muffins, cookies, and crackers will stay fresh in an airtight container at room temperature for about 3 days, or up to a week in the refrigerator.
No-Bake Energy Bites and granola bars should be refrigerated and will last for 1–2 weeks.
Fully Dehydrated Fruit Leather is very shelf-stable and can last for up to a month in an airtight container at room temperature.
Cut Fruits and Veggies should be packed for same-day consumption, though heartier vegetables like carrots and celery can be prepped and stored in water in the fridge for several days.
What’s the best way to keep snacks from getting soggy in a lunchbox?
Can I make these snacks nut-free for school?
What are the best containers for packing school snacks?
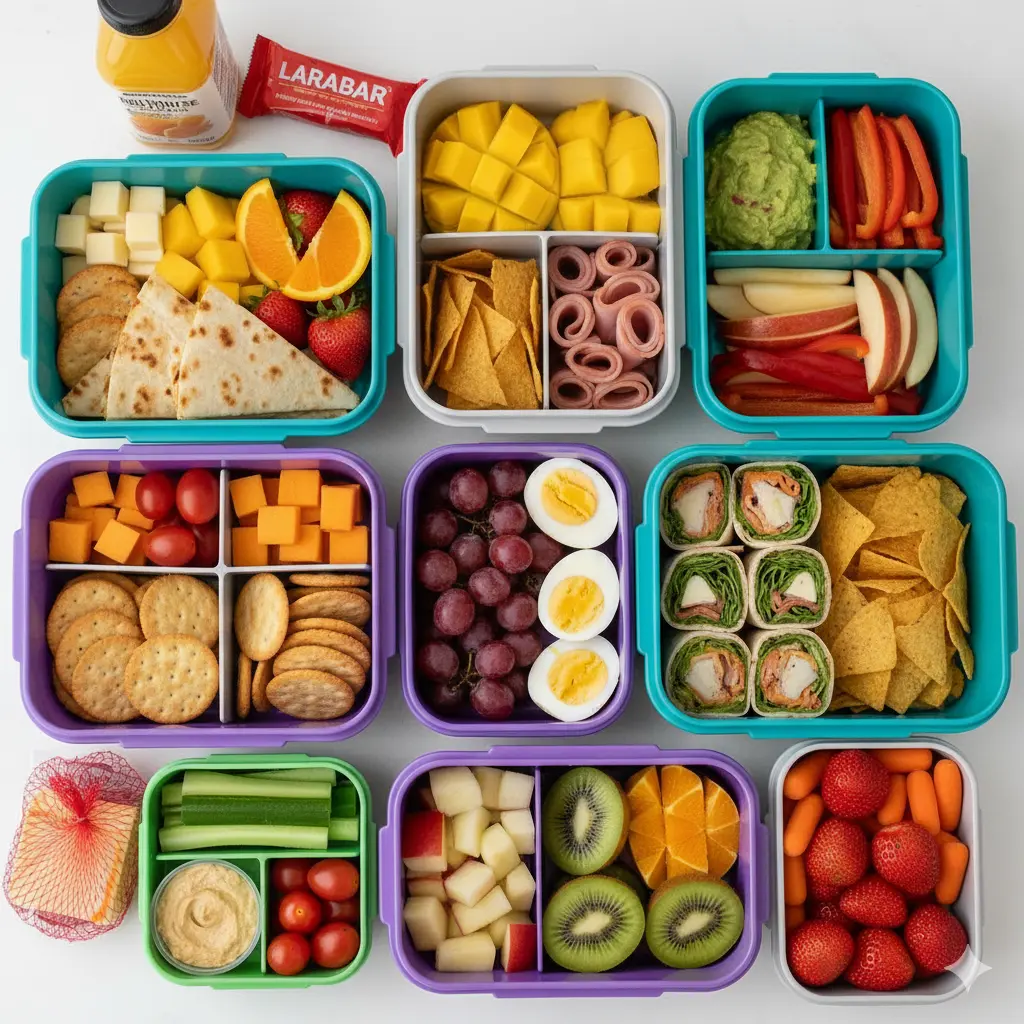
Bento Boxes are excellent because their compartments keep different food items from touching, preserving texture and preventing sogginess.
Stainless Steel Containers are durable, long-lasting, and don’t retain odors or leach chemicals. Many come with silicone lids that are leak-resistant.
Reusable Silicone Bags are a great, eco-friendly alternative to disposable plastic bags for dry snacks like trail mix, popcorn, or crackers.


